Email Setup for Mac - OSX El Capitan

Email Setup for Mac - OSX El Capitan

The following instructions will guide you through the step-by-step process of adding a secure email account to Mail in OSX El Capitan (10.11). 

Account Settings

  • Account type: IMAP
  • Incoming mail server: mail.invisibleink.com
  • Outgoing mail server: mail.invisibleink.com
  • Username: you@yourdomain.com (full email address, all lowercase)


Posted December 10, 2015

Details

Step 1: Open Mail. When prompted to choose a mail account provider, select "Other Mail Account" and click Continue.
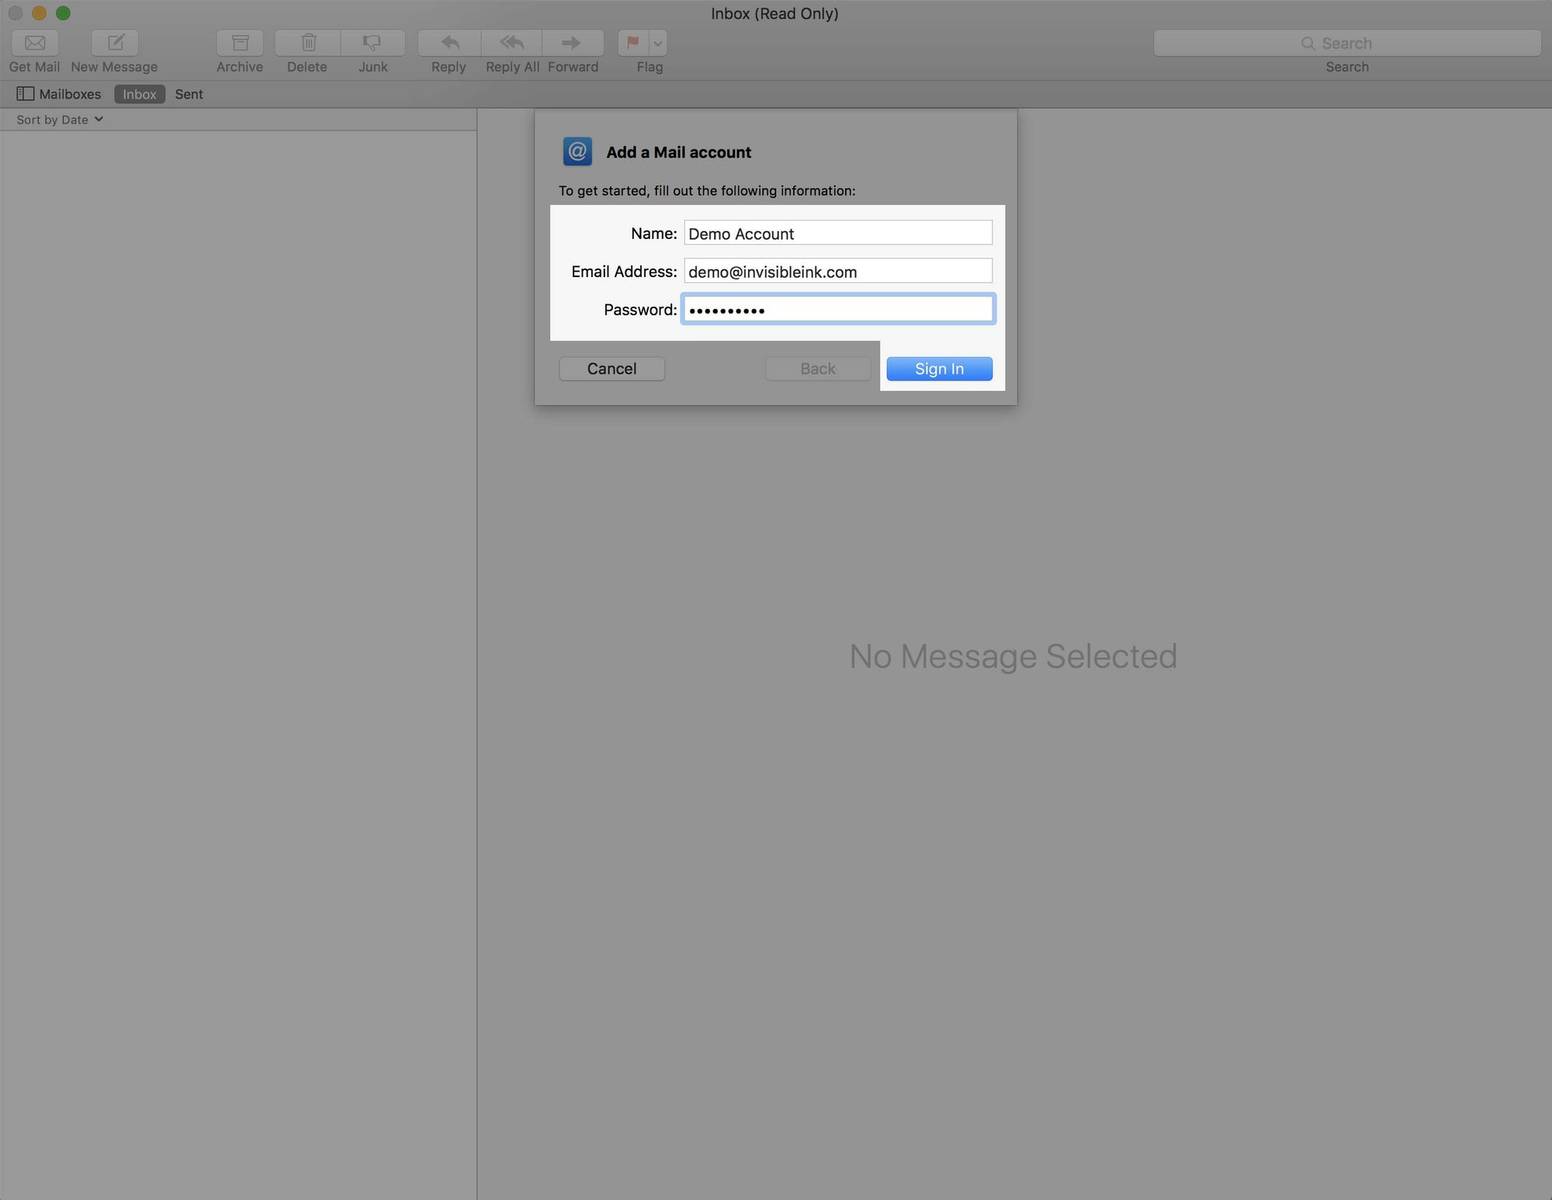
Step 2: Enter your name, email address and password, then click Sign In.
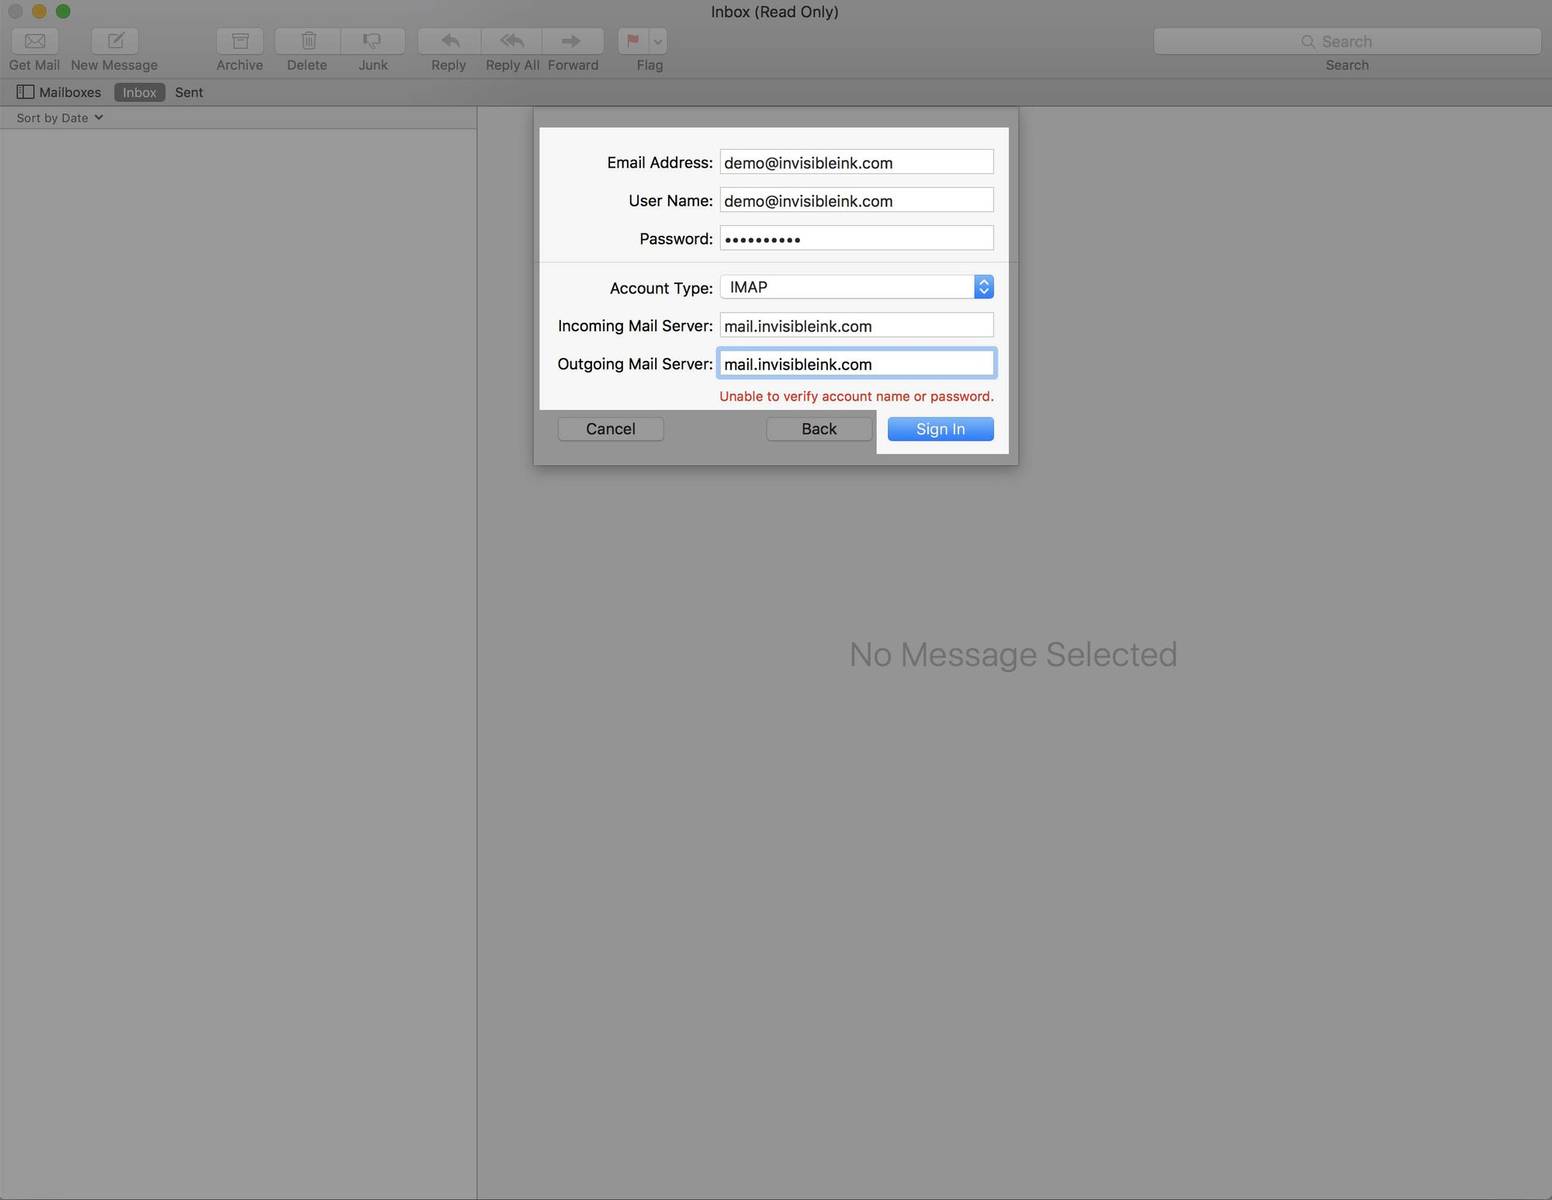
Step 3: Mail will attempt to set up your account. When it fails, set your account type to IMAP and enter mail.invisibleink.com in the Incoming and Outgoing mail server fields, then click Sign In.
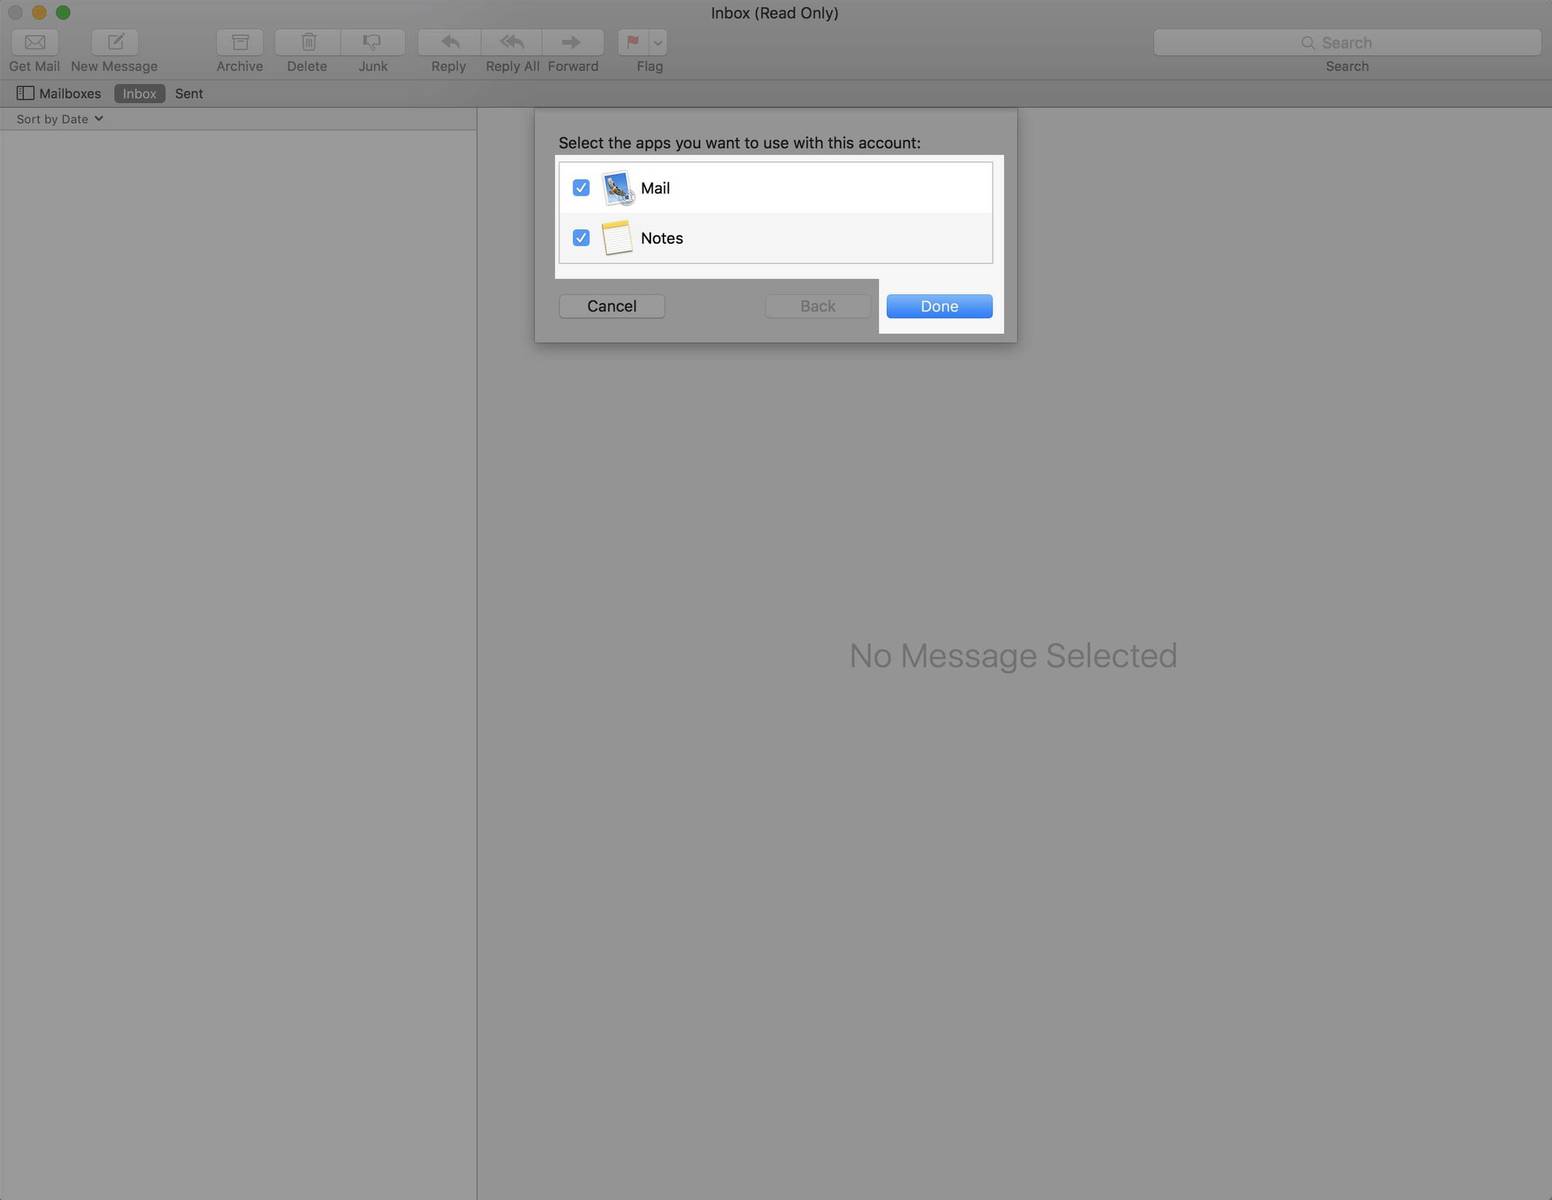
Step 4: Mail will verify your settings. Click Done to view your inbox.
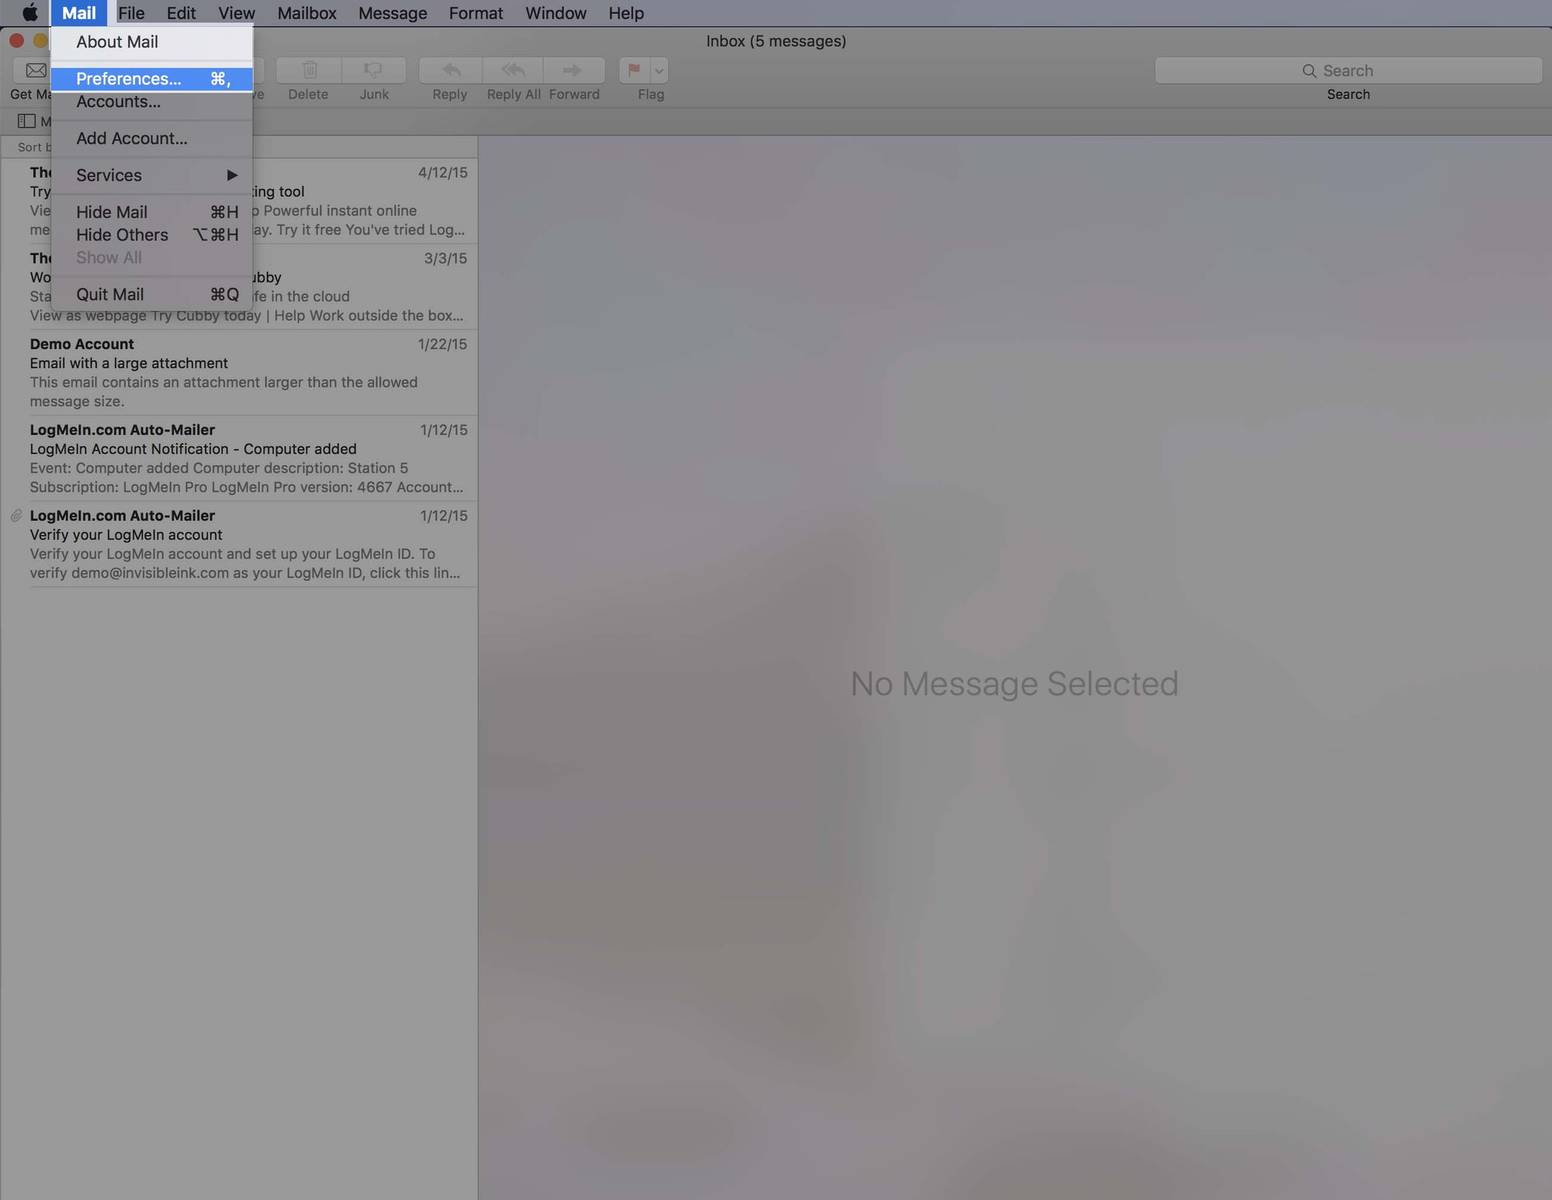
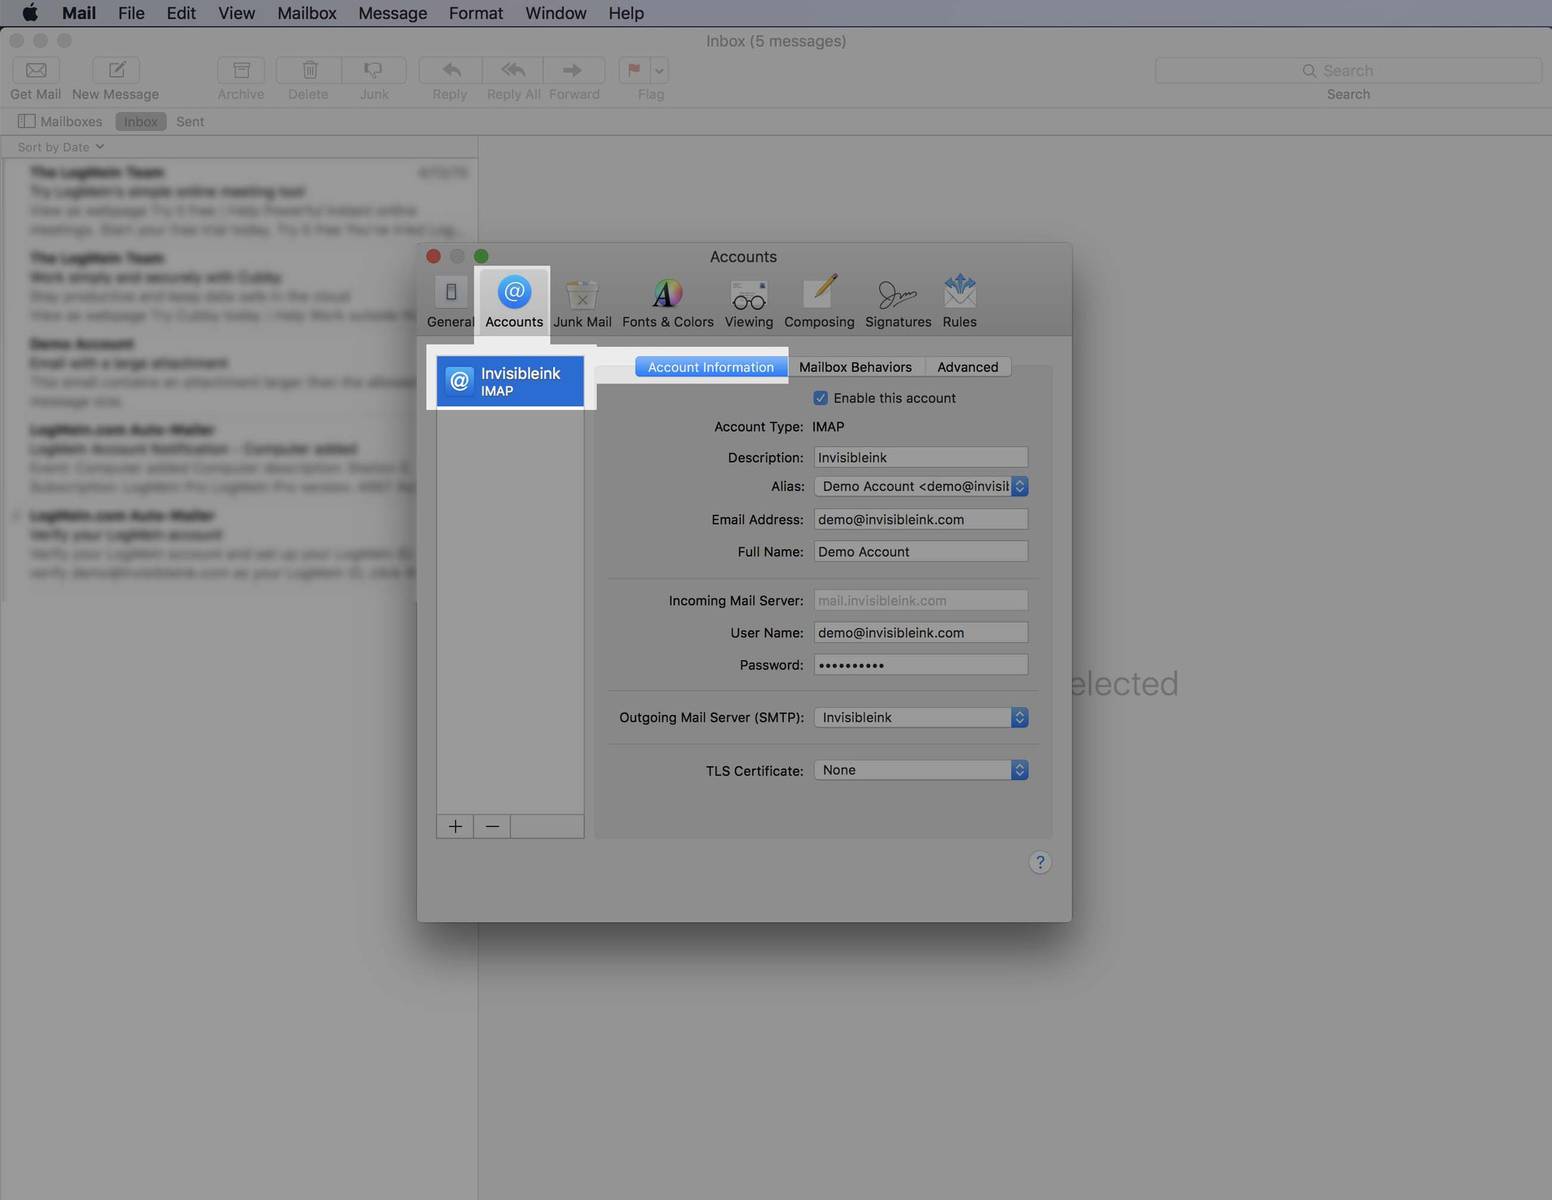
Step 5: Select the Mail menu and click Preferences.
Step 6: Select your new mailbox from the Accounts menu and click on the Account Information tab.
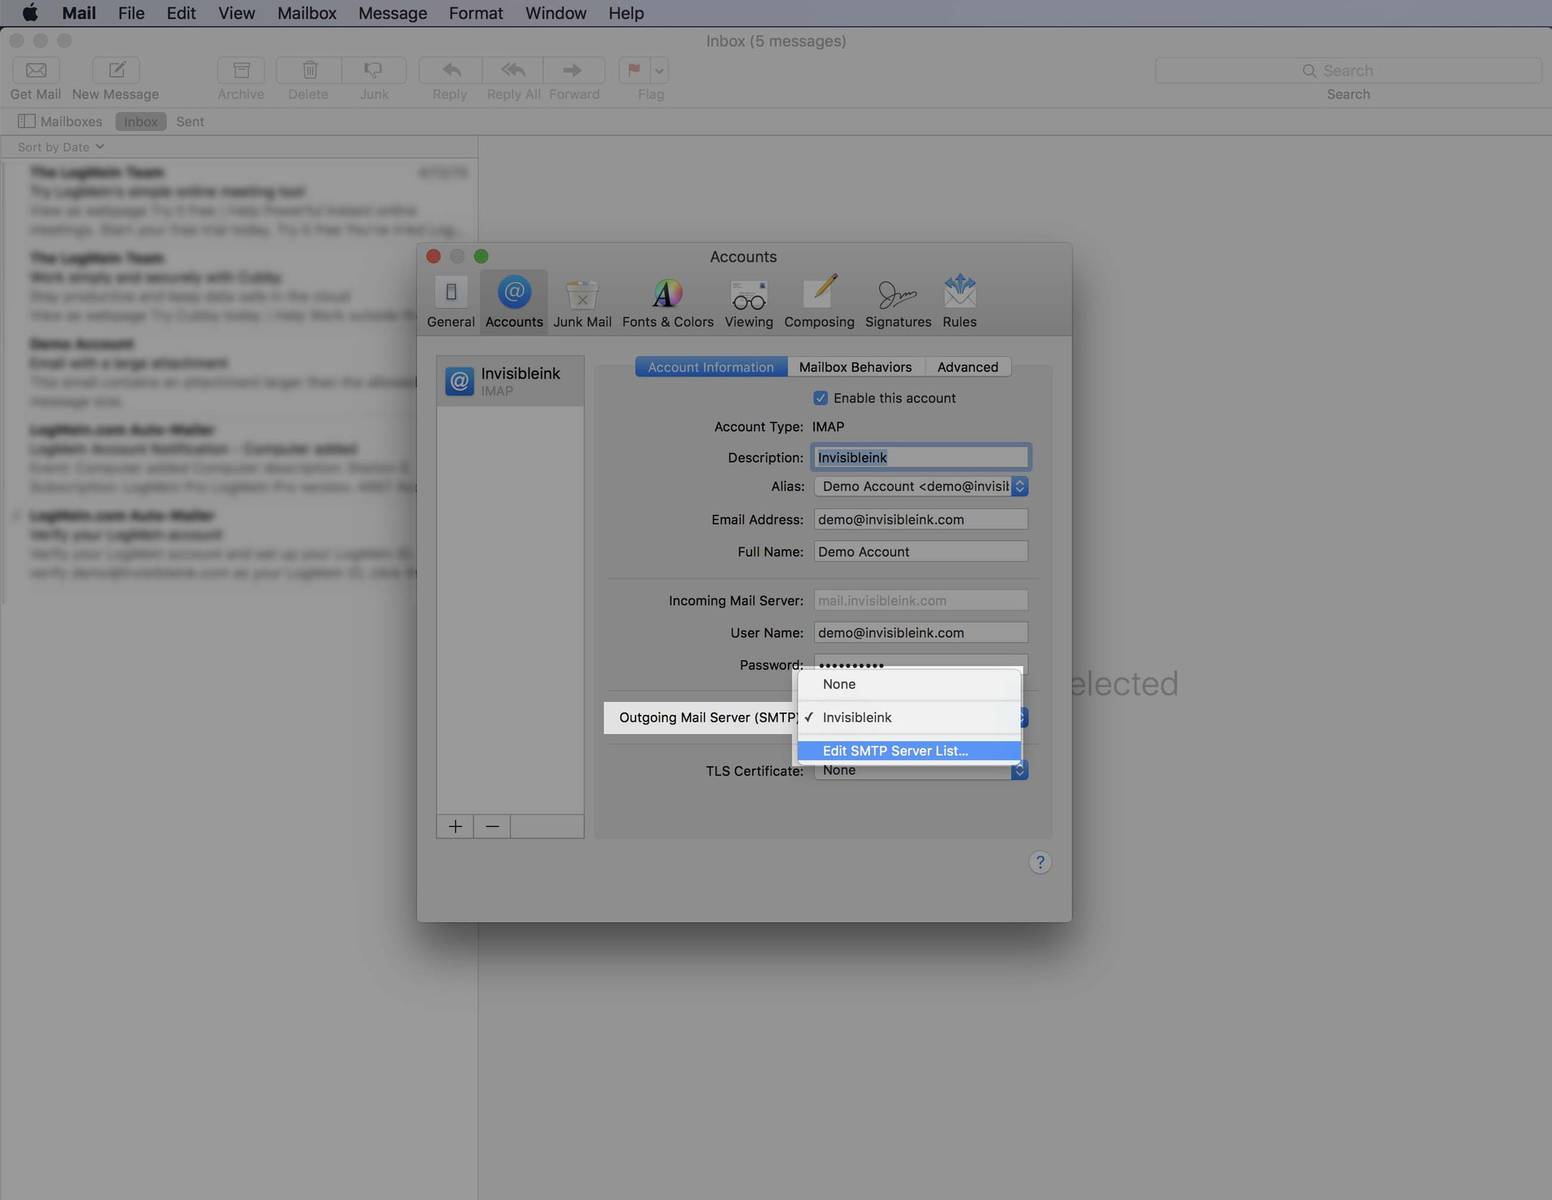
Step 7: Select "Edit SMTP Server List…" from the Outgoing Mail Server (SMTP) dropdown menu.
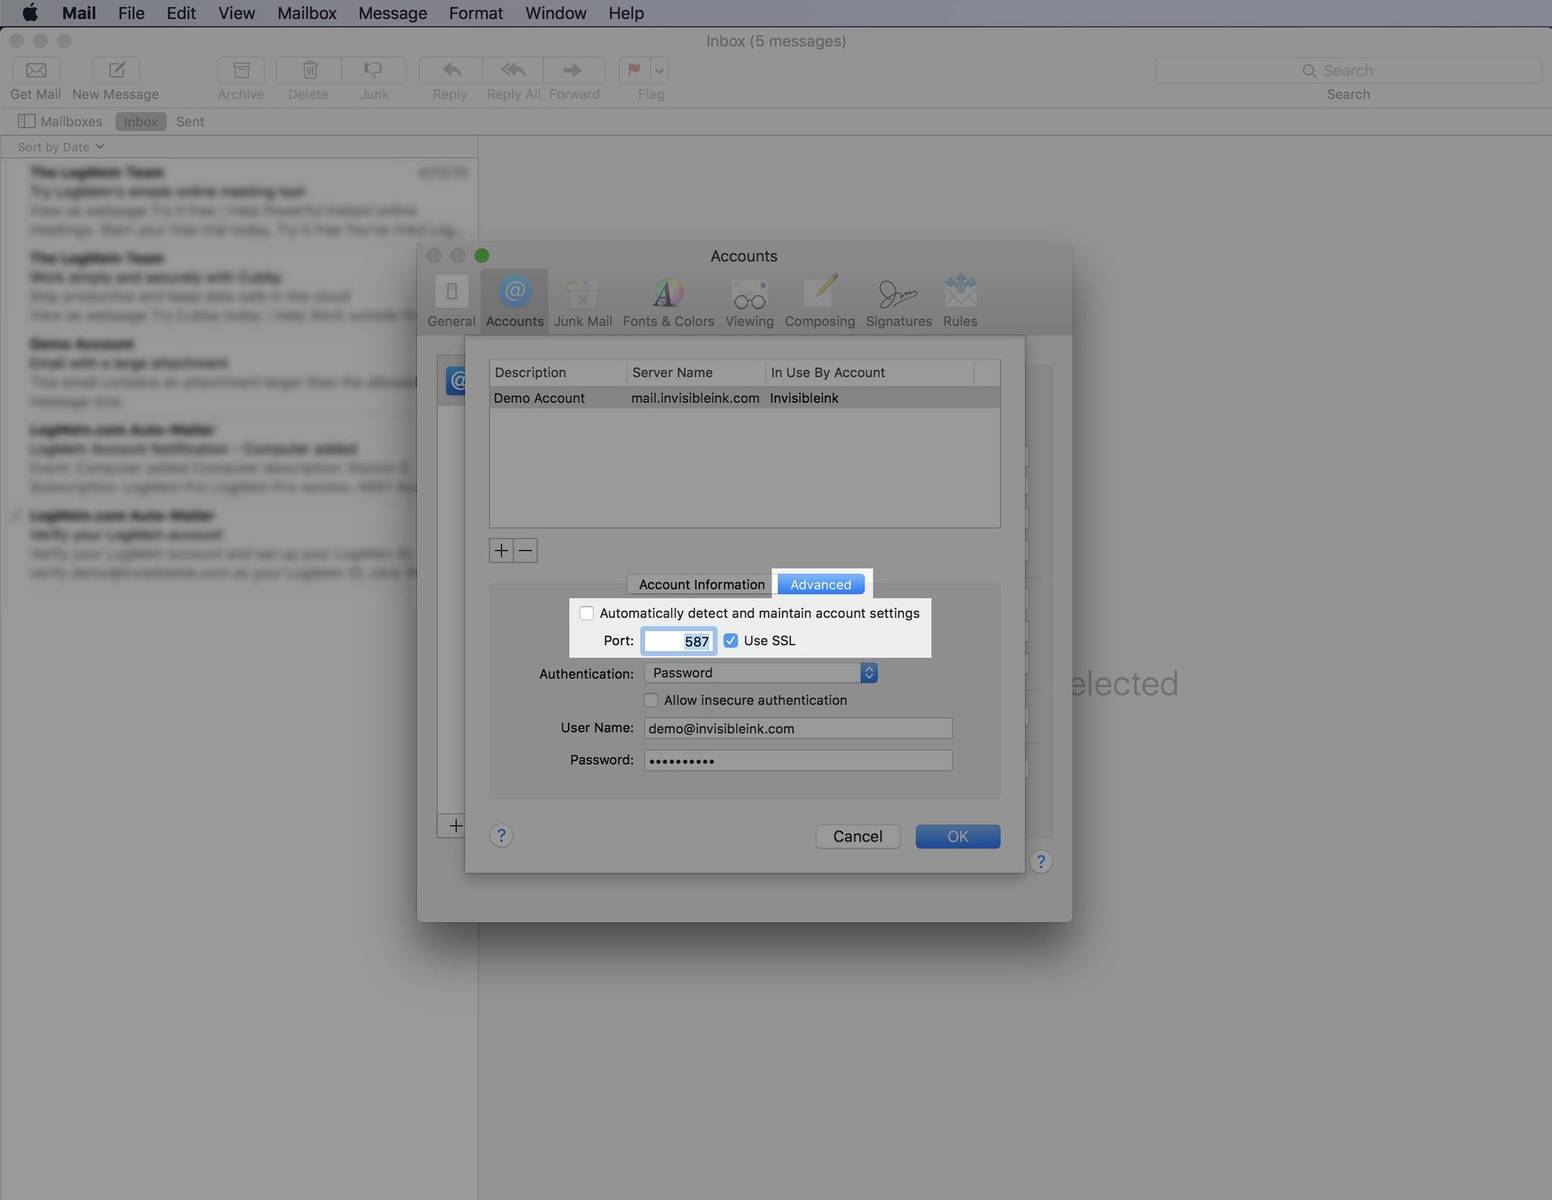
Step 8: Click the Advanced tab and un-check the checkbox labeled "Automatically detect and maintain account settings", then change the Port number from 25 to 587. Click OK to close the outgoing server settings window.
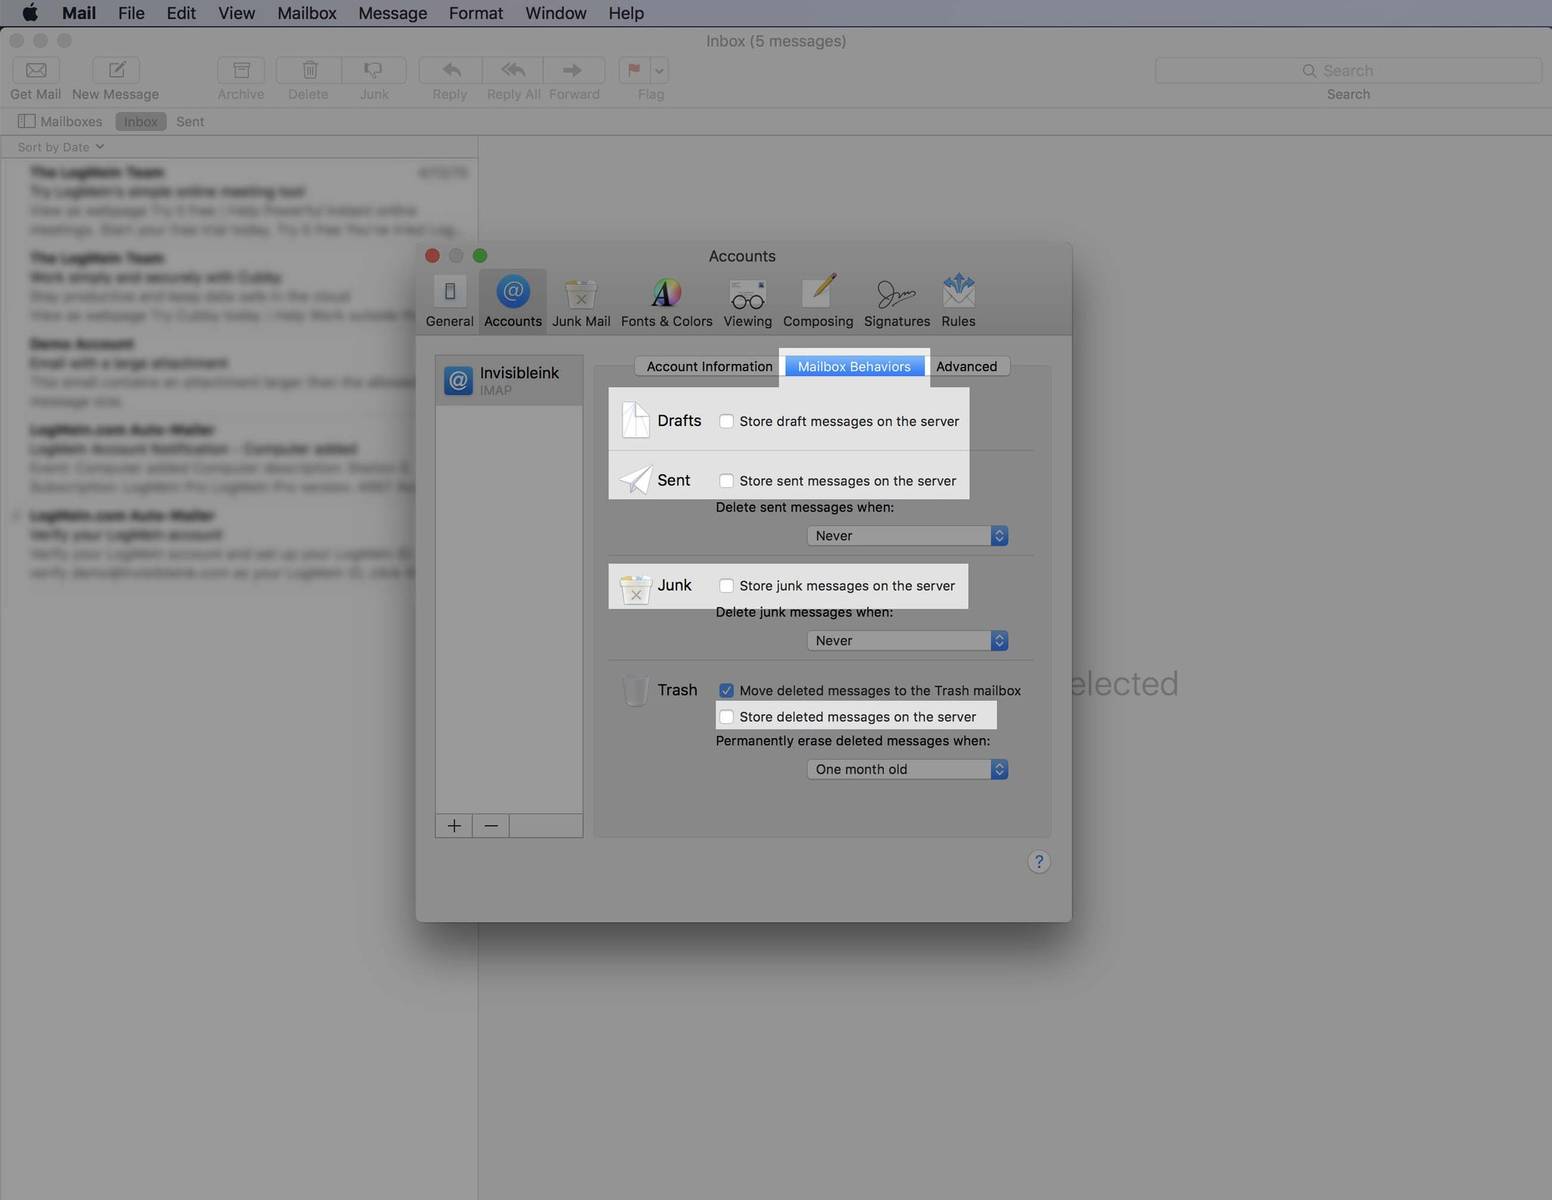
Step 9: Select the Mailbox Behaviors tab, and deselect the options to leave messages on the server. This will help prevent your mailbox from filling up.
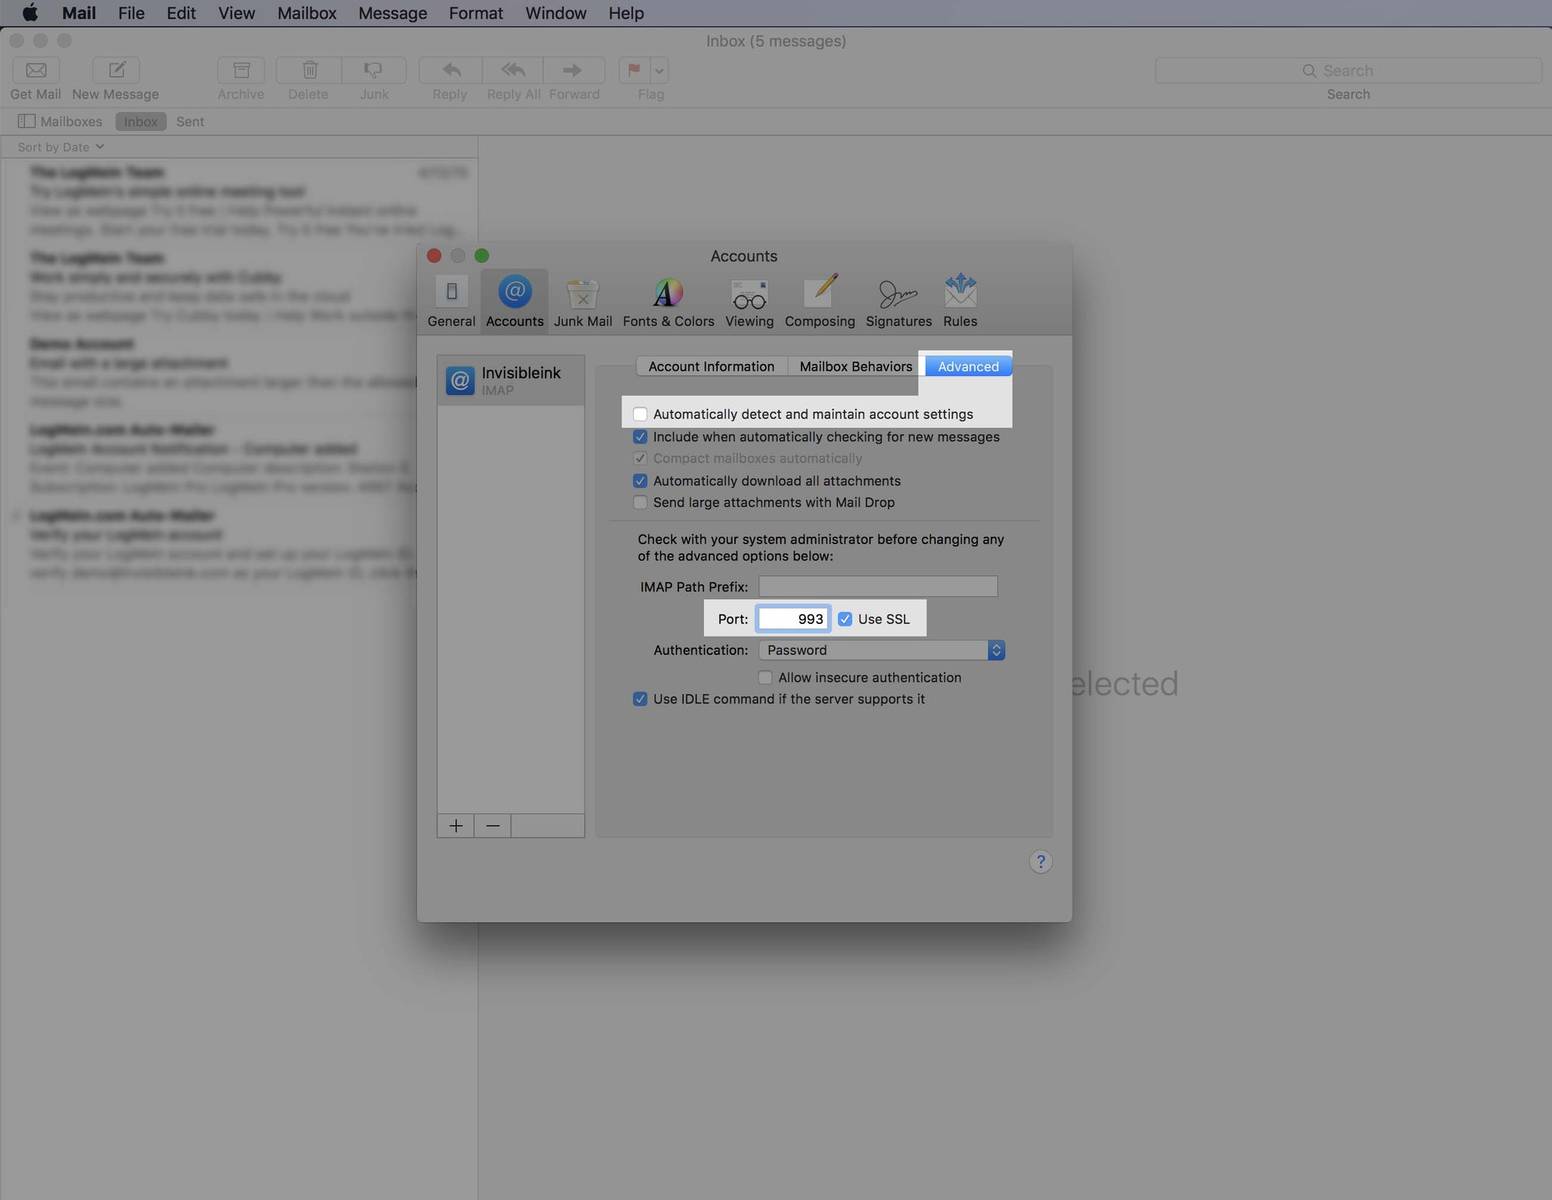
Step 10: Select the Advanced tab and un-check the checkbox labeled "Automatically detect and maintain account settings". Confirm the Port is set to 993 with SSL turned on.
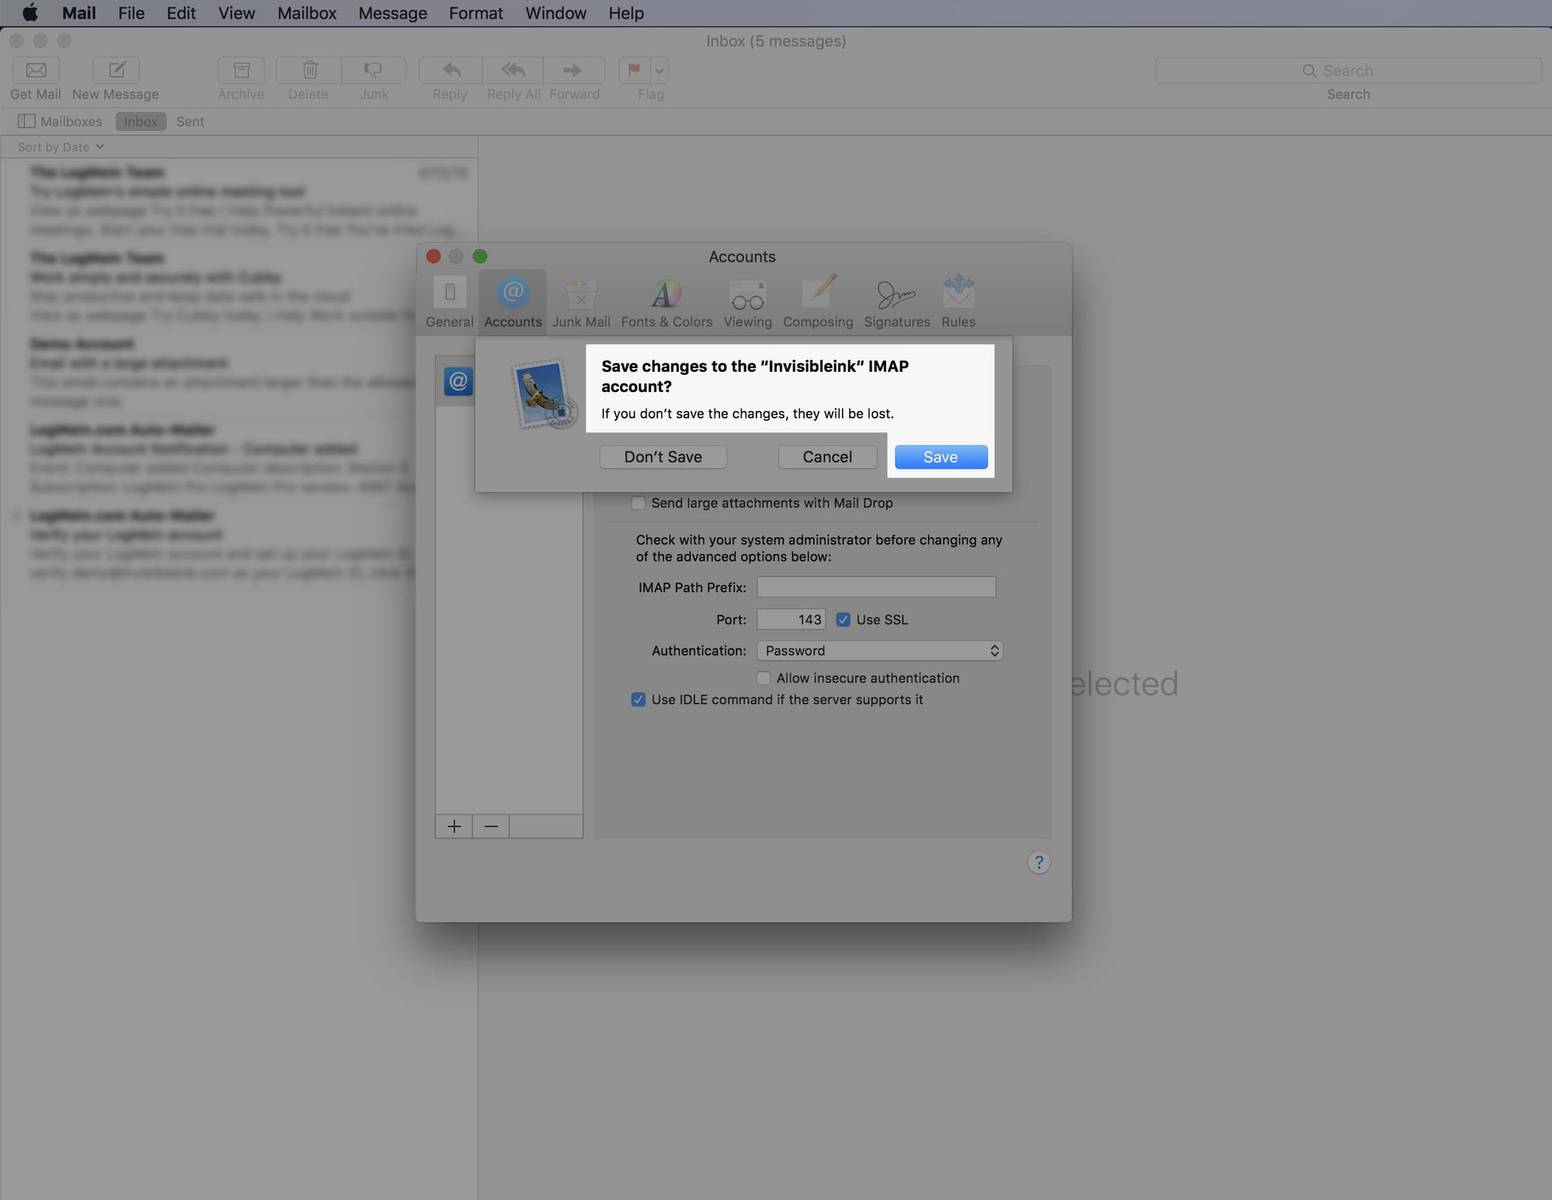
Step 11: Close the Accounts window. You should be prompted to save changes, click Save.
[?]