Outlook 2010 Setup - IMAP - Part I

Outlook 2010 Setup - IMAP - Part I

Whether you’re starting from scratch on a shiny new Windows 7 computer,  or simply upgrading Outlook to the 2010 version, you may need a little guidance when creating your new account.

The first thing you will need to decide is whether you would like to set up a POP3 or IMAP account to send and receive email. If you don’t know the difference between these two account types, or which option is better for you, that’s OK. The short answer? If you plan on using more than one device to send or receive email messages (laptop, smart phone, etc.), we recommend using the “IMAP” protocol to manage your account. If you only use one computer to access your email, you can choose “POP3” instead. For more about POP vs. IMAP, click here.


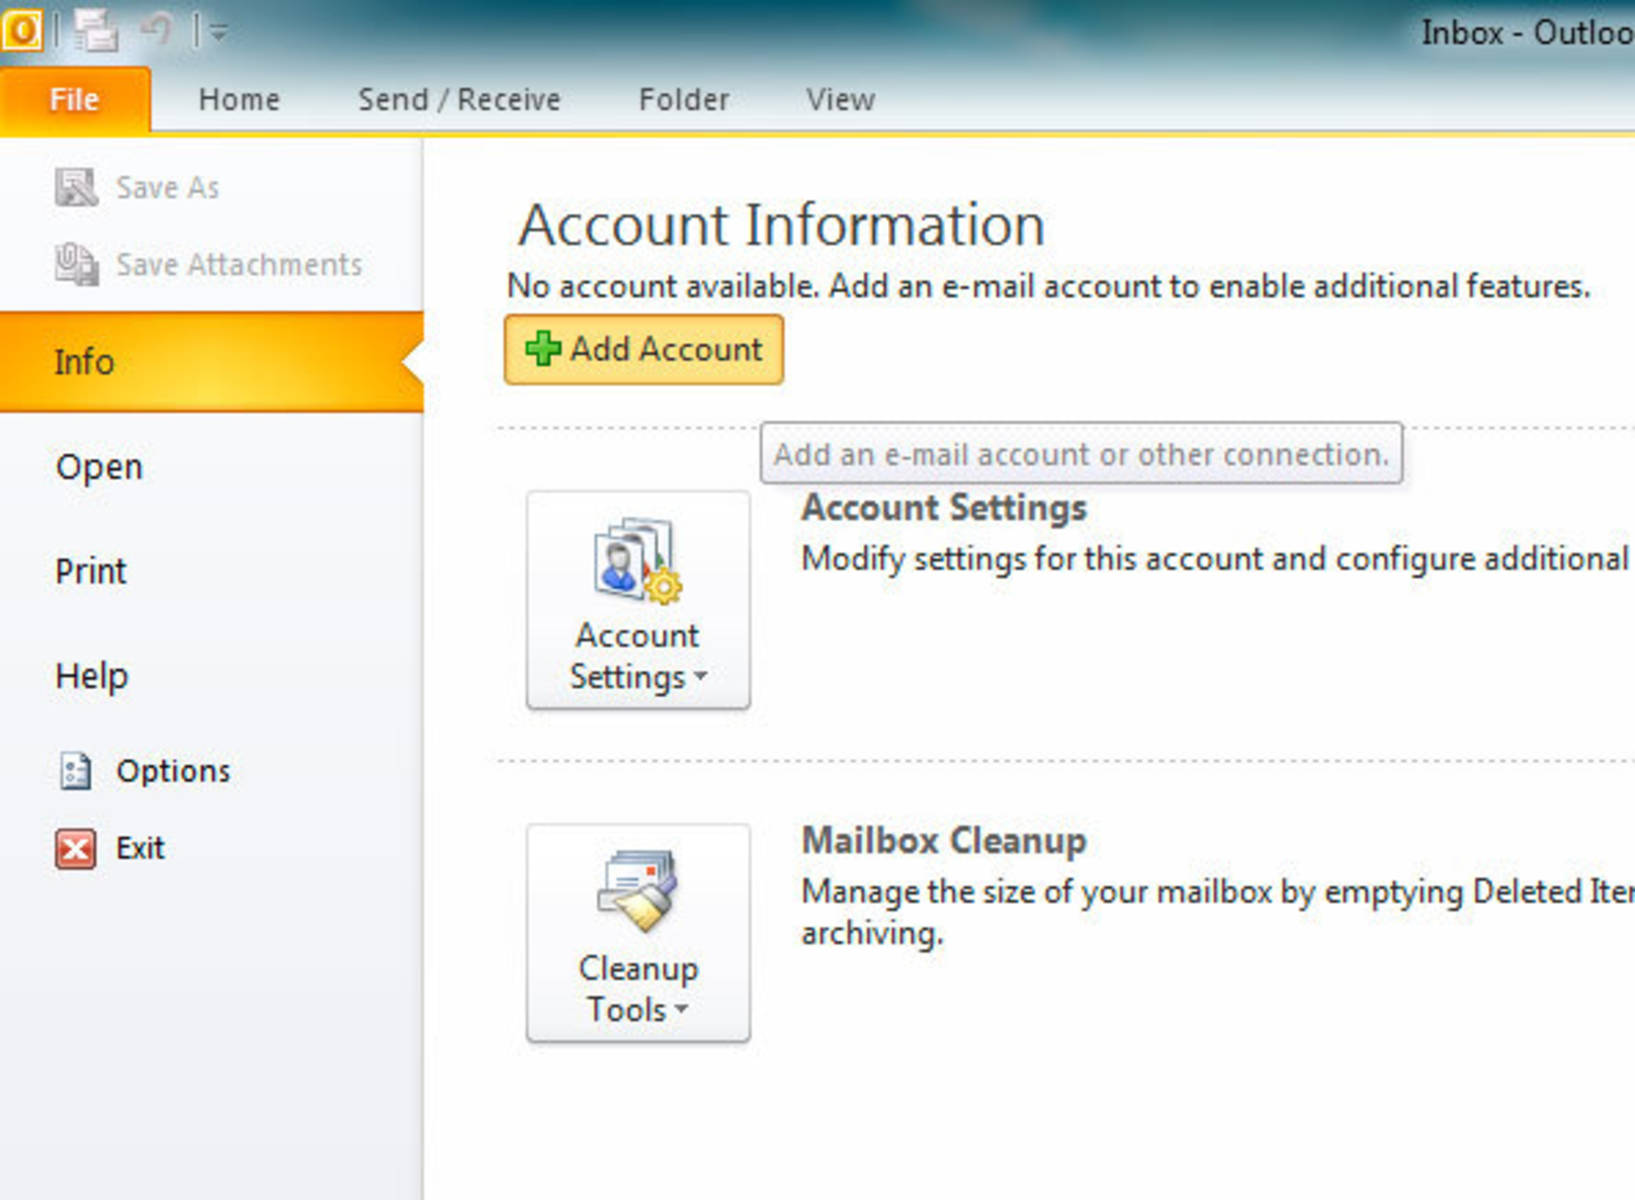
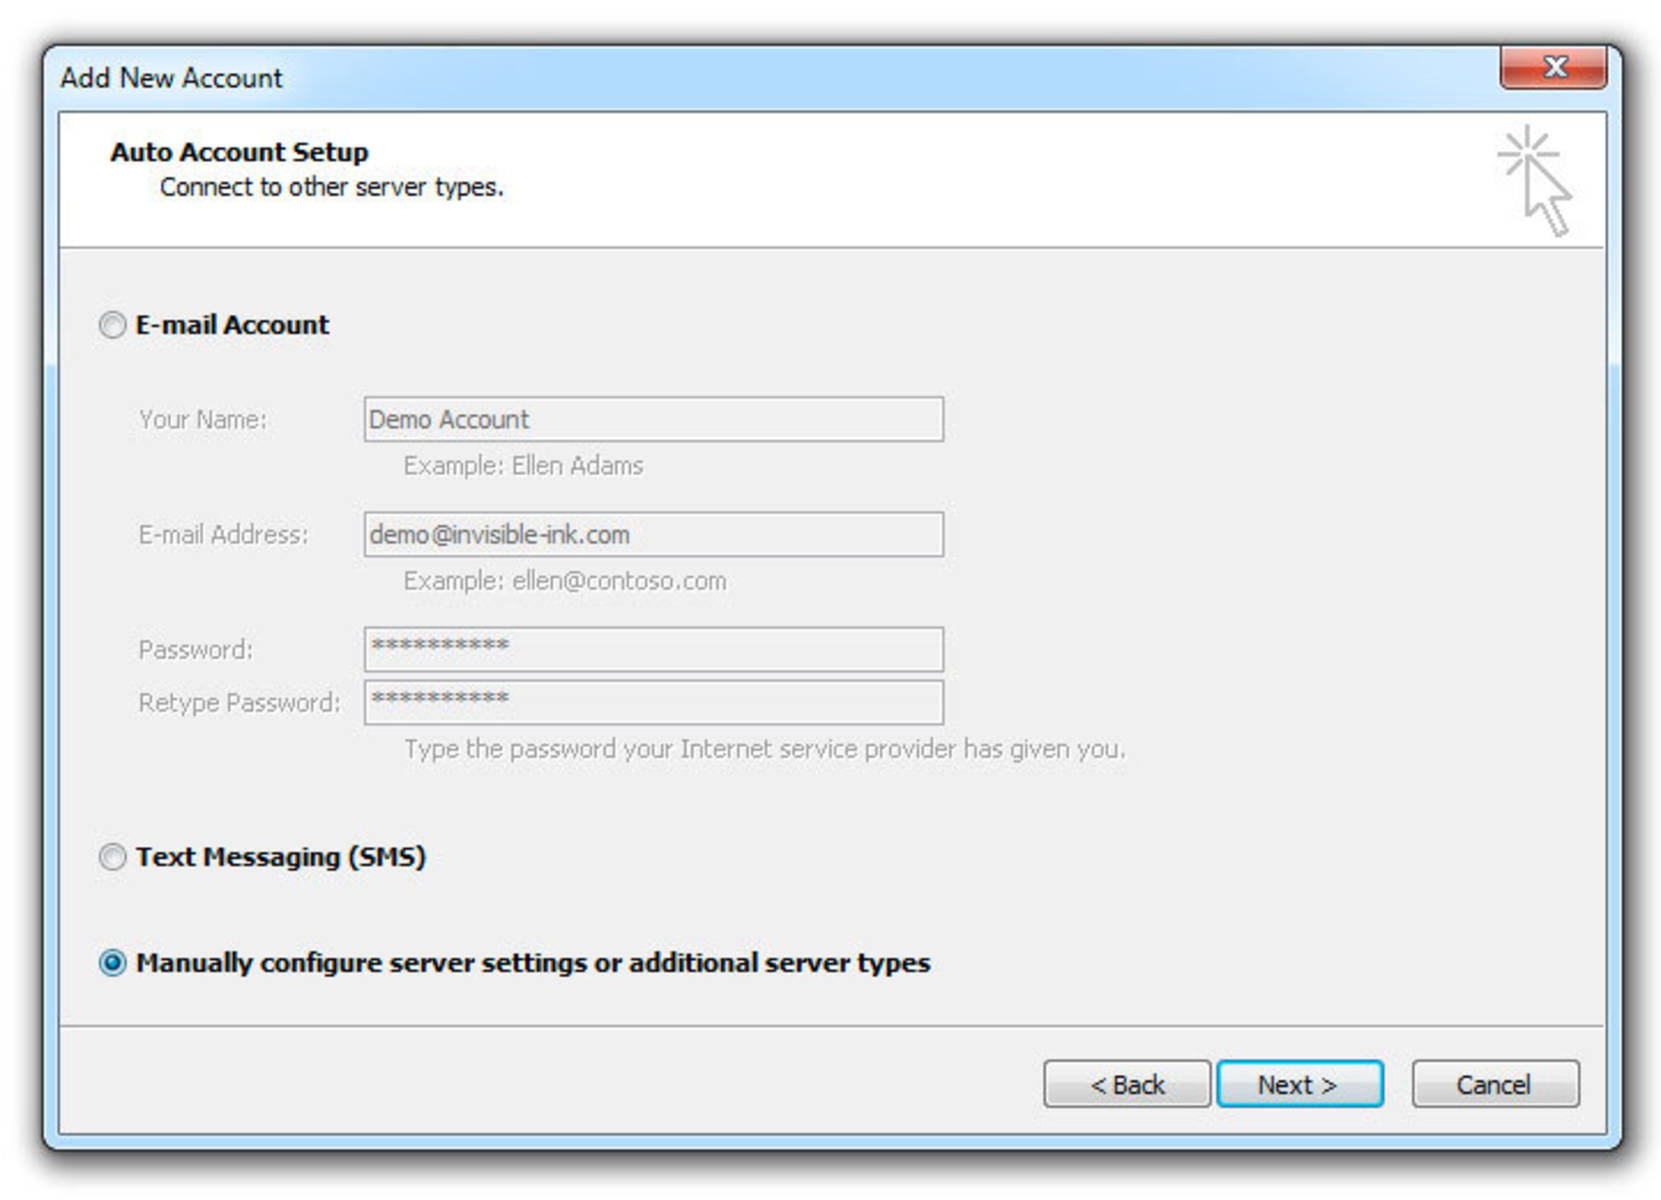
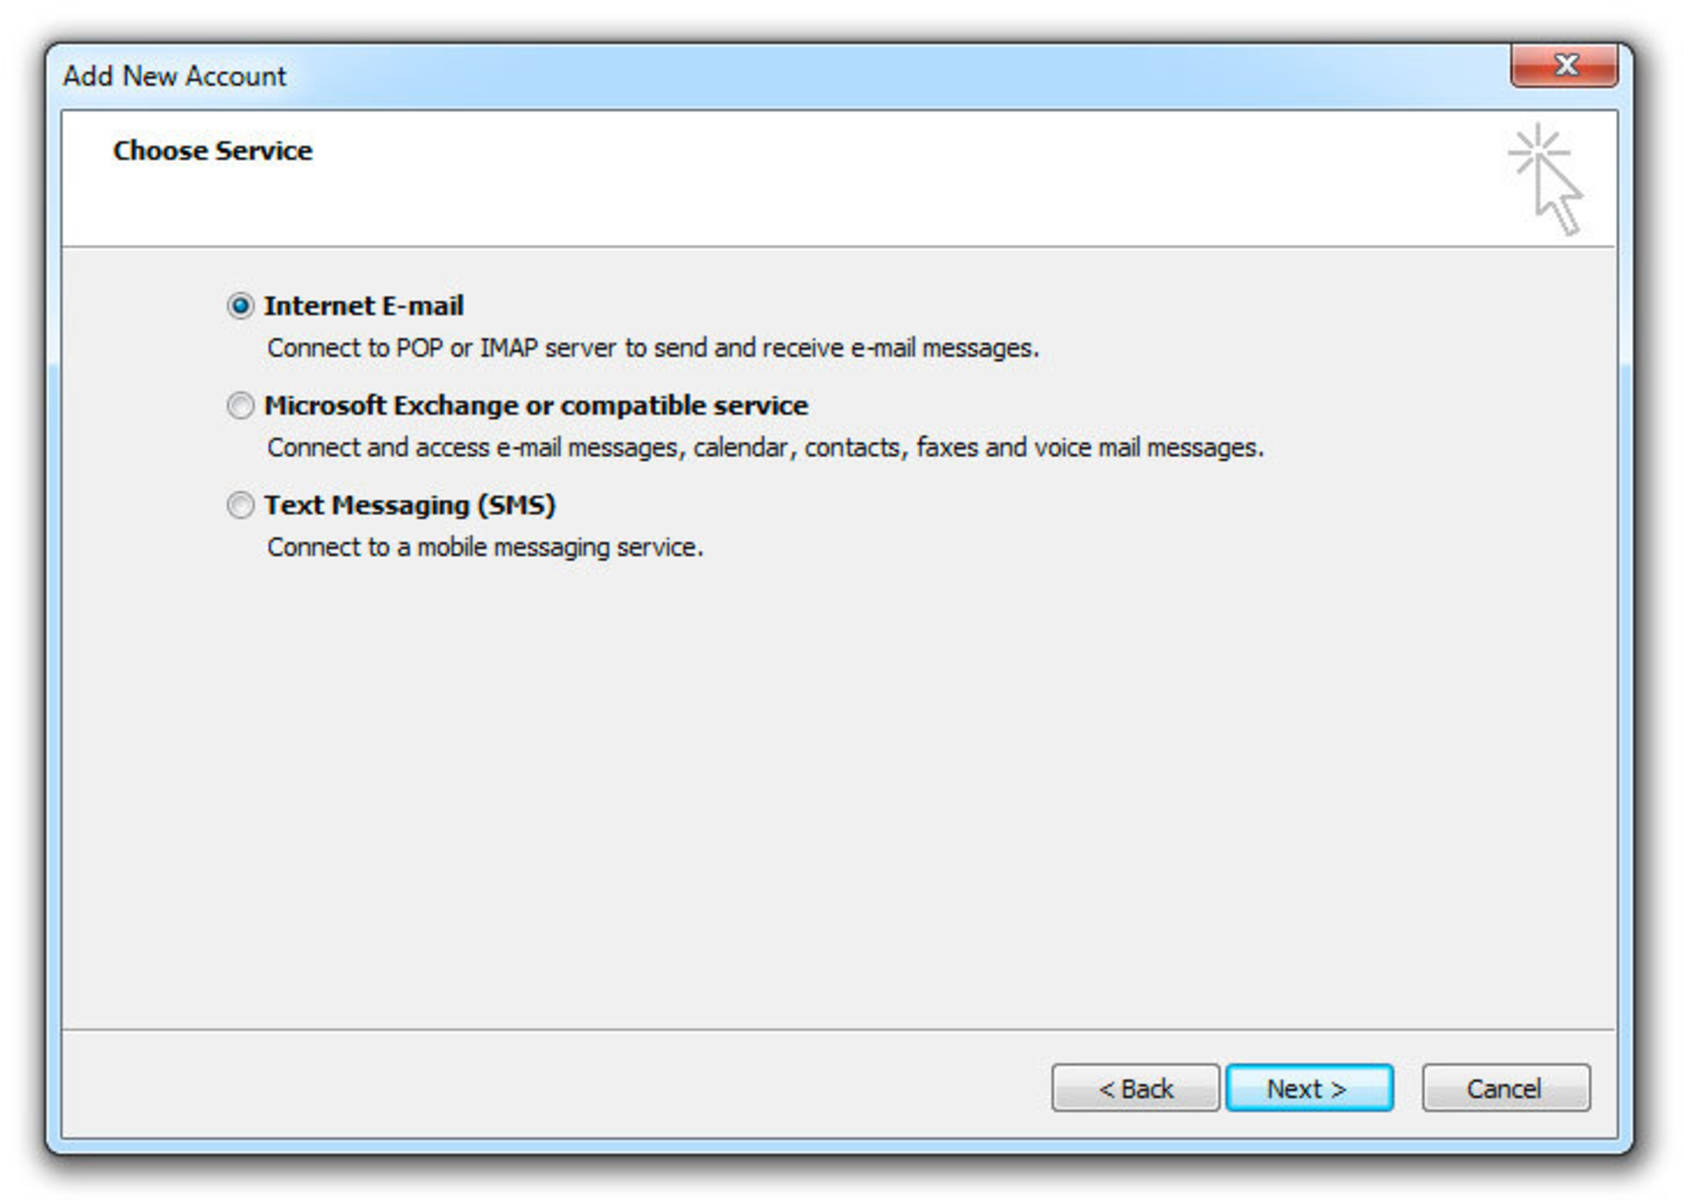
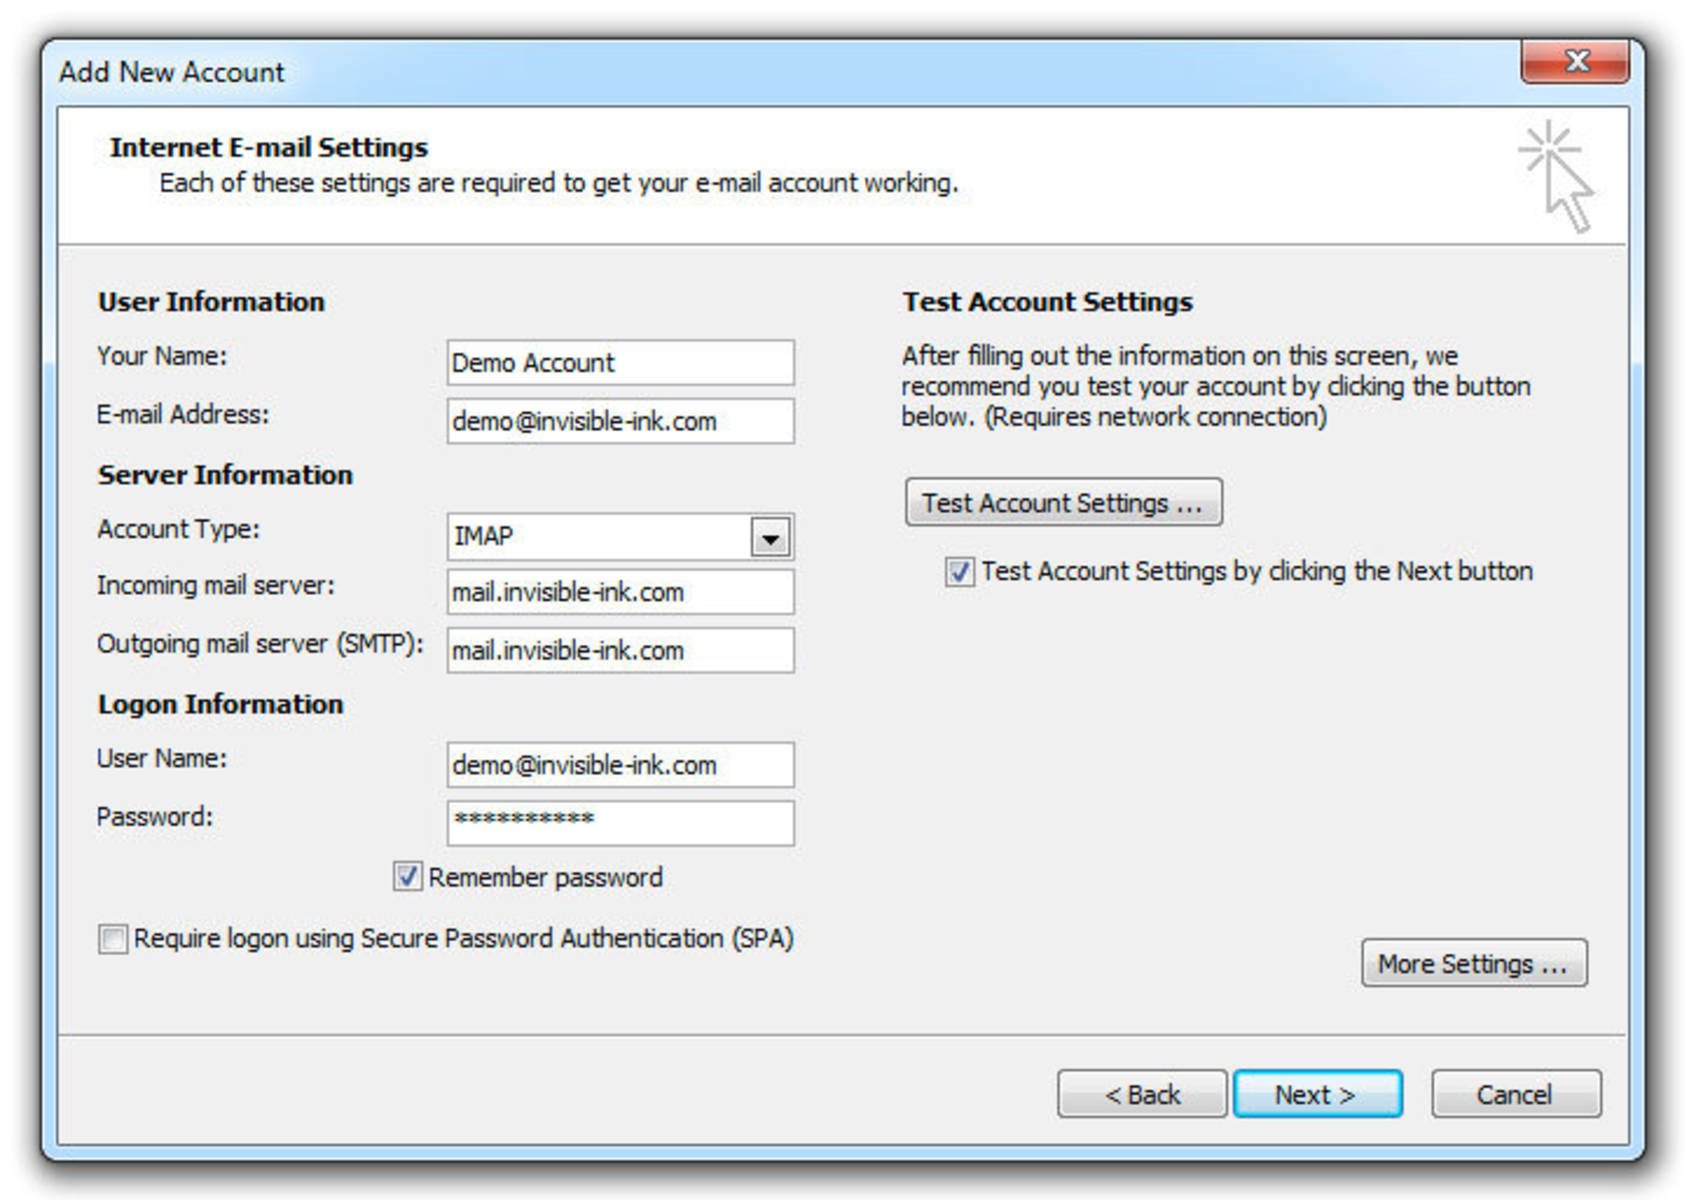
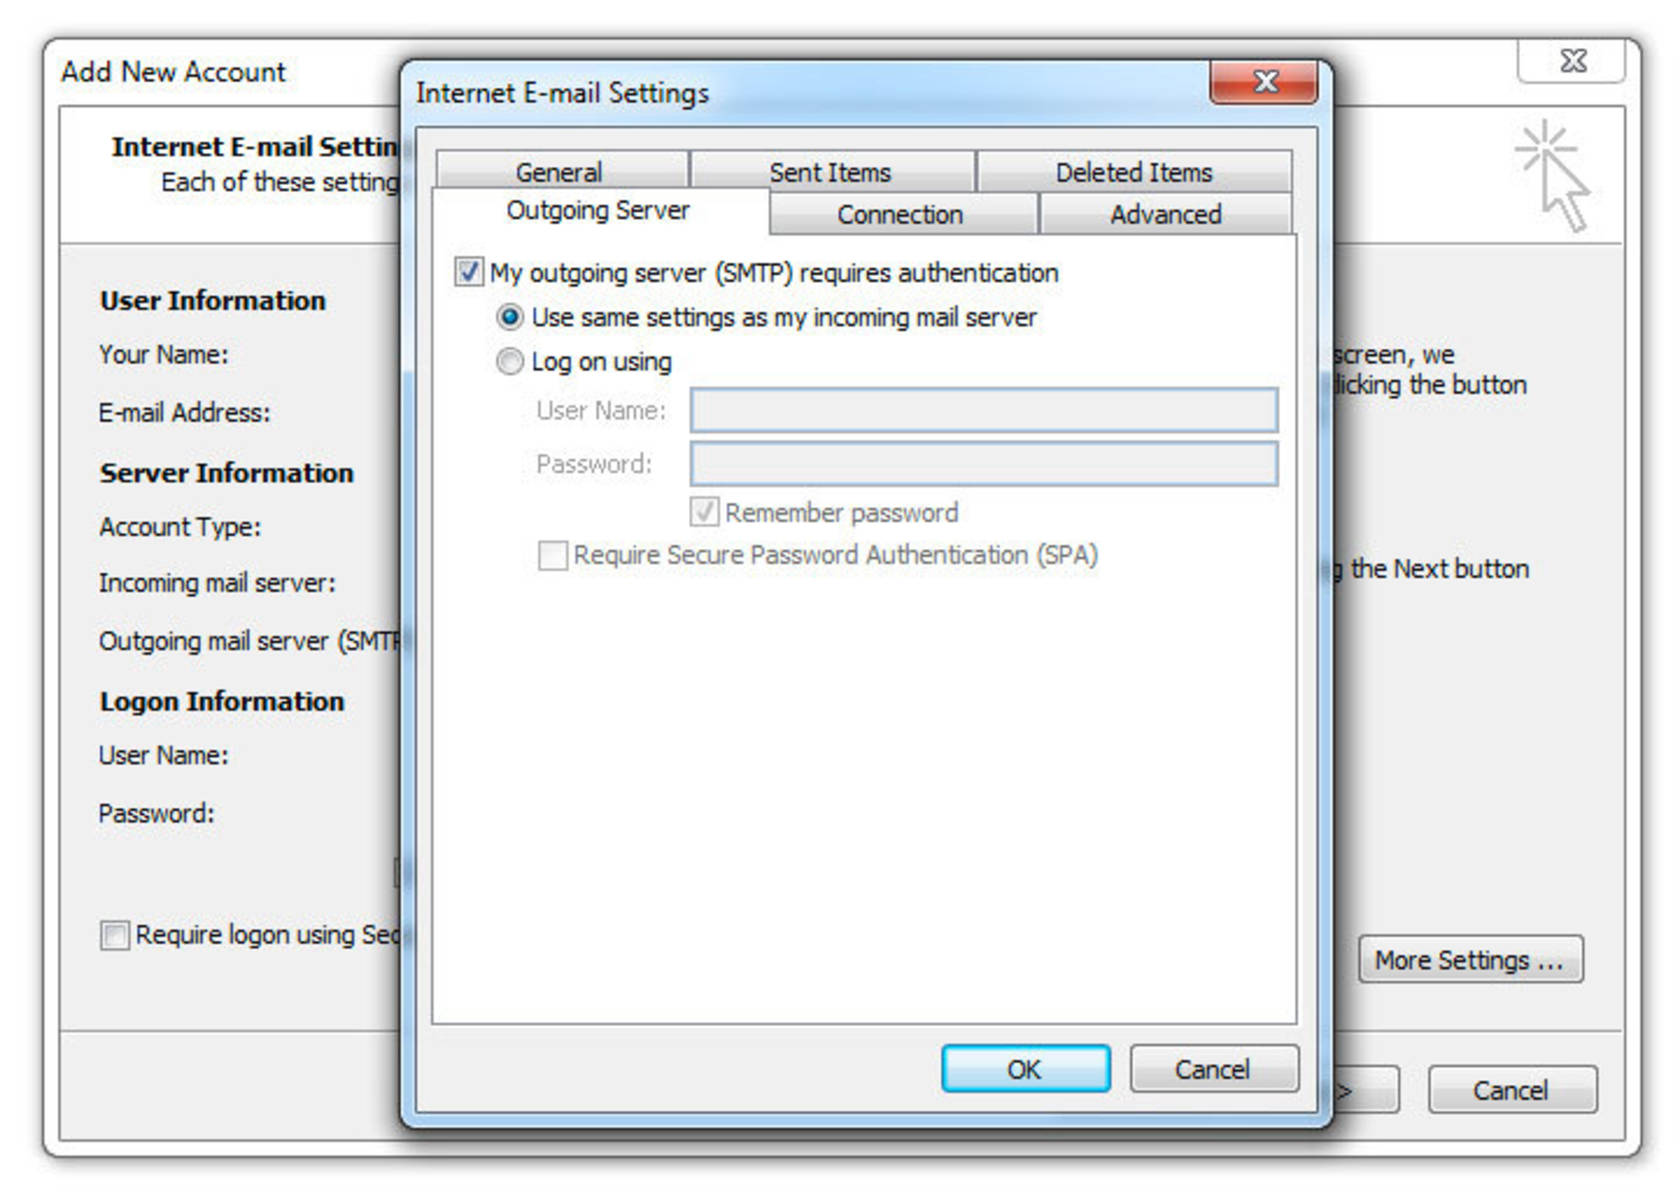
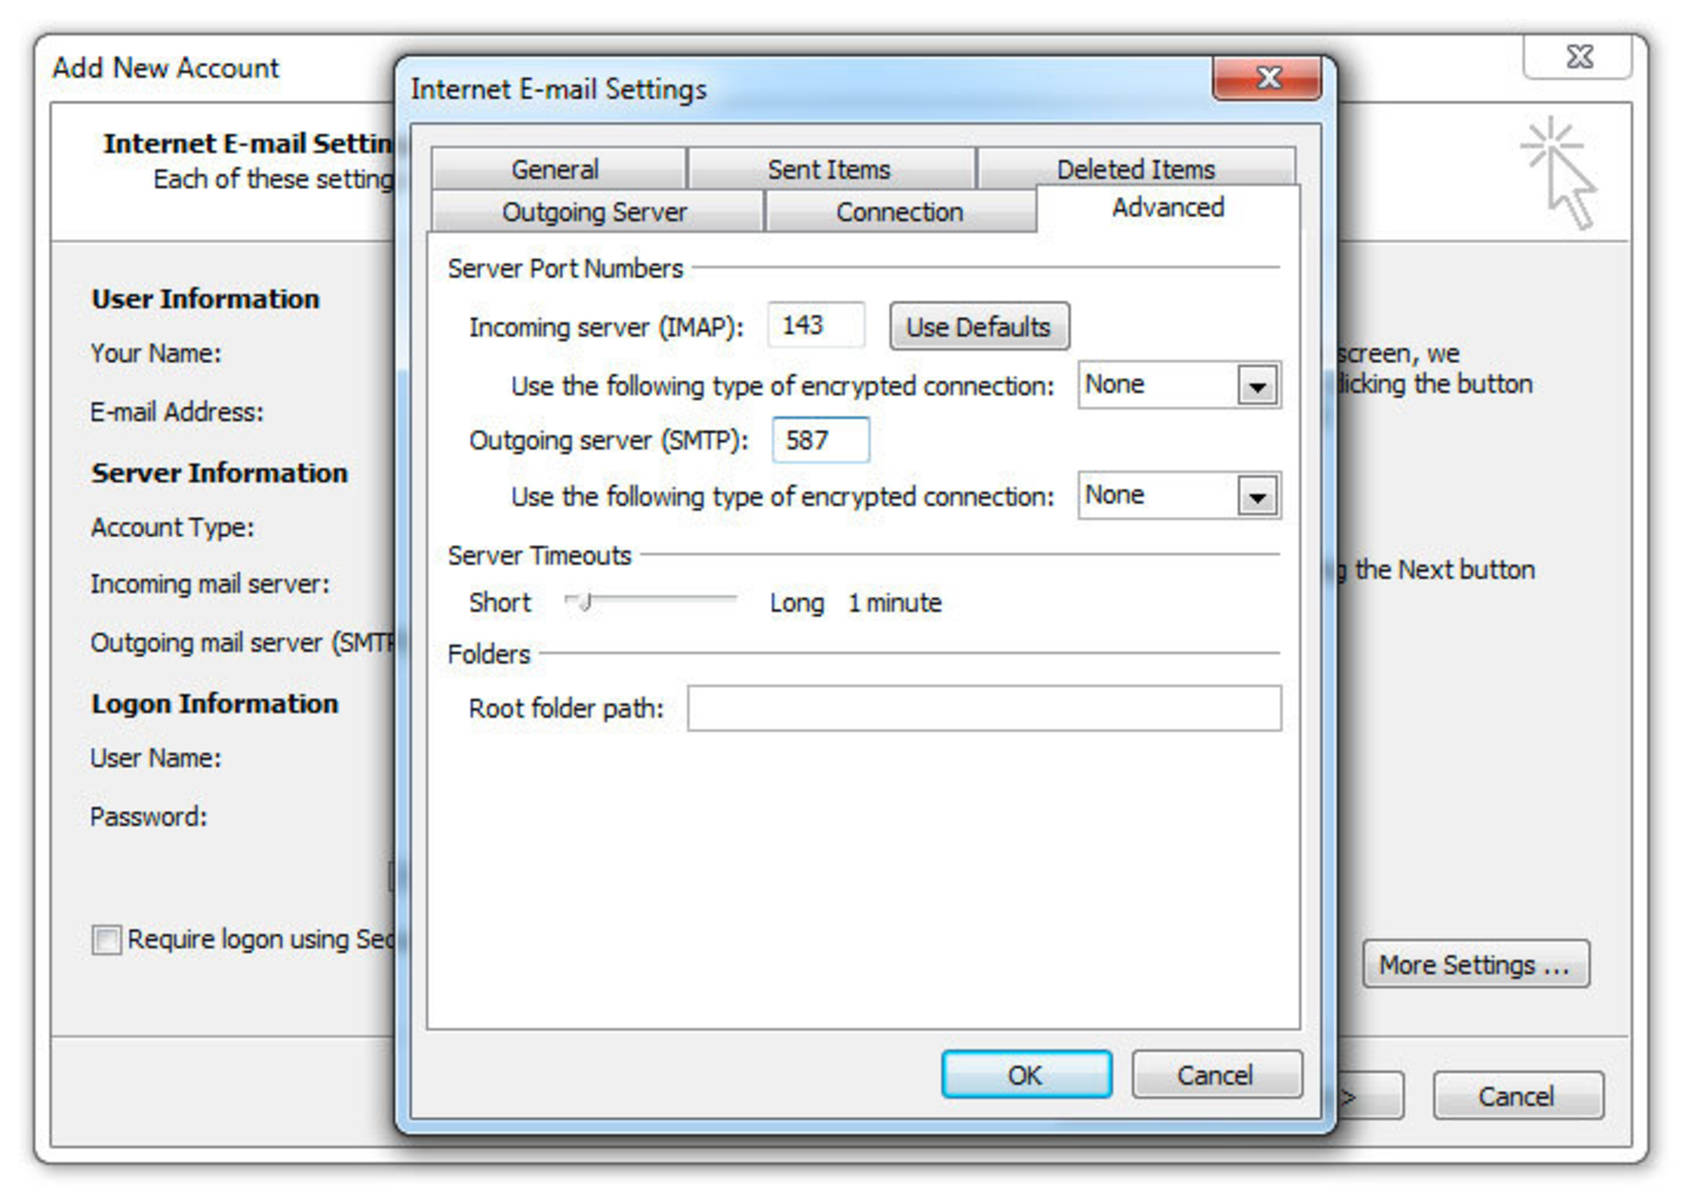
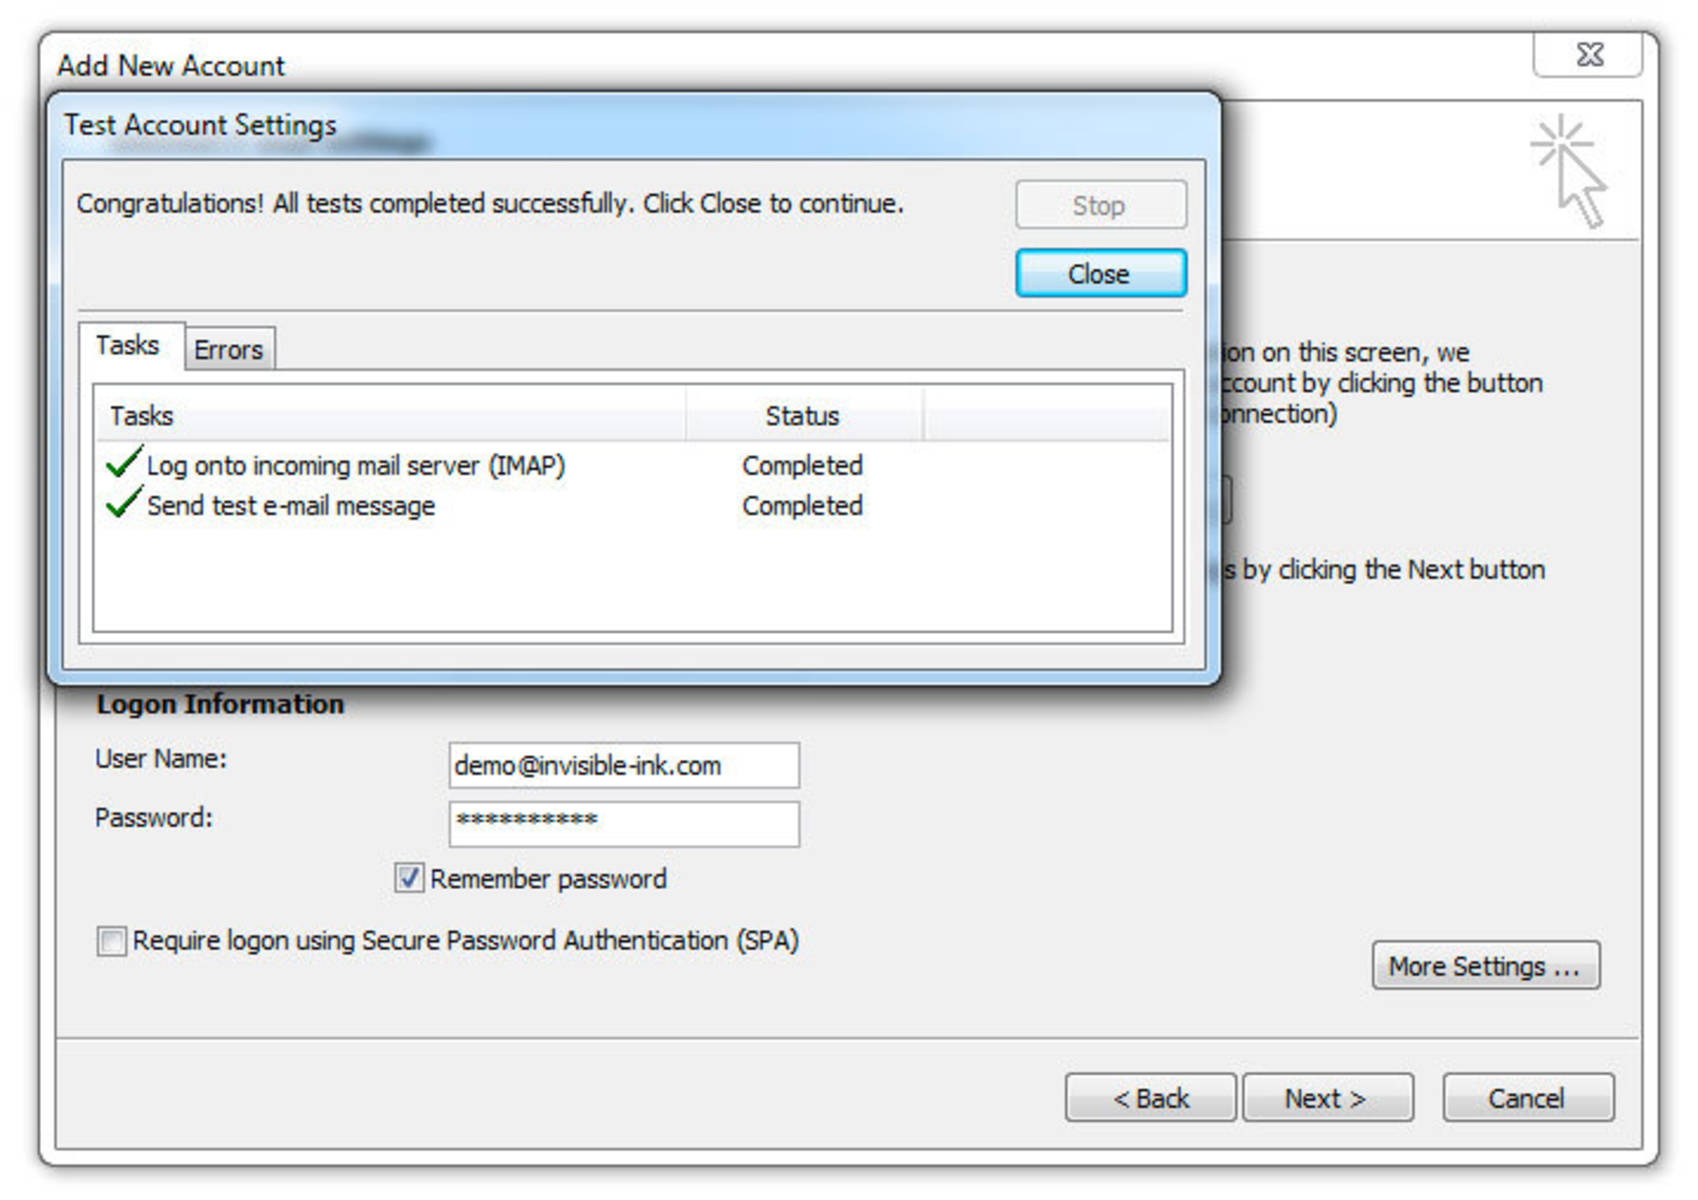
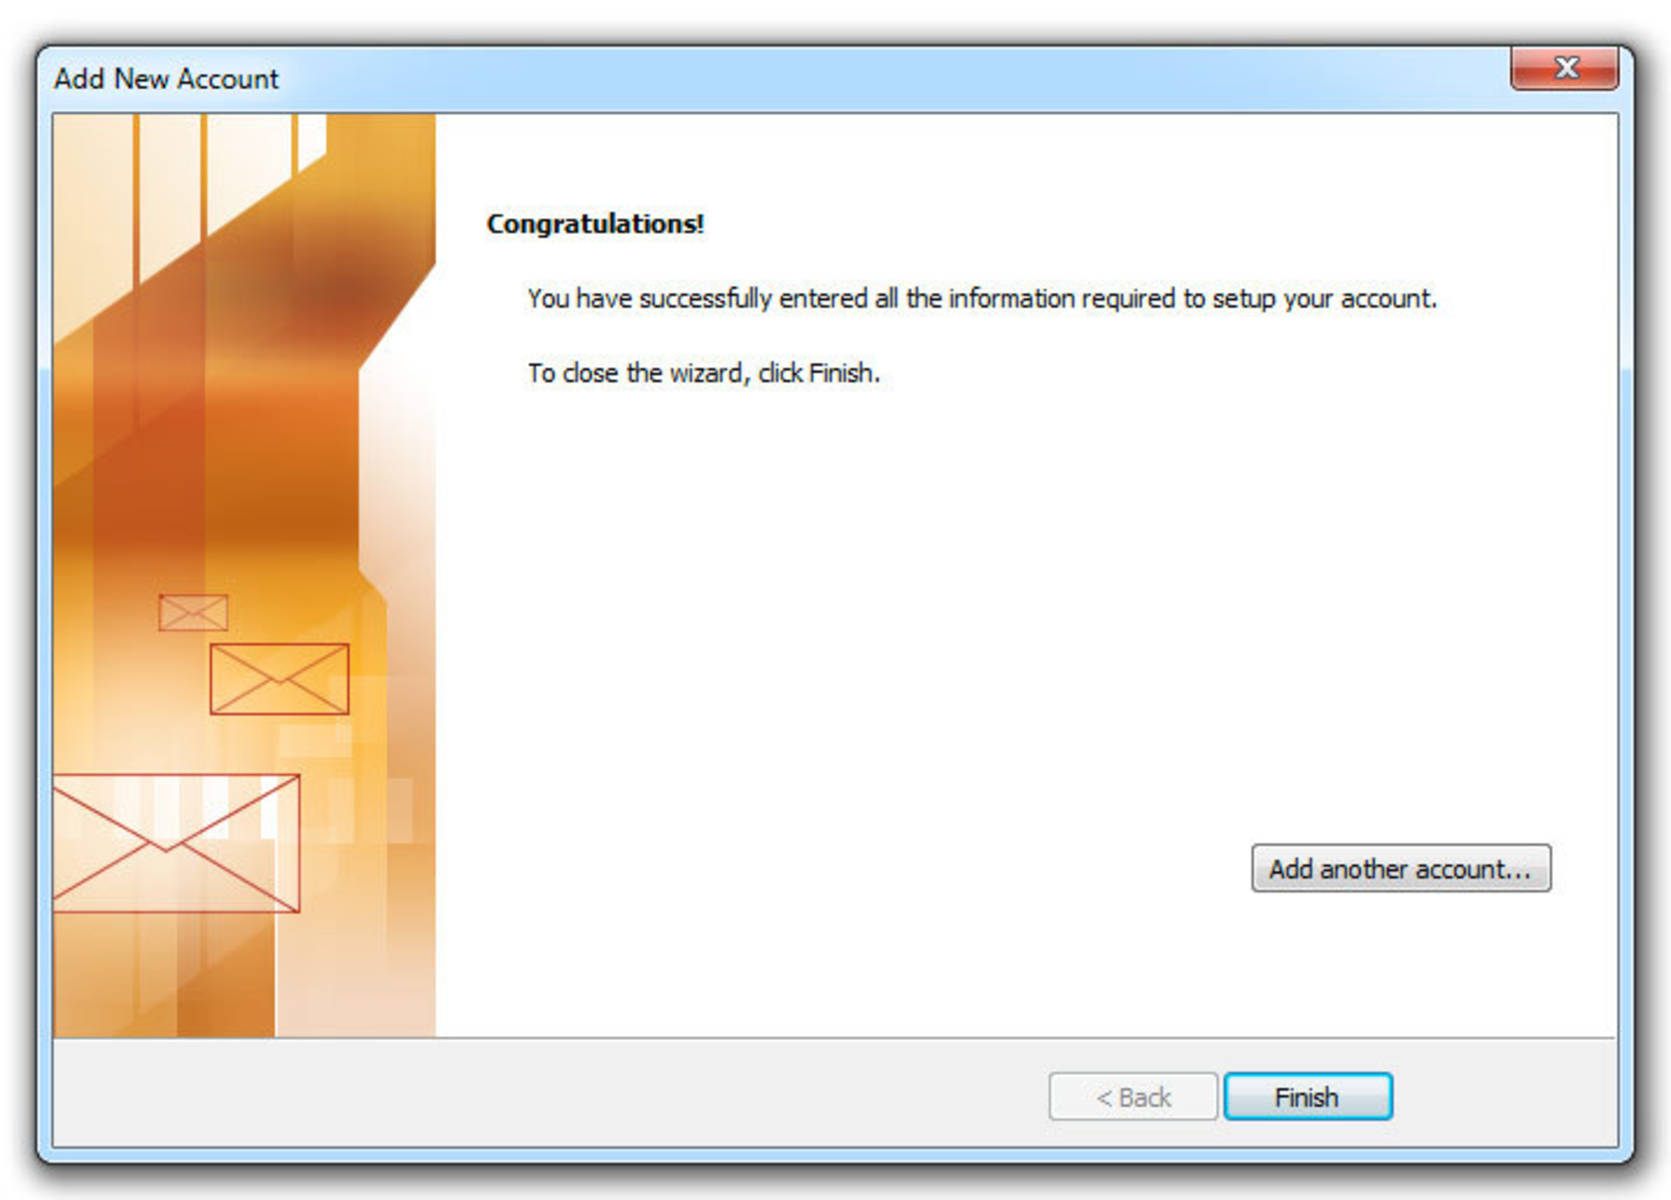
Click on the images below to view instructions for setting up a new IMAP email account using Outlook 2010. Note: When setting up your mailbox, substitute all Demo Account settings displayed in the example images below with your own.


Once you have completed the initial setup process, we recommend reading Part II of our Outlook 2010 setup guide to learn how to save your sent messages on your computer instead of on the server.

Posted November 23, 2011

Details

Step 1 » Open Outlook. From the file menu, select Info and choose Add Account. Note: If you just installed Outlook, a setup wizard will appear allowing you to bypass this step.
Step 2 » Select "Manually configure server settings or additional server types". Click Next.
Step 3 » Select Internet E-mail and click Next.
Step 4 » Select IMAP Account Type & enter your email settings. Server Address: mail.yourdomain.com / User Name: you@yourdomain.com
Step 5 » Click More Settings and select the Outgoing Server tab. Check the box labeled "My outgoing server (SMTP) requires authentication."
Step 6 » Select the Advanced tab and change the Outgoing server (SMTP) port number to 587. Click OK.
Step 7 » Click Next to test your account settings. When the test has completed successfully, click Close.
Step 8 » Your mailbox is now ready to use. Click Finish to return to your Outlook inbox.
[?]