Email Setup for Thunderbird 24

Email Setup for Thunderbird 24

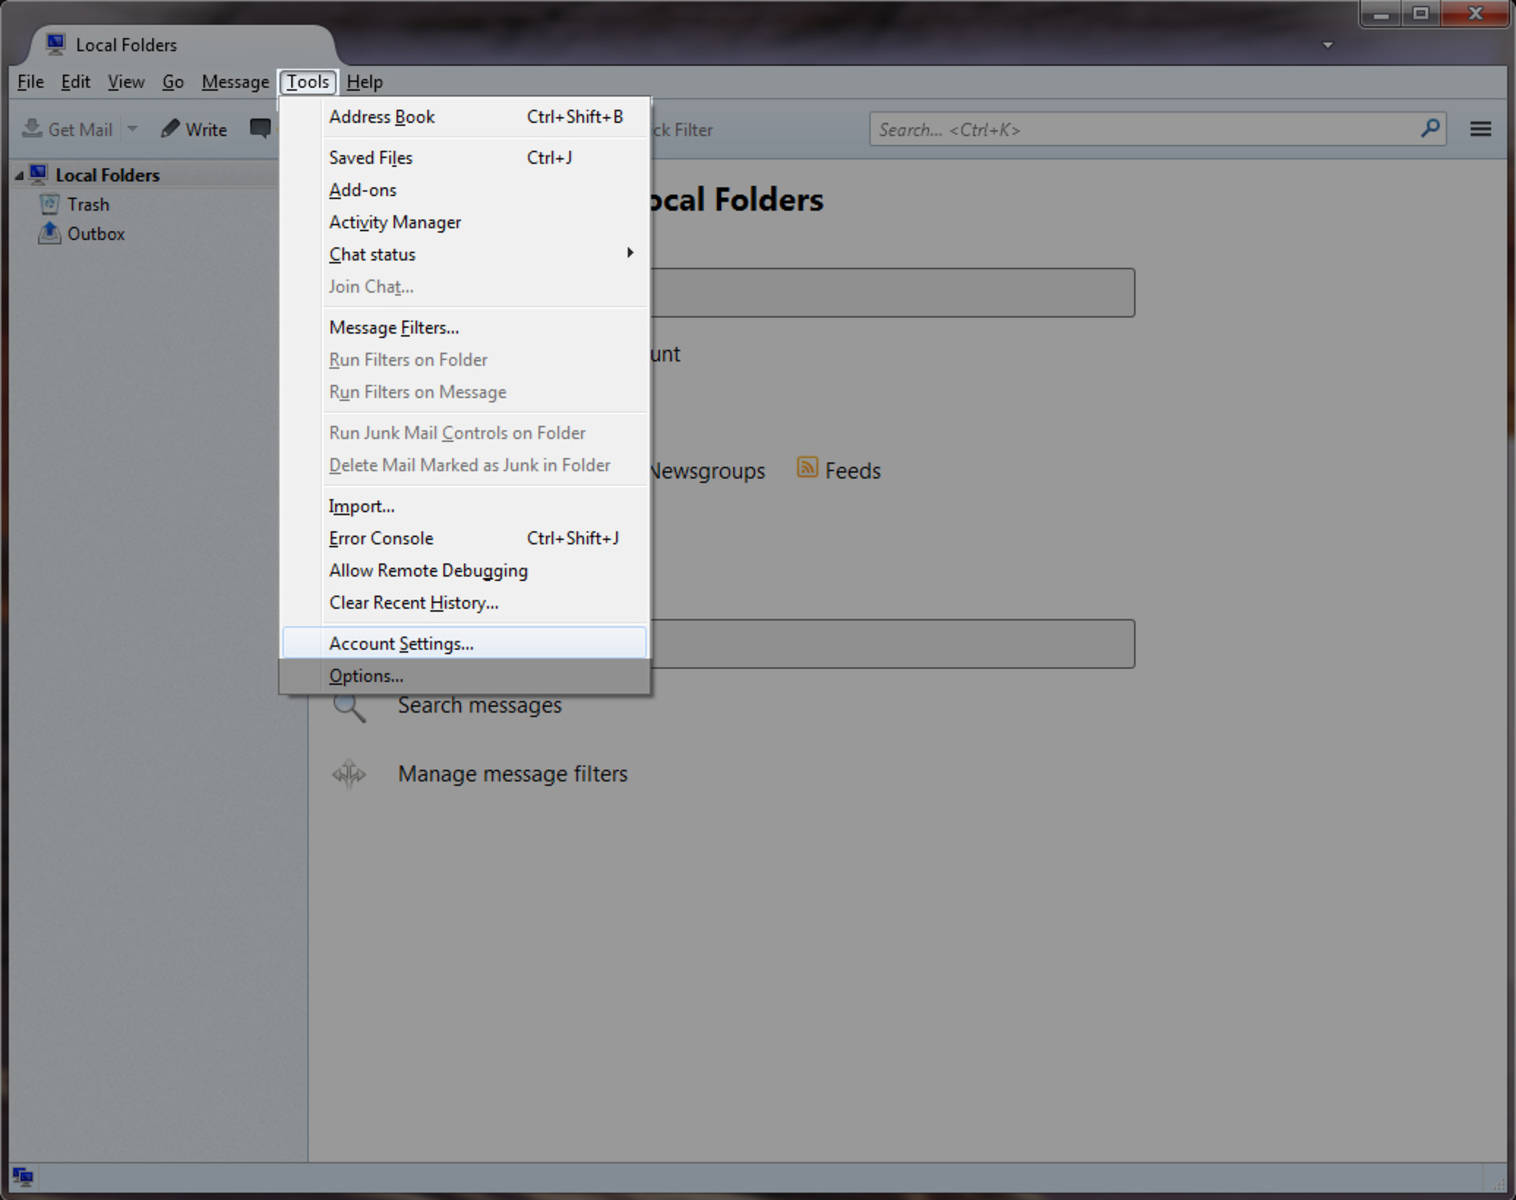
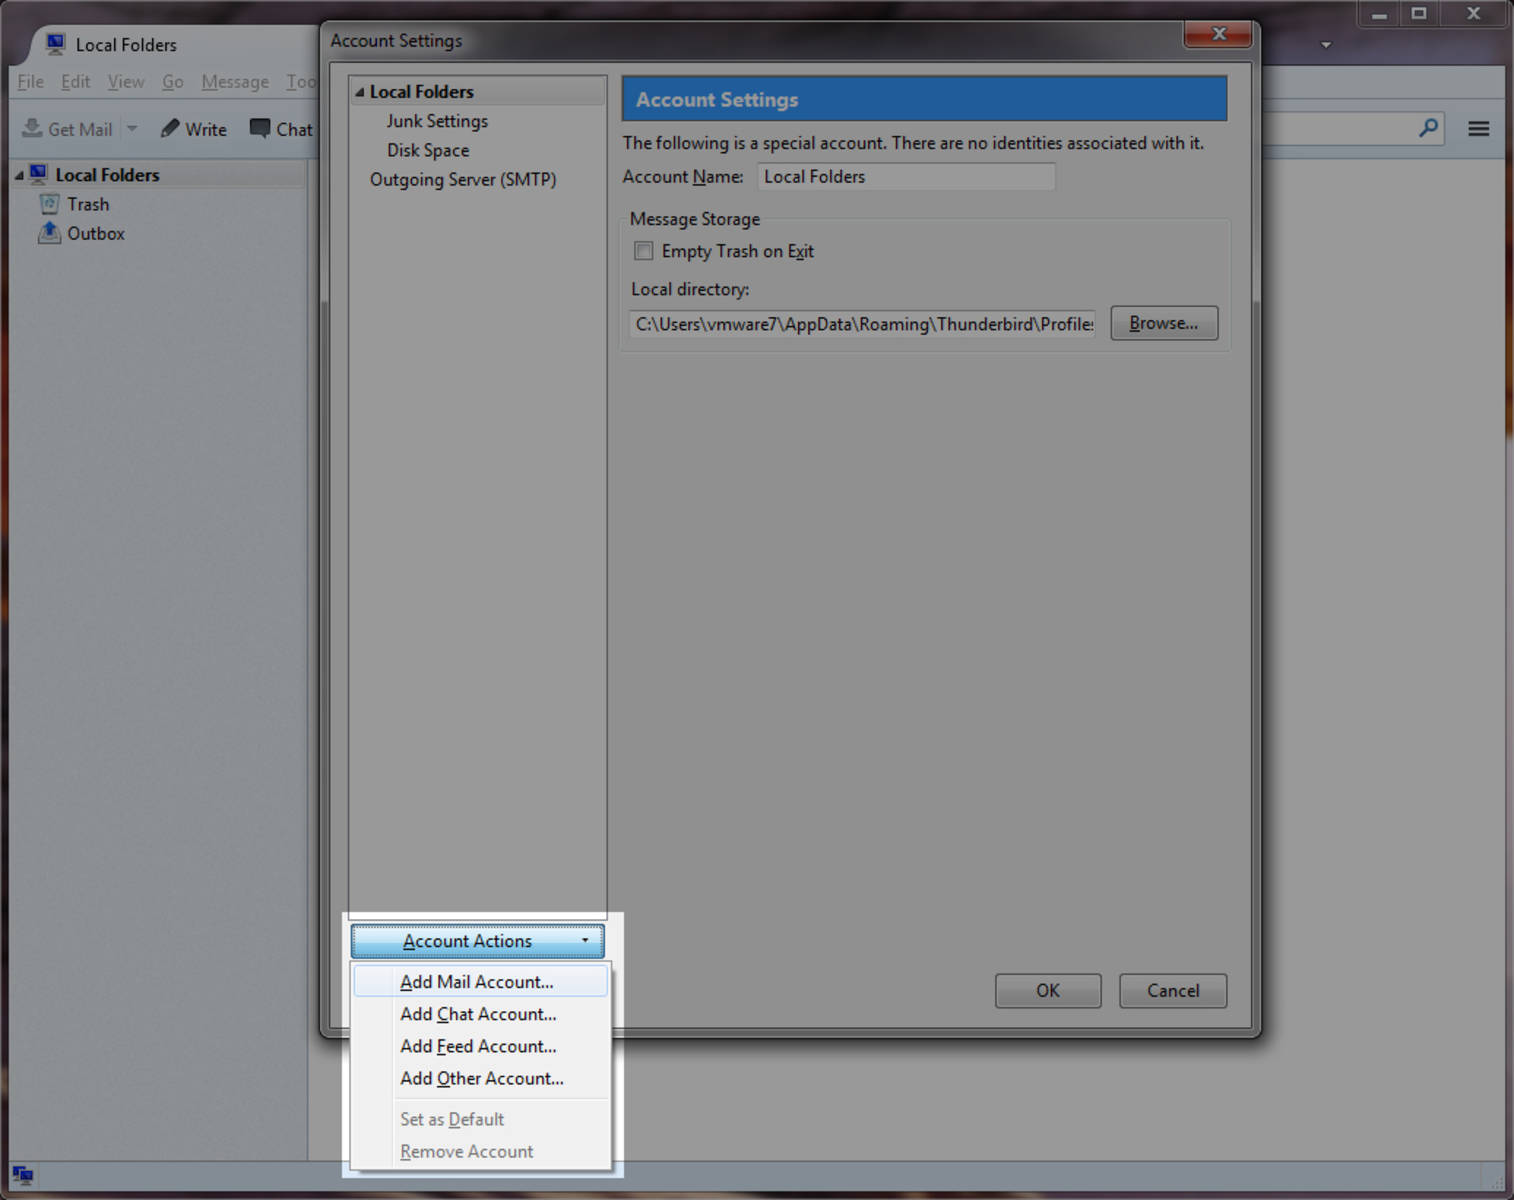
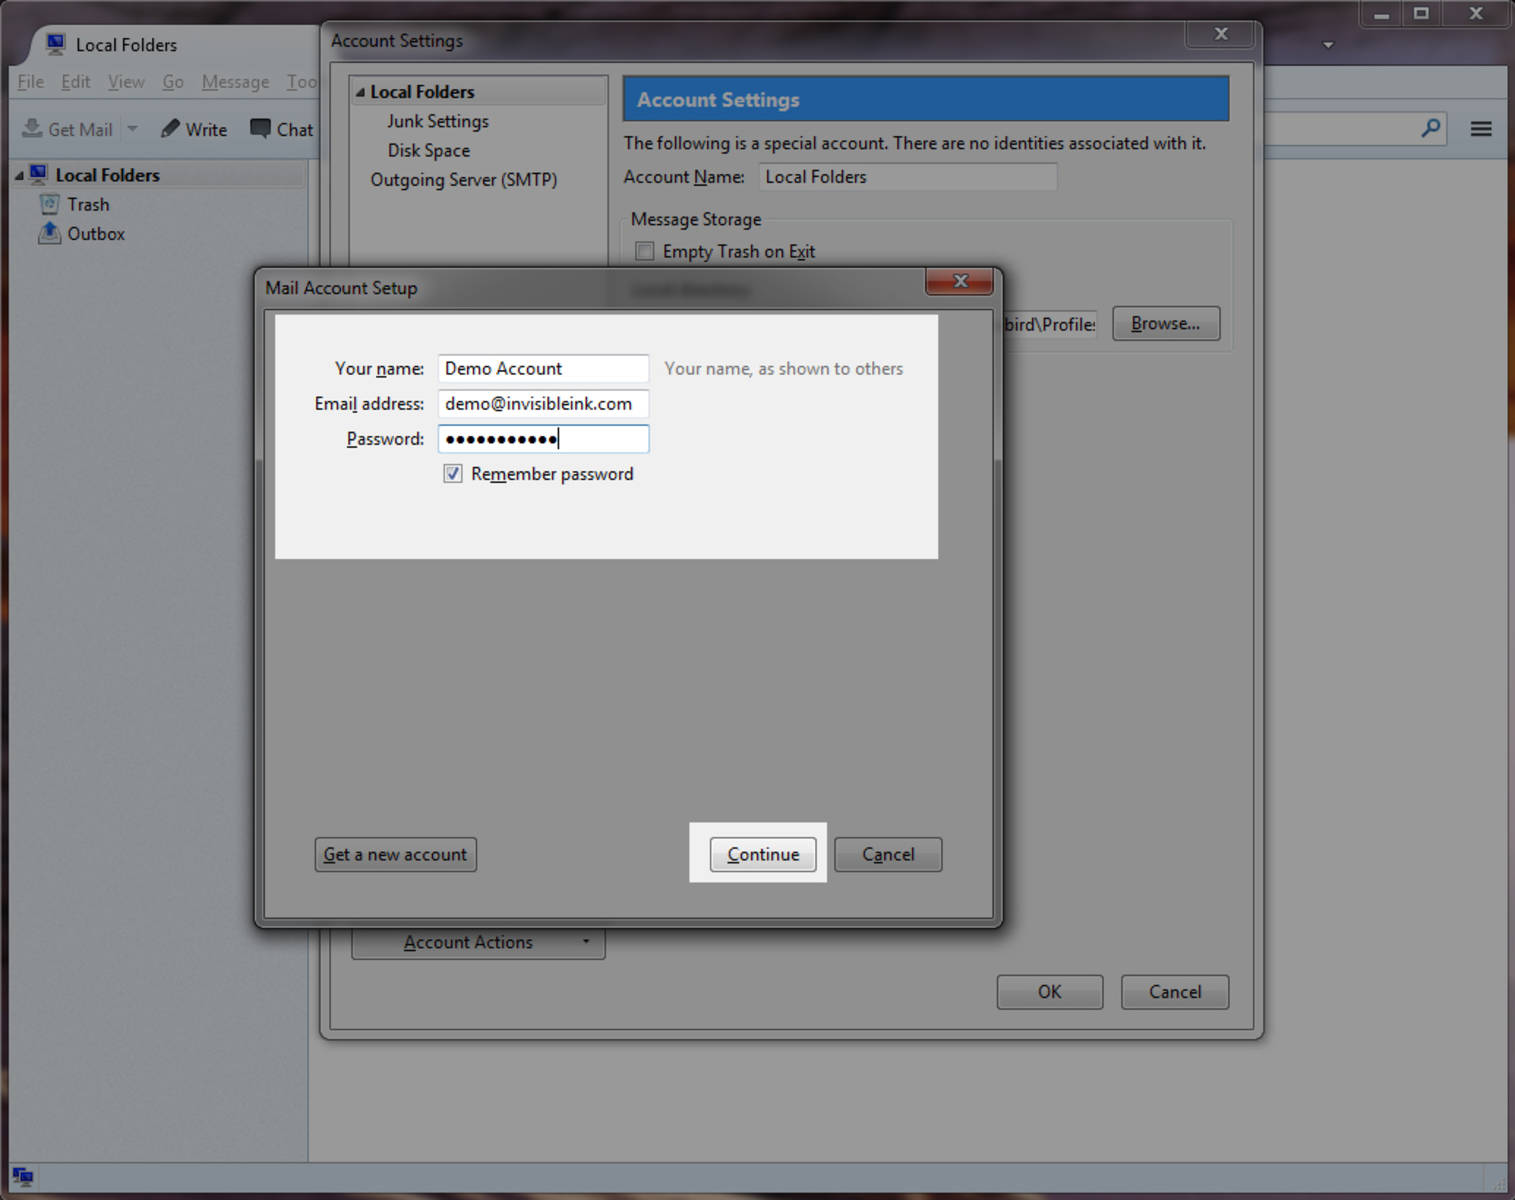
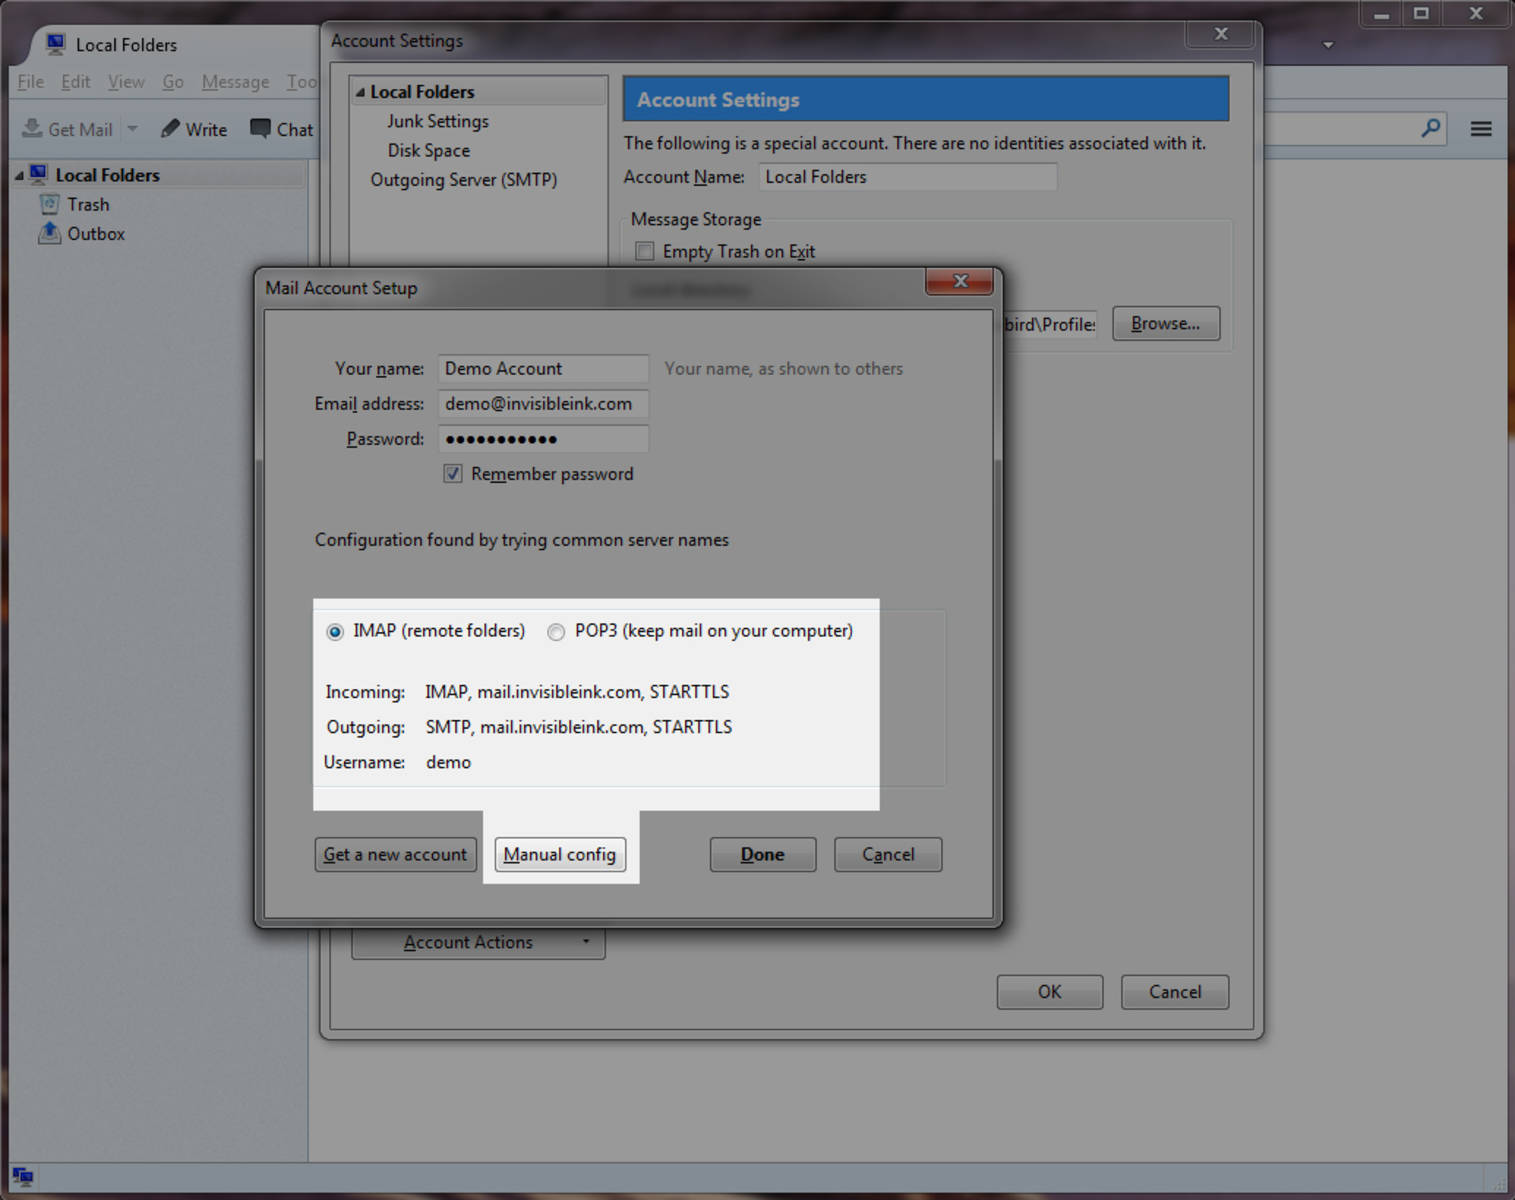
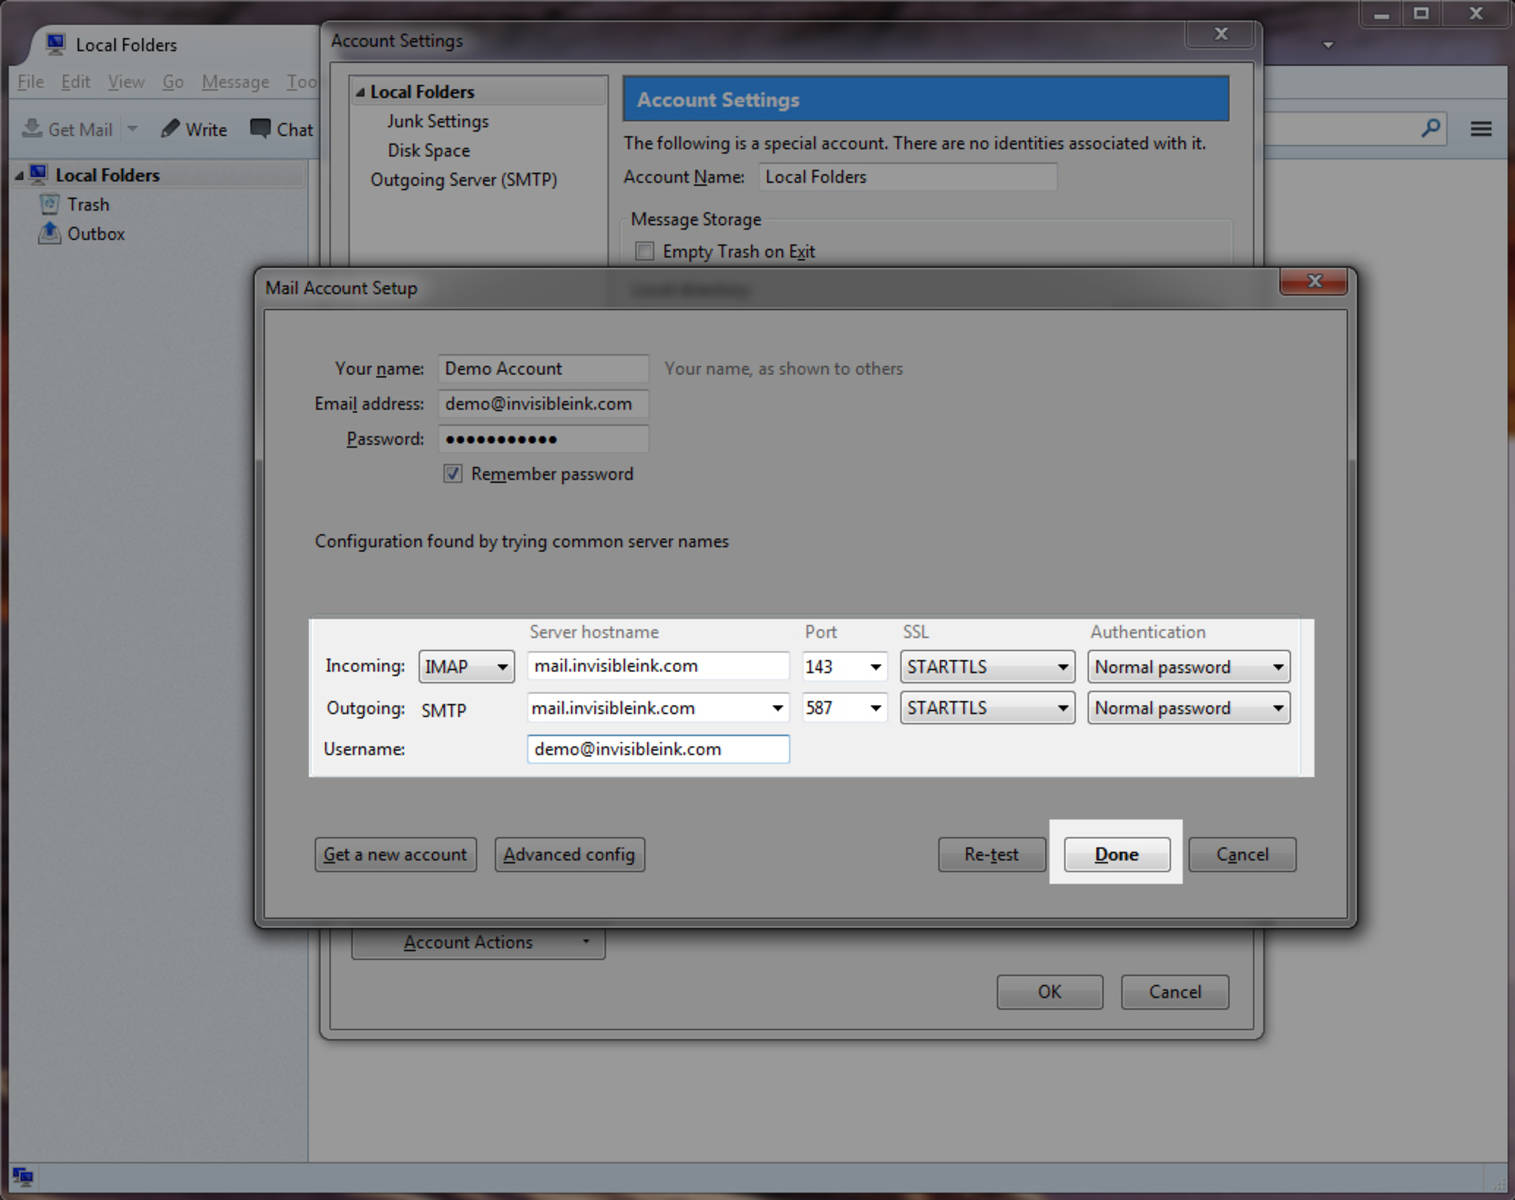
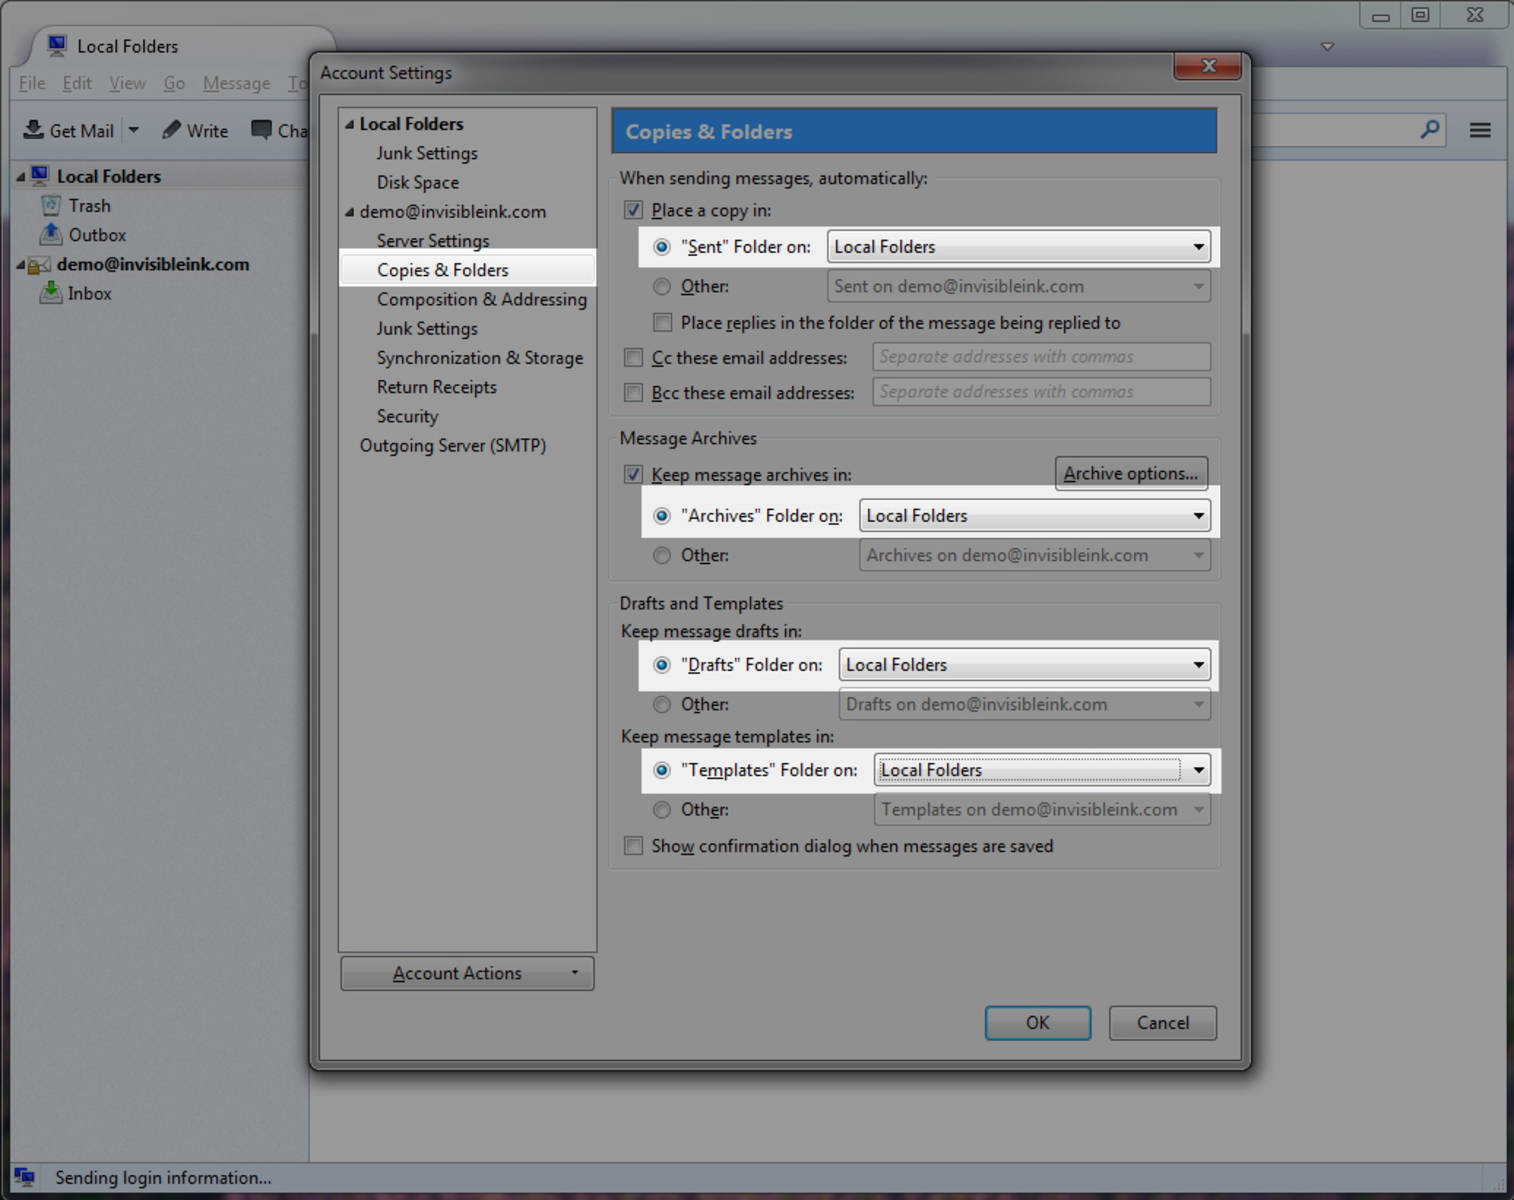
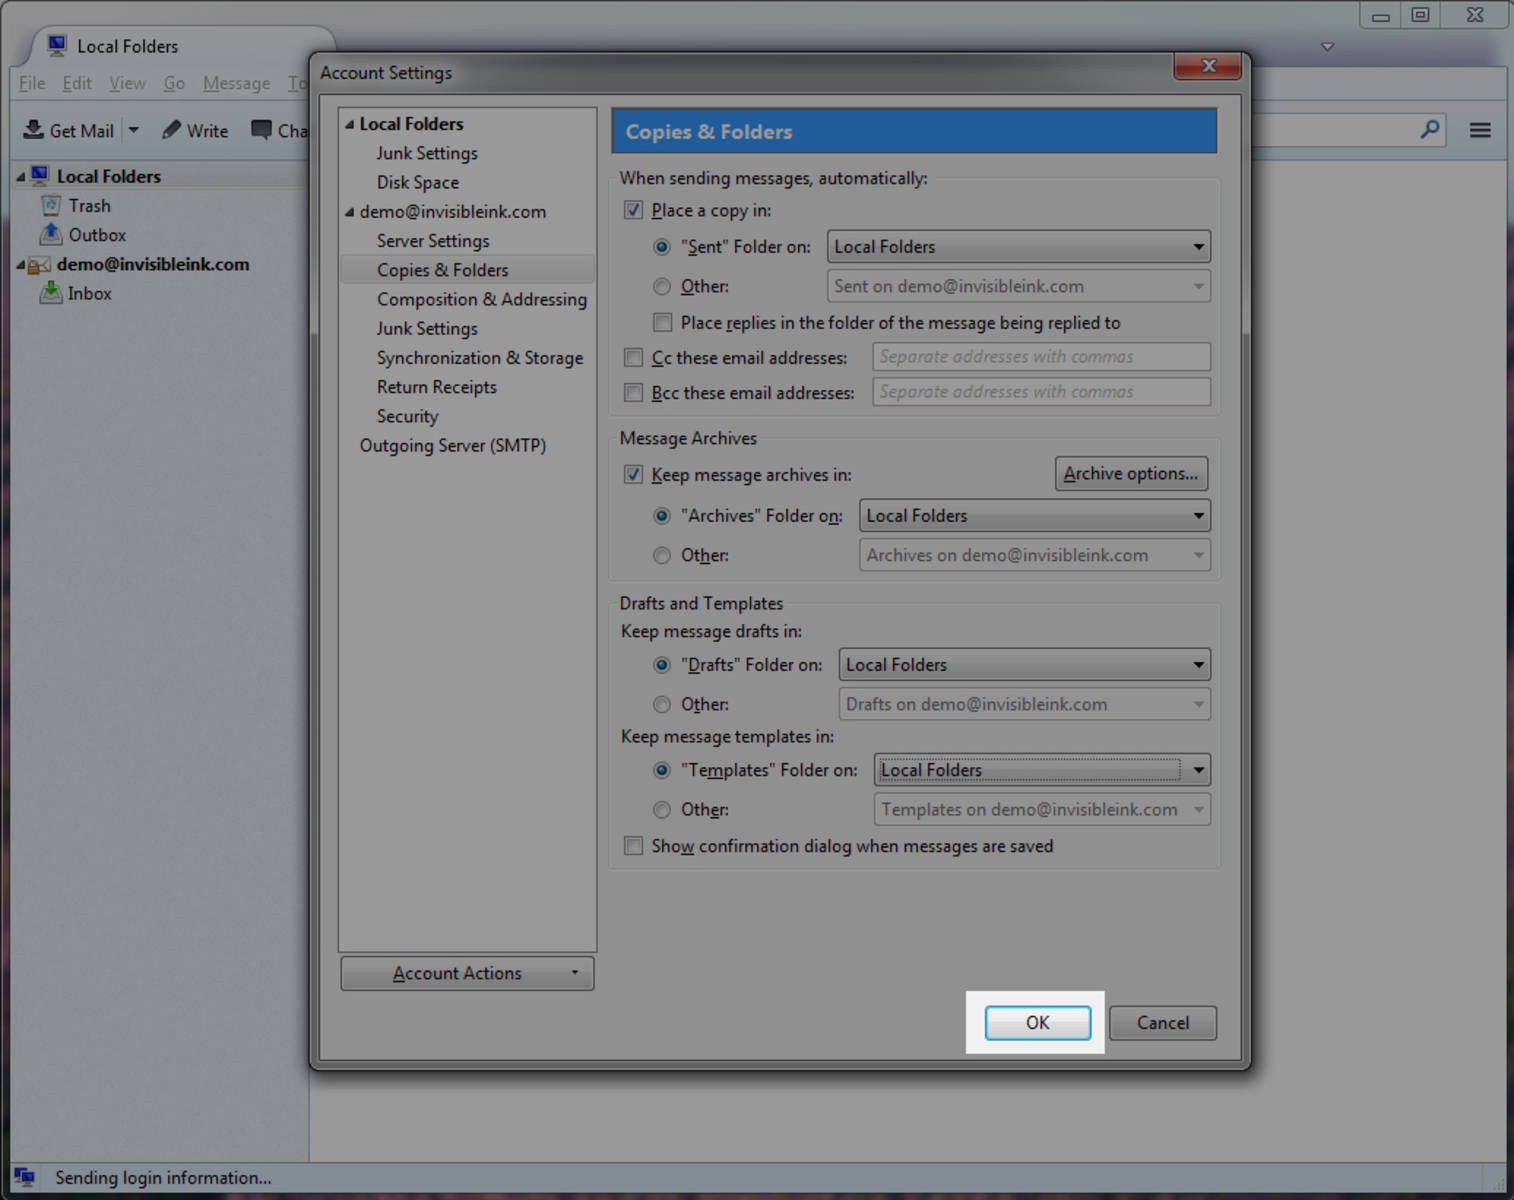
Mozilla's Thunderbird is a free alternative to the standard mail apps for Windows and Mac. The following instructions will guide you through the step-by-step process of adding a secure IMAP account. This guide was prepared using Windows 7 and Thunderbird version 24, but the process is nearly identical for Mac users, as well as recent versions with the older user interface.

Account Settings

  • Account type: IMAP
  • Incoming mail server: mail.invisibleink.com
  • Outgoing mail server: mail.invisibleink.com
  • Username: you@yourdomain.com (full email address, all lowercase)

View Setup Guide

Posted November 26, 2014

Details

Step 1 » Open Thunderbird and select Account Settings from the Tools menu.
Step 2 » From the Account Actions menu (bottom left), select Add Mail Account.
Step 3 » Enter your name, email address and password, then click Continue.
Step 4 » Thunderbird will attempt to configure your account. When prompted, click Manual Config to enter additional settings.
Step 5 » Type mail.invisibleink.com in the incoming and outgoing server hostname fields, then select STARTTLS from the SSL drop-down menu. Authentication should be set to Normal Password for both hostnames. Enter your full email address for the username, then click Done to create your account.
Step 6 » Thunderbird will return to the Account Settings screen after successfully completing a test of your settings. Select the Copies & Folders menu under your new account to change the location of stored emails to Local Folders. By changing some of the folders to save on your computer instead of the server, you can help prevent your mailbox from reaching its quota.
Step 7 » Click OK to return to the Inbox to start using your new account.
[?]