Setting up an Email Archive in Outlook 2013

Setting up an Email Archive in Outlook 2013

If your mailbox is full, setting up an email archive can save you the trouble of sorting through old messages to decide what to keep. You can store messages you don’t need to access from all of your devices on your primary desktop computer (assuming you still have one!) to alleviate a perpetually full mailbox.

Using an email archive means your messages are stored locally instead of on the server, so these messages do not contribute to your mailbox storage quota. 

To better understand how this works, let’s use our office as an example. Emails related to ongoing projects and new messages we have not responded to remain in our inbox on the server until we have completed the task(s) related to these emails.

Completed projects and messages we no longer need to access from our various devices can be filed away in the Email Archive folder in the off chance we ever need to review these messages in the future.

Keep in mind that moving messages to the Email Archive saves space on the server, but that also means archived messages can only be viewed from the single computer that contains the Email Archive folders.

View Instructions

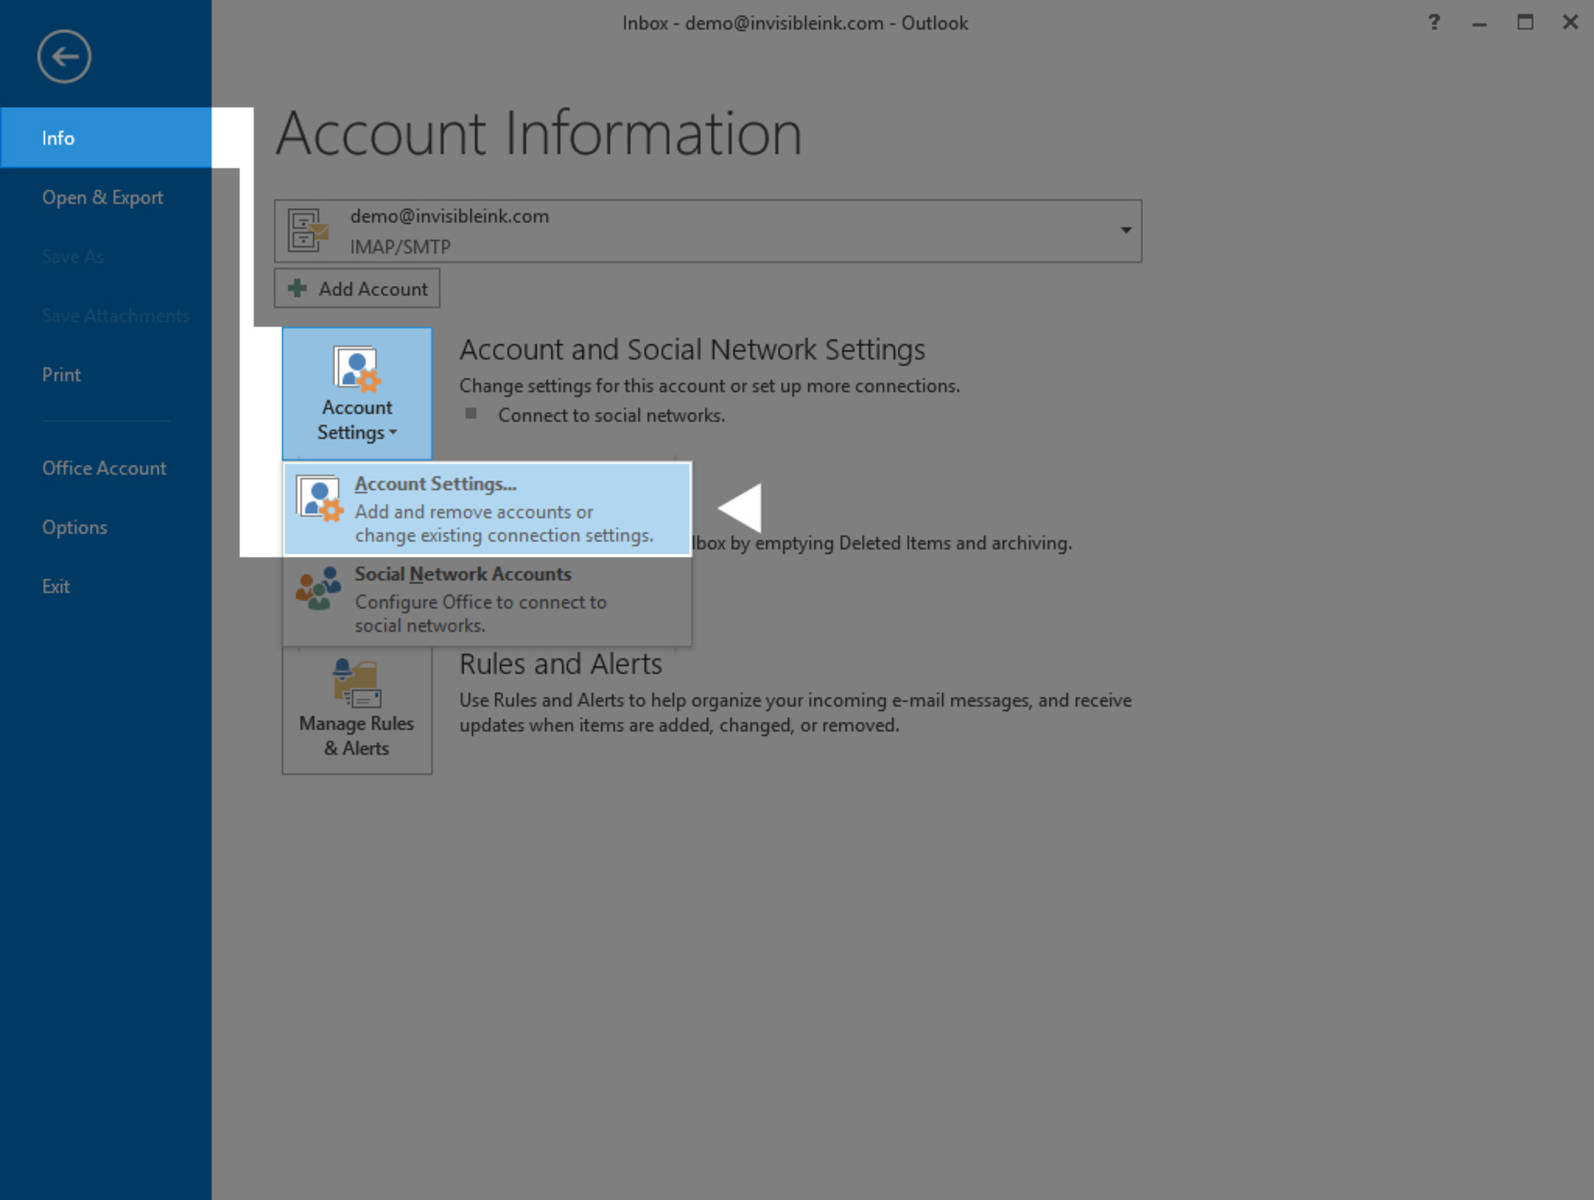
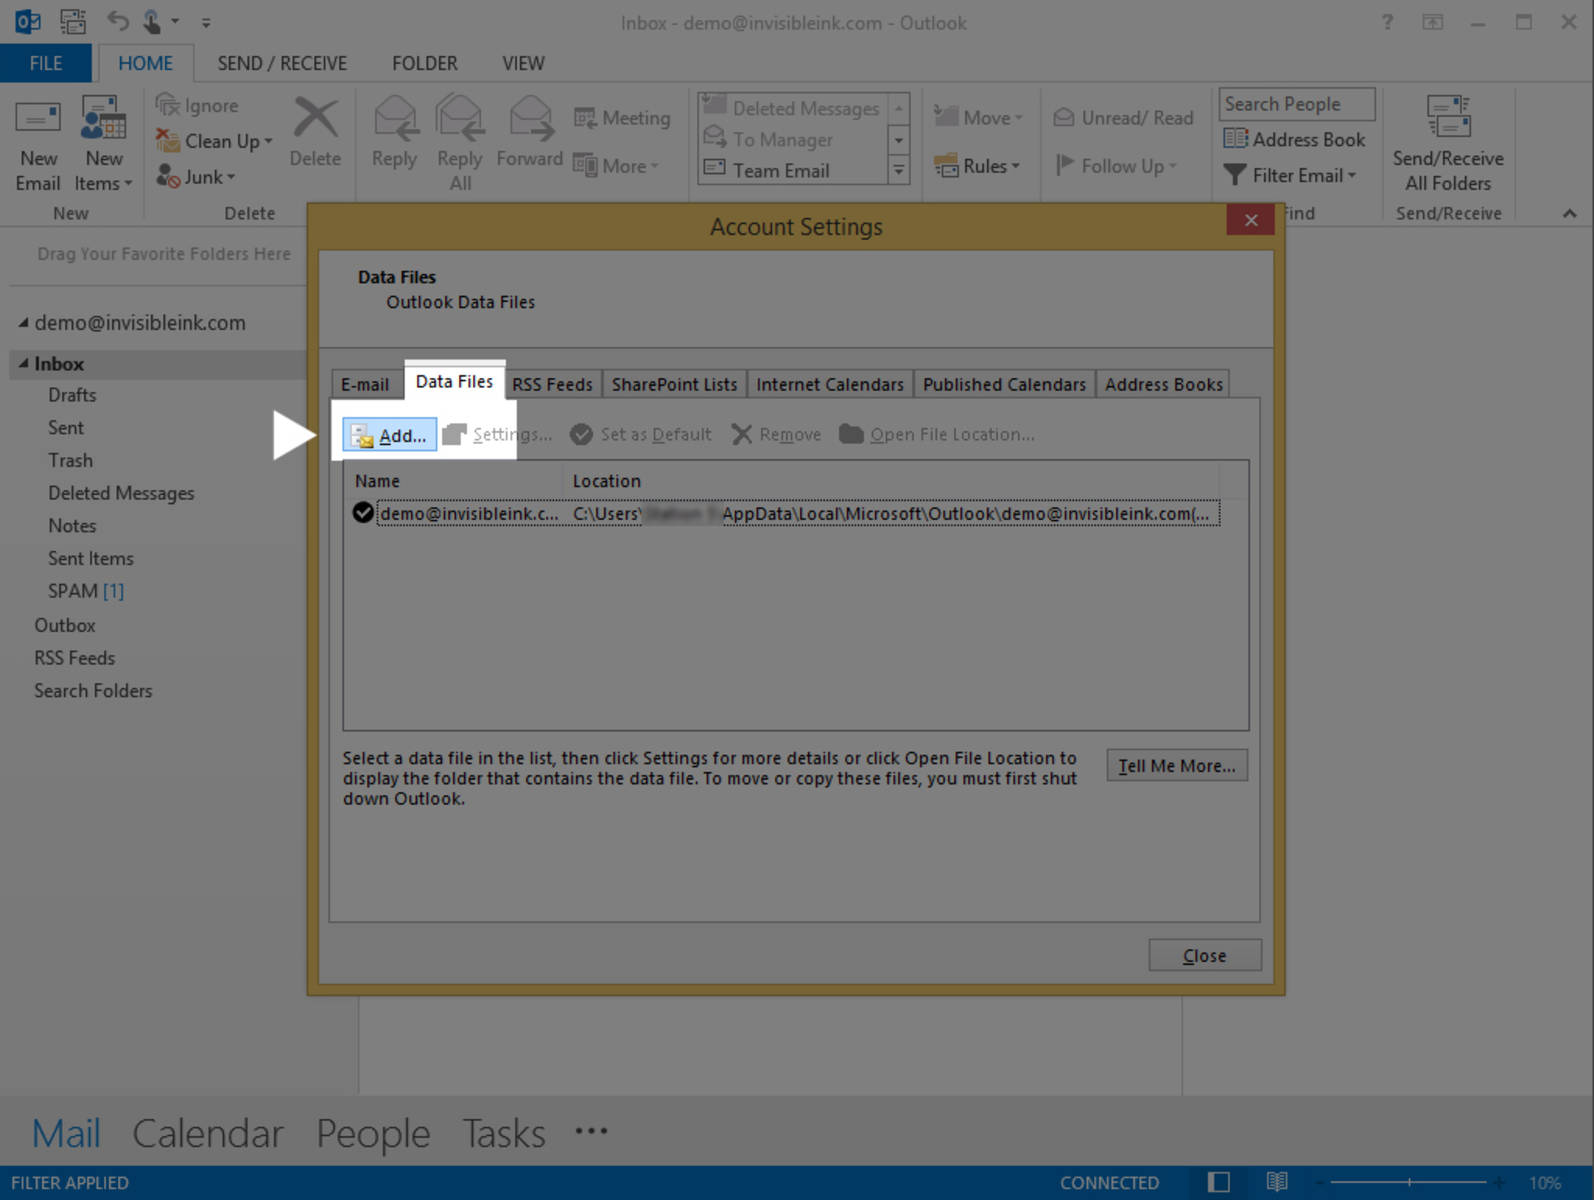
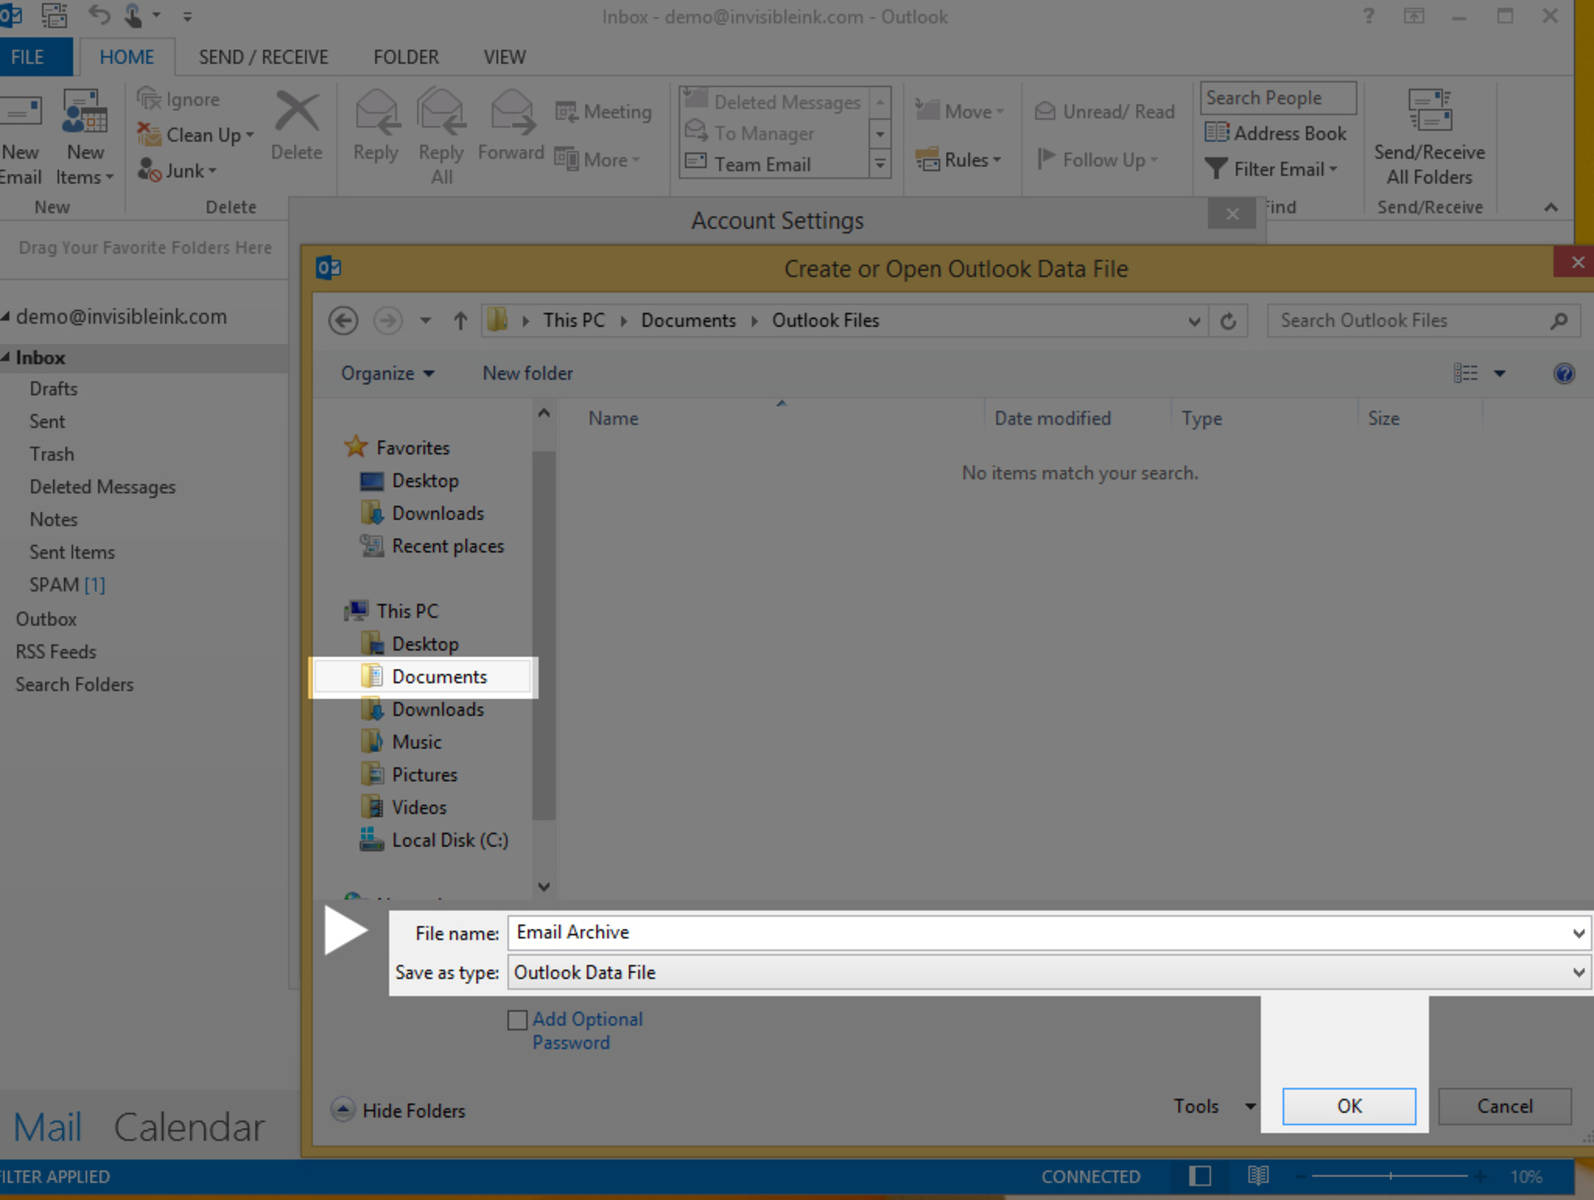
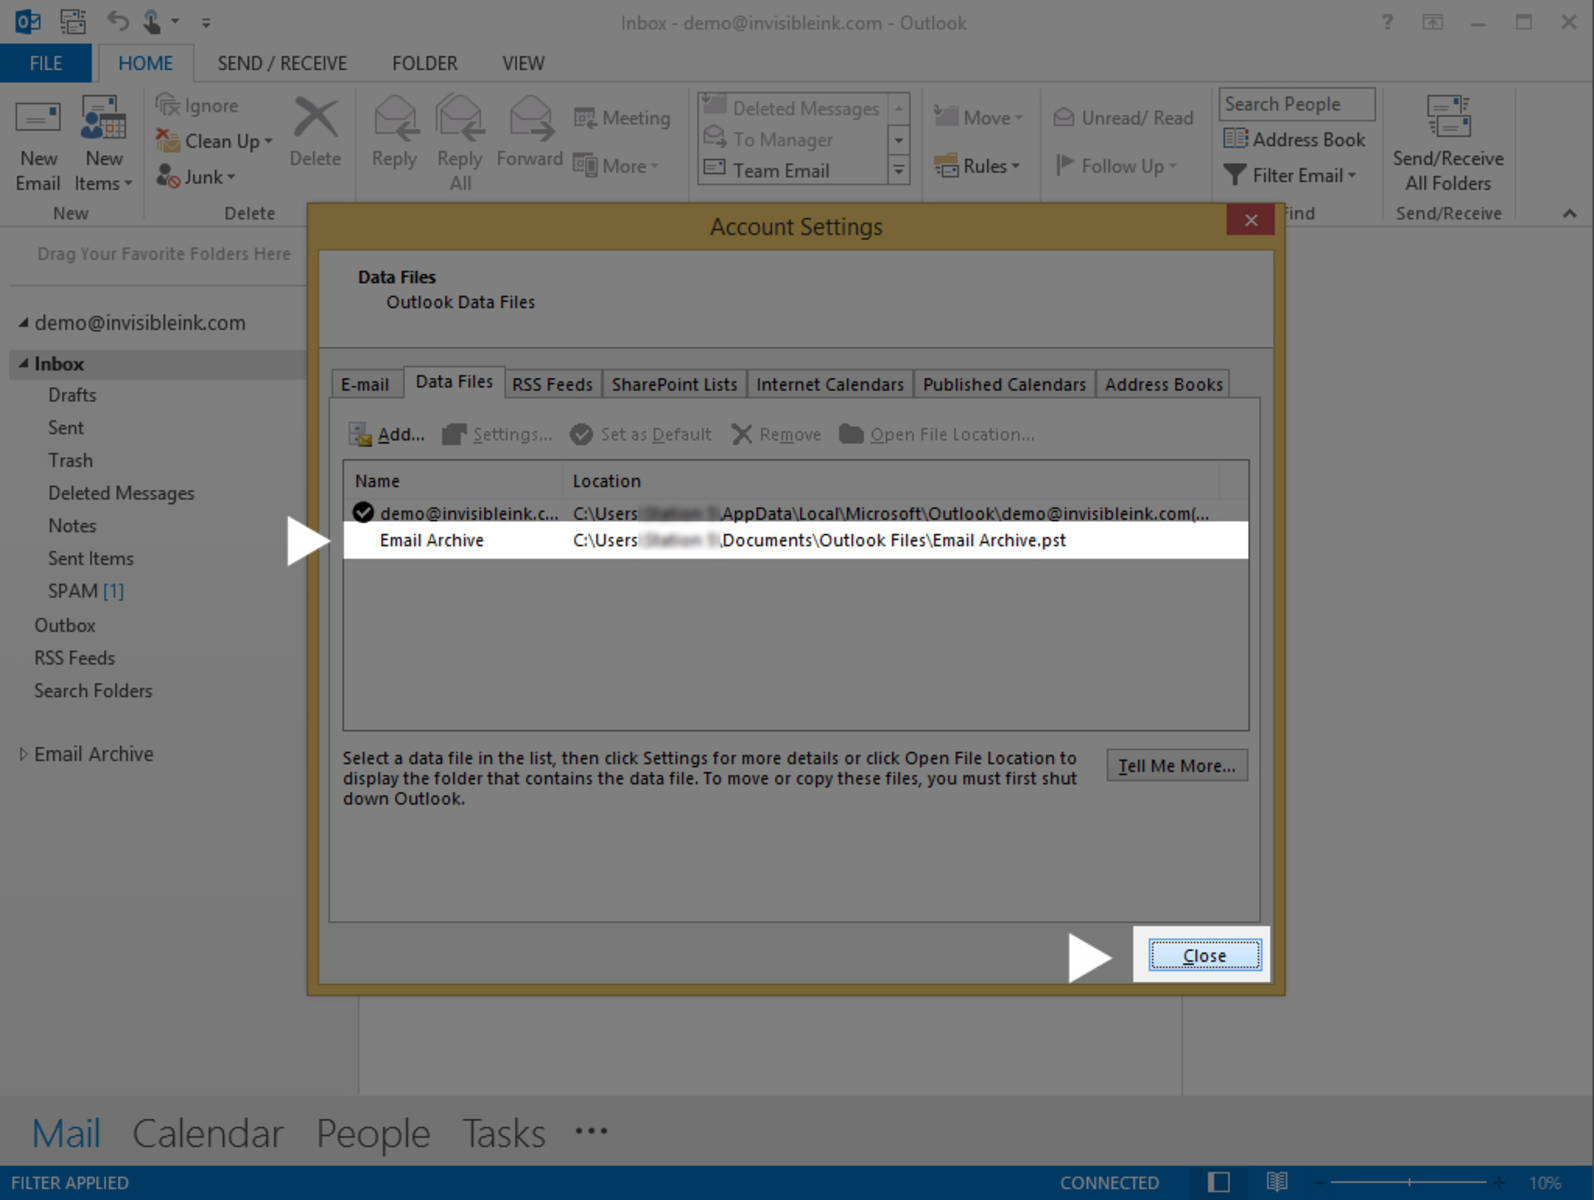
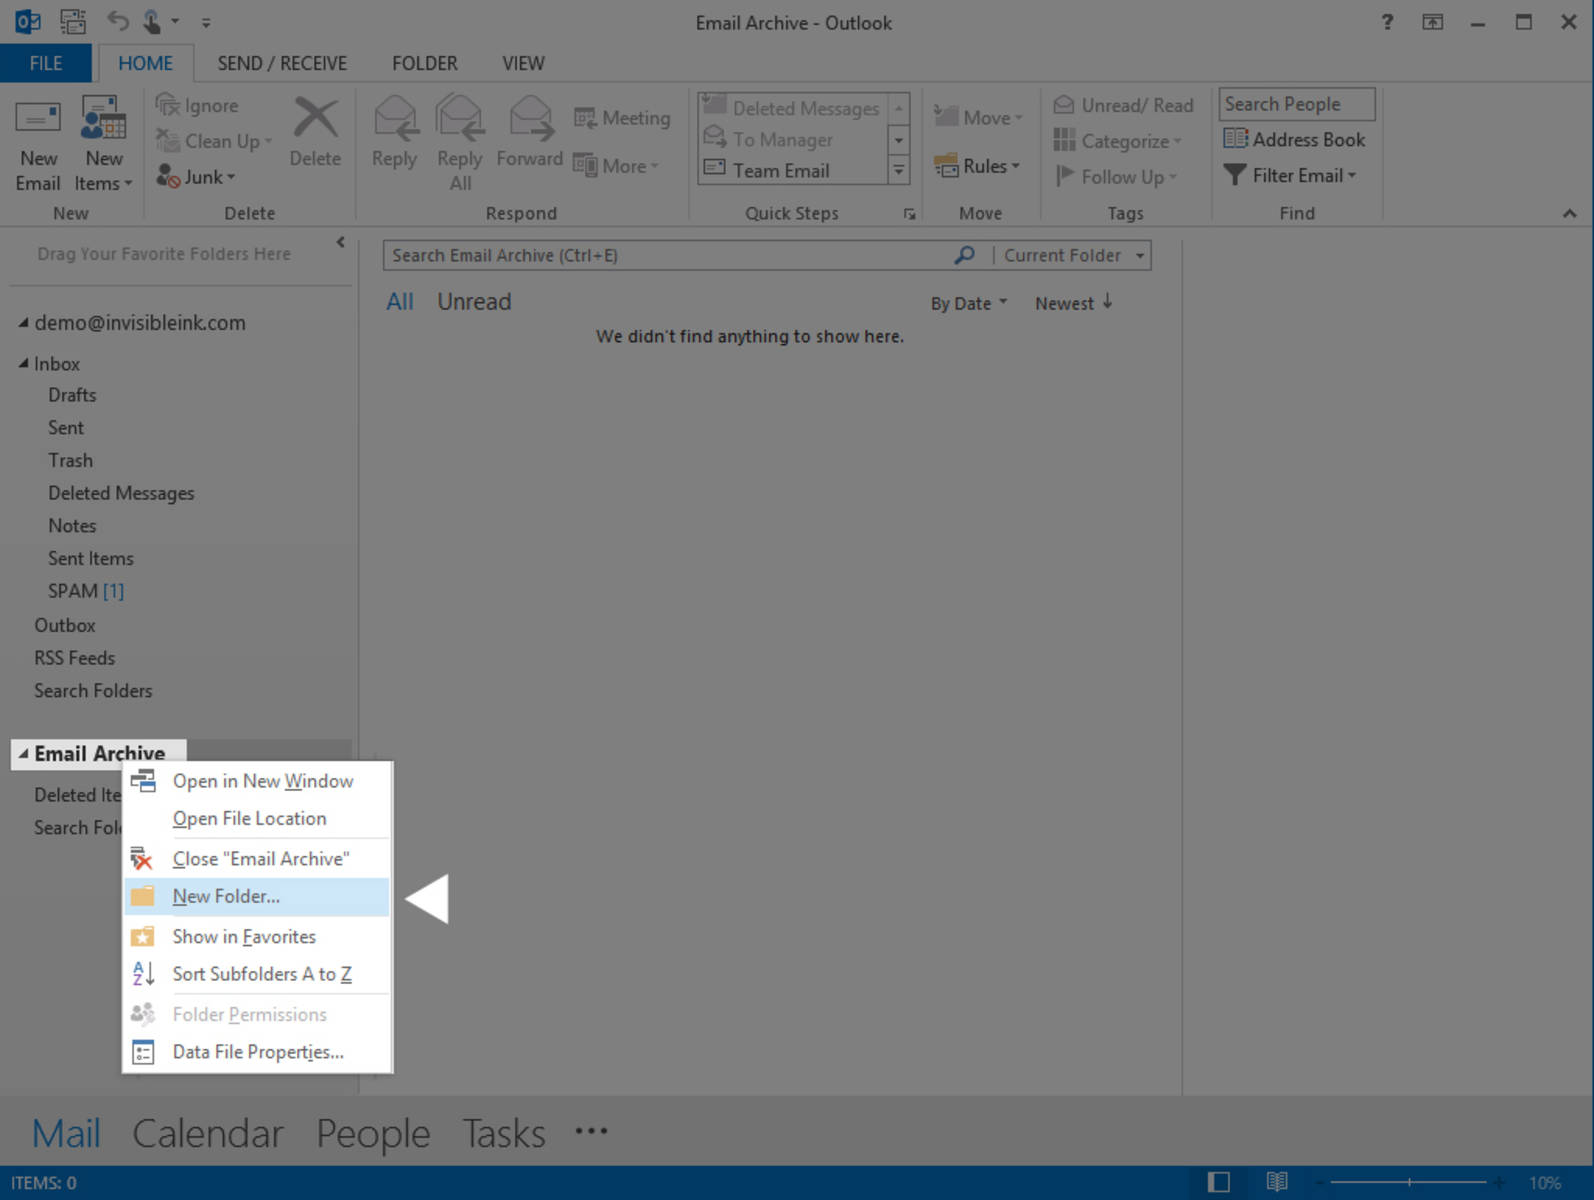
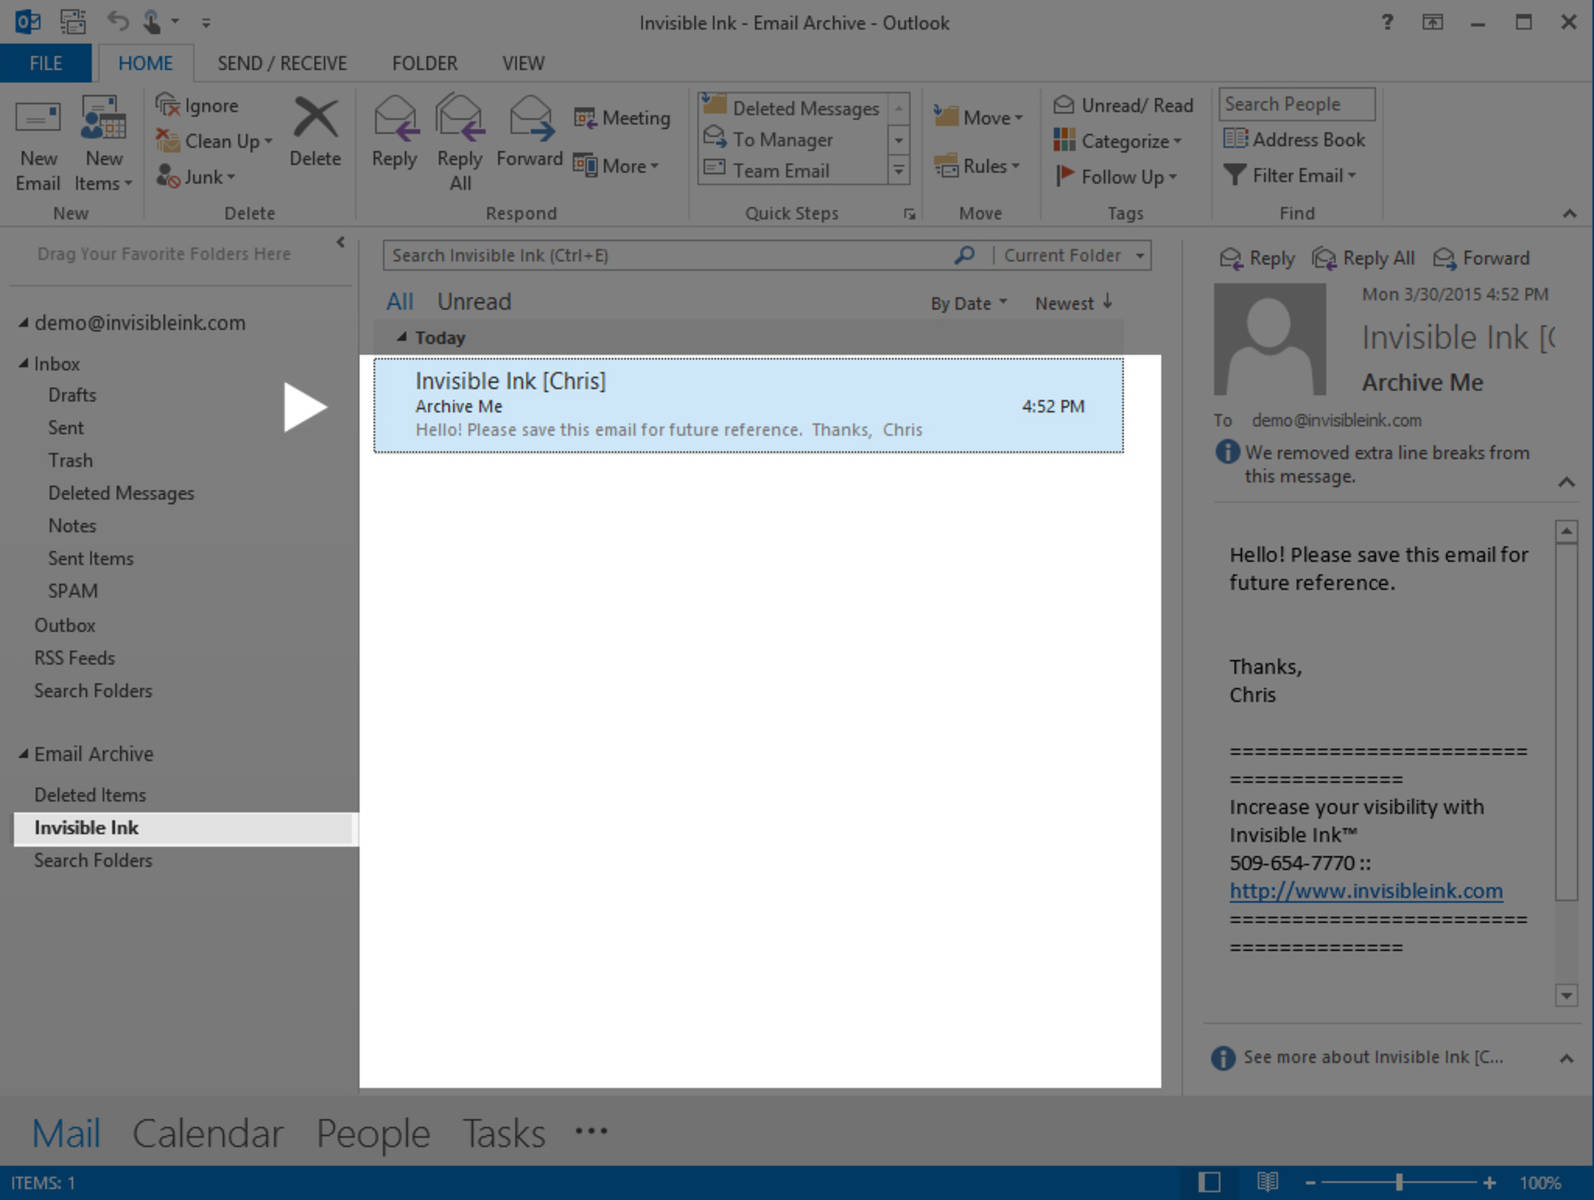
Click the images below to view step-by-step instructions.


Posted March 30, 2015

Details

Step 1 » From the File menu, select Info, then click Account Settings.
Step 2 » Select the Data Files tab and click the Add button.
Step 3 » Create a new file called Email Archive. Click OK to save this file to your computer (we chose the My Documents folder).
Step 4 » Your new Outlook data file should now be listed on the Data Files tab. Click Close to return to your inbox.
Step 5 » Right-click on the new Email Archive data file and choose New Folder to create an archive folder (i.e. Invisible Ink).
Step 6 » Once your new archive folder has been created, drag & drop any emails you no longer need to keep on the server to the new Email Archive folder.
Step 7 » Select your new archive folder to make sure the message(s) were successfully removed from the server and placed into the local archive folder.
[?]