

If you’re a fan of Google’s Gmail service, you may find it difficult to adjust to third party mail apps like Outlook or Mail for Mac. Did you know you can check email for your domain inside of your existing Gmail account? Spend a few minutes setting up your email account inside of Google’s mail system and you can send and receive from your company email without switching apps.
To check your email address from Google mail service, follow these step-by-step instructions to add a POP account within your existing Gmail account.
Before you start be sure you know the difference between POP3 and IMAP.
Log in to your Gmail account and click the Settings icon in the upper right corner of the screen, then click "See all settings".
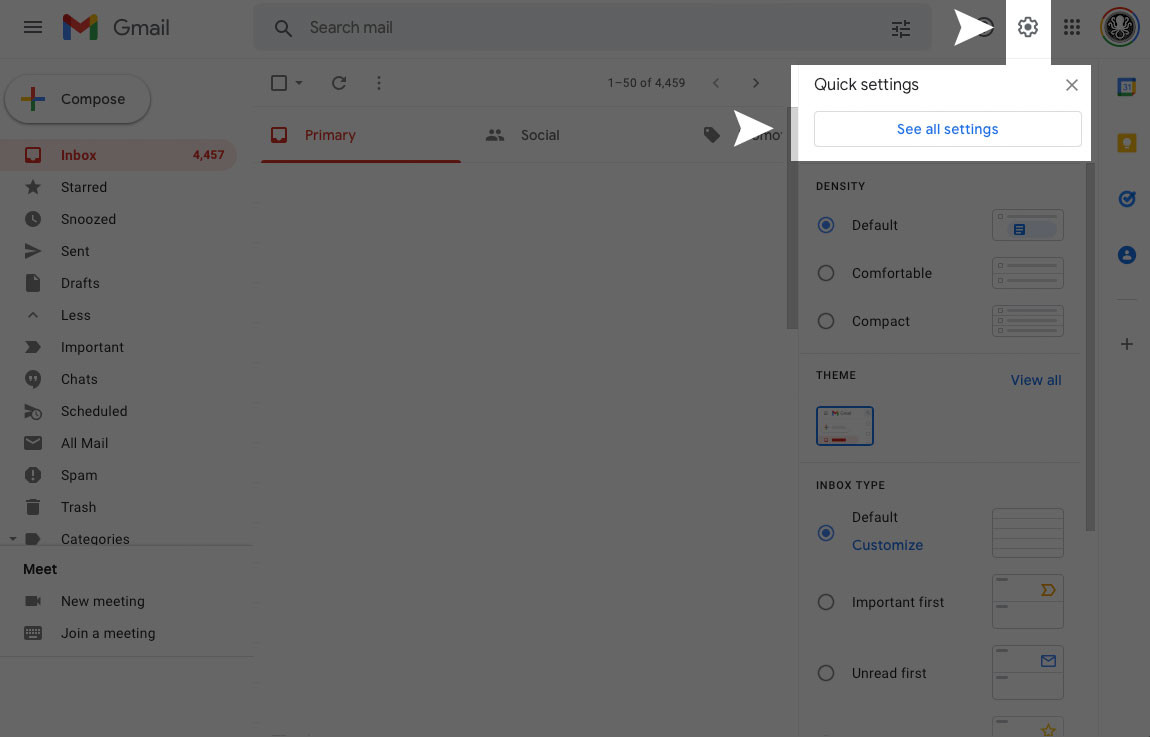
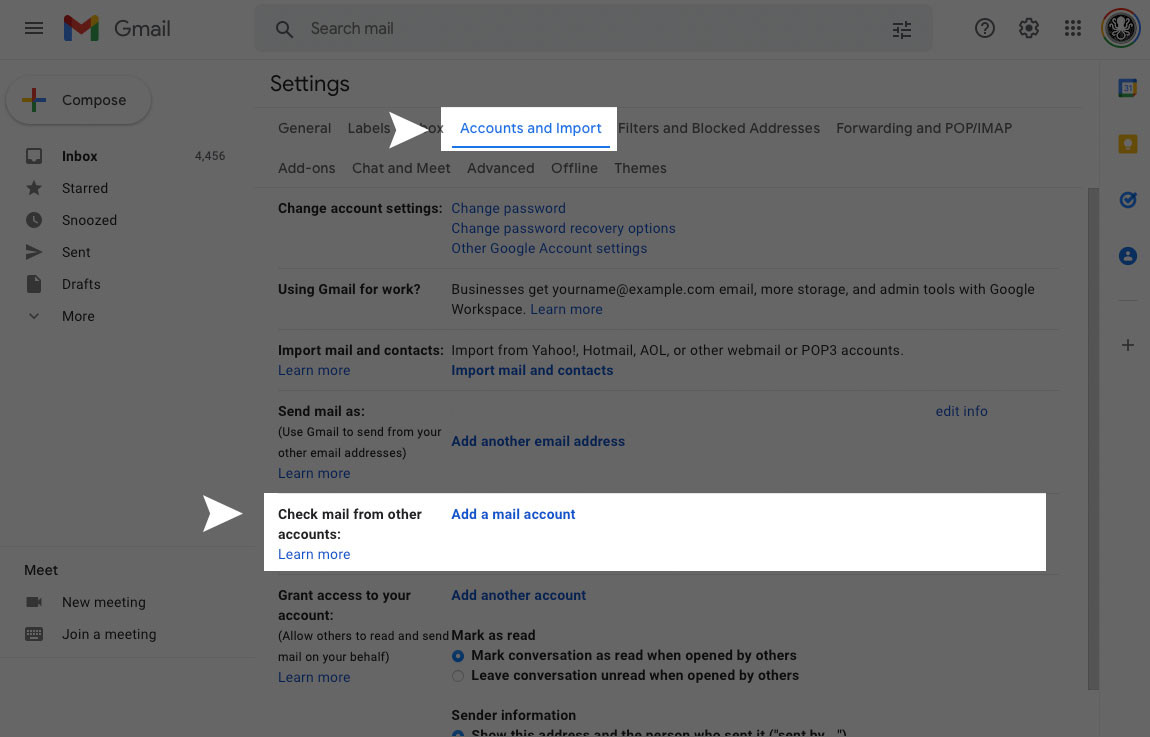
Select “Accounts and Import” and click “Add a mail account”.
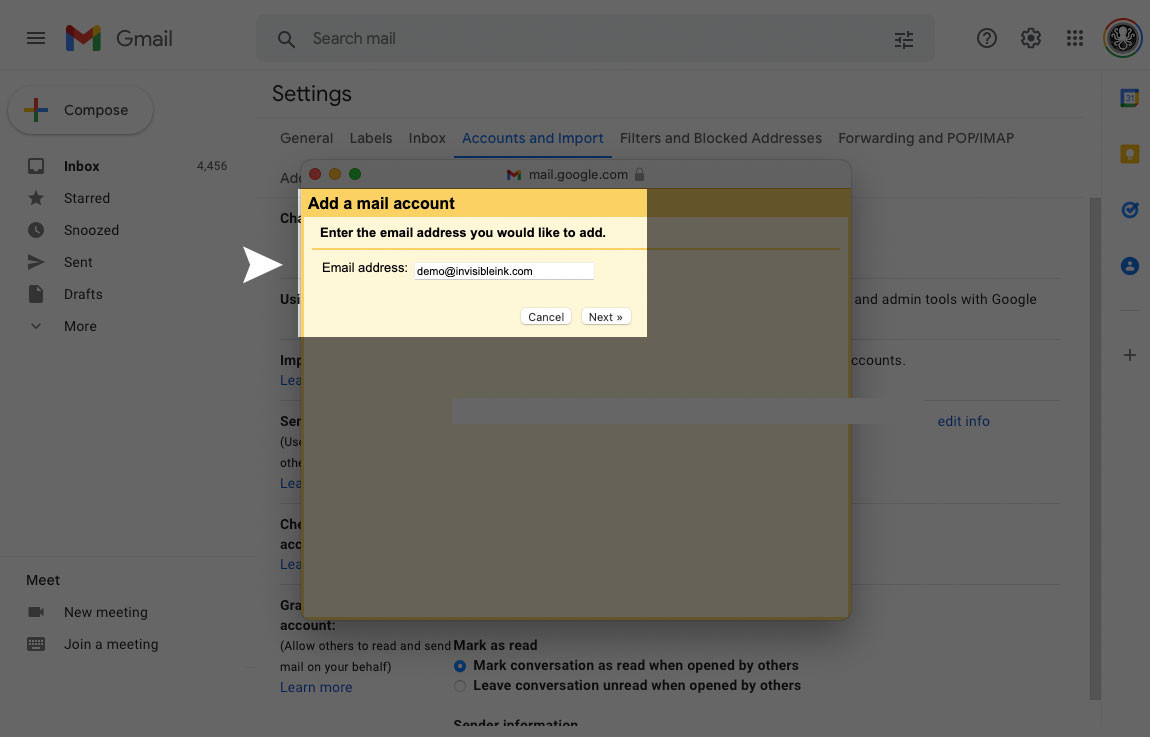
Enter your email address and click Next Step to proceed.
Select “Import emails from my other account (POP3)”, then click Next.

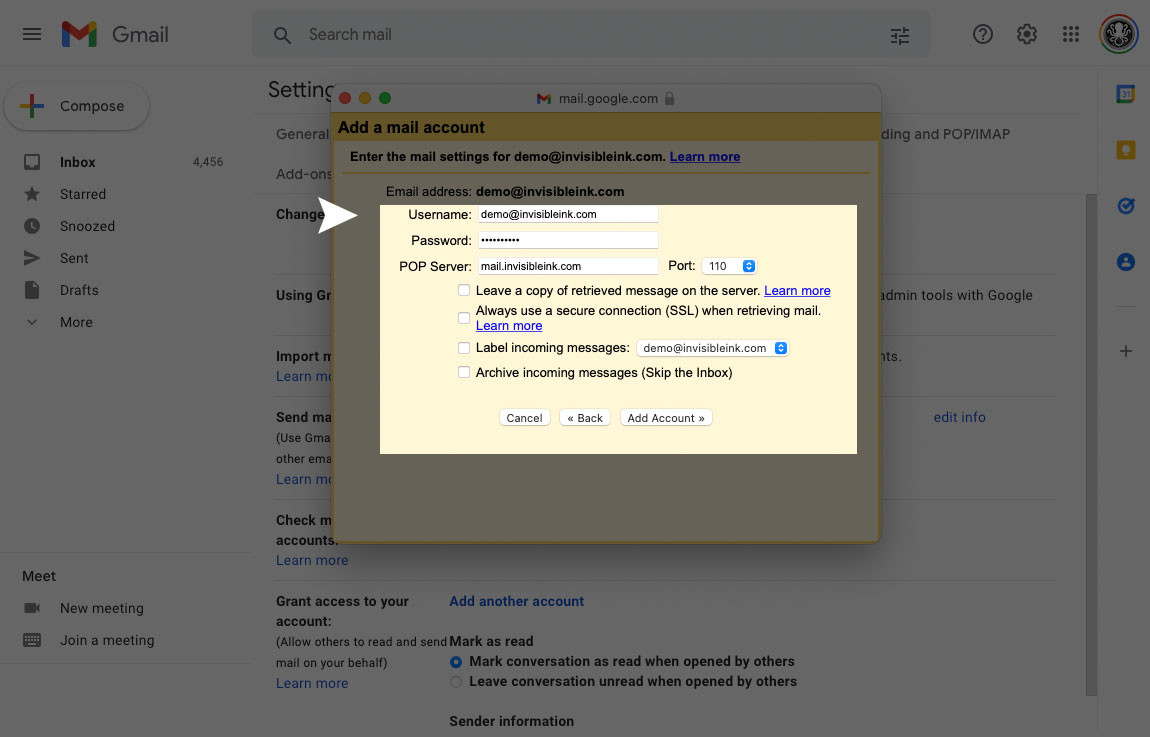
Enter your username (full email address, all lowercase), password and POP Server (mail.invisibleink.com) and select any additional preferences, then click Add Account. IMPORTANT: Do not check the box labeled “Always use a secure connection (SSL) when retrieving mail.” Your primary Gmail account is already encrypted by default.
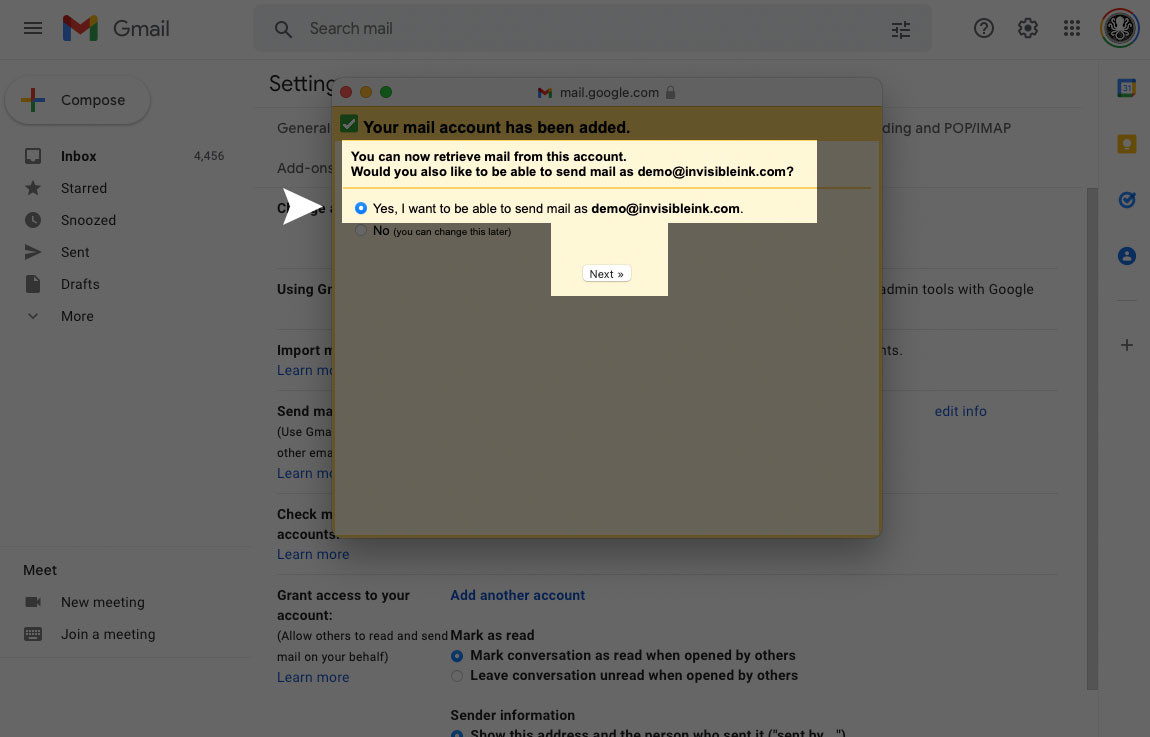
Select the option to send mail as your domain email account, then click Next.
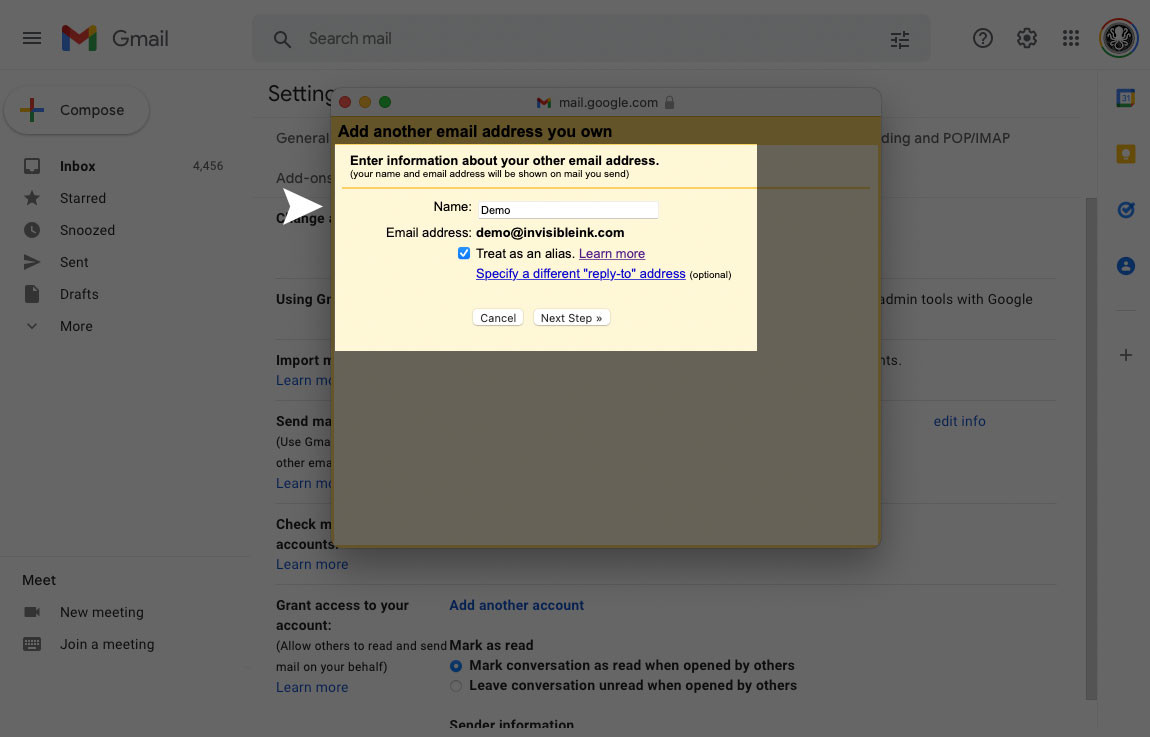
Enter a name for your new account and select “Treat as an alias”, then click Next Step.
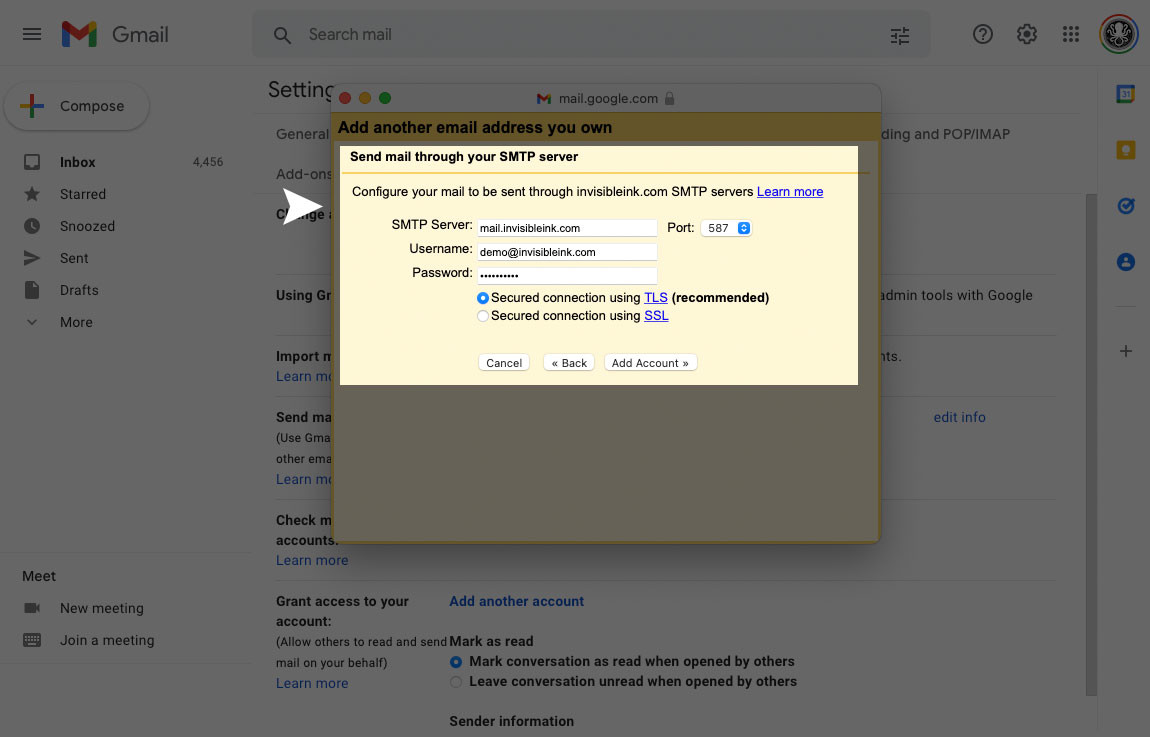
Enter the SMTP Server (mail.invisibleink.com), username (full email address, all lowercase) and password. Select Port 587 and “Secured connection using TLS” then click Add Account.
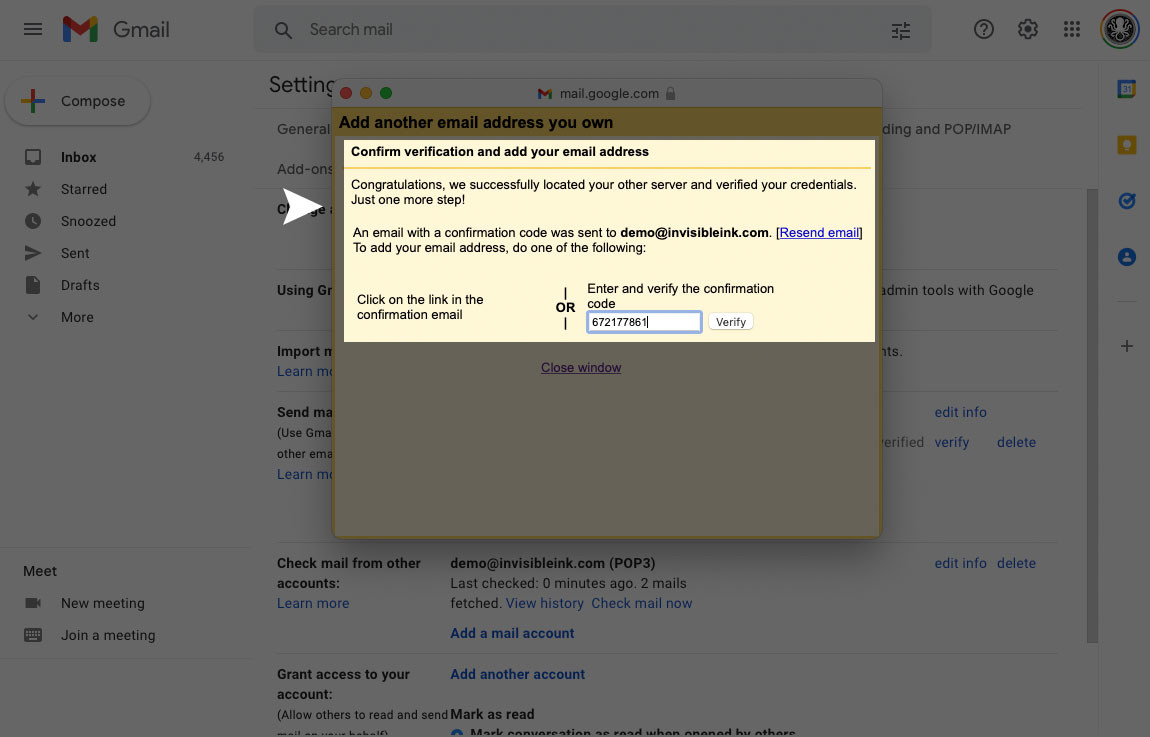
Log in to your email account using our website or another device and find the verification code sent by Gmail. Enter the code and click Verify to complete setup for your POP3 account in Gmail.
Updated April 26, 2022
Posted September 26, 2014