Outlook 2010 Setup - IMAP - Part II

Outlook 2010 Setup - IMAP - Part II

Saving Sent Messages Locally

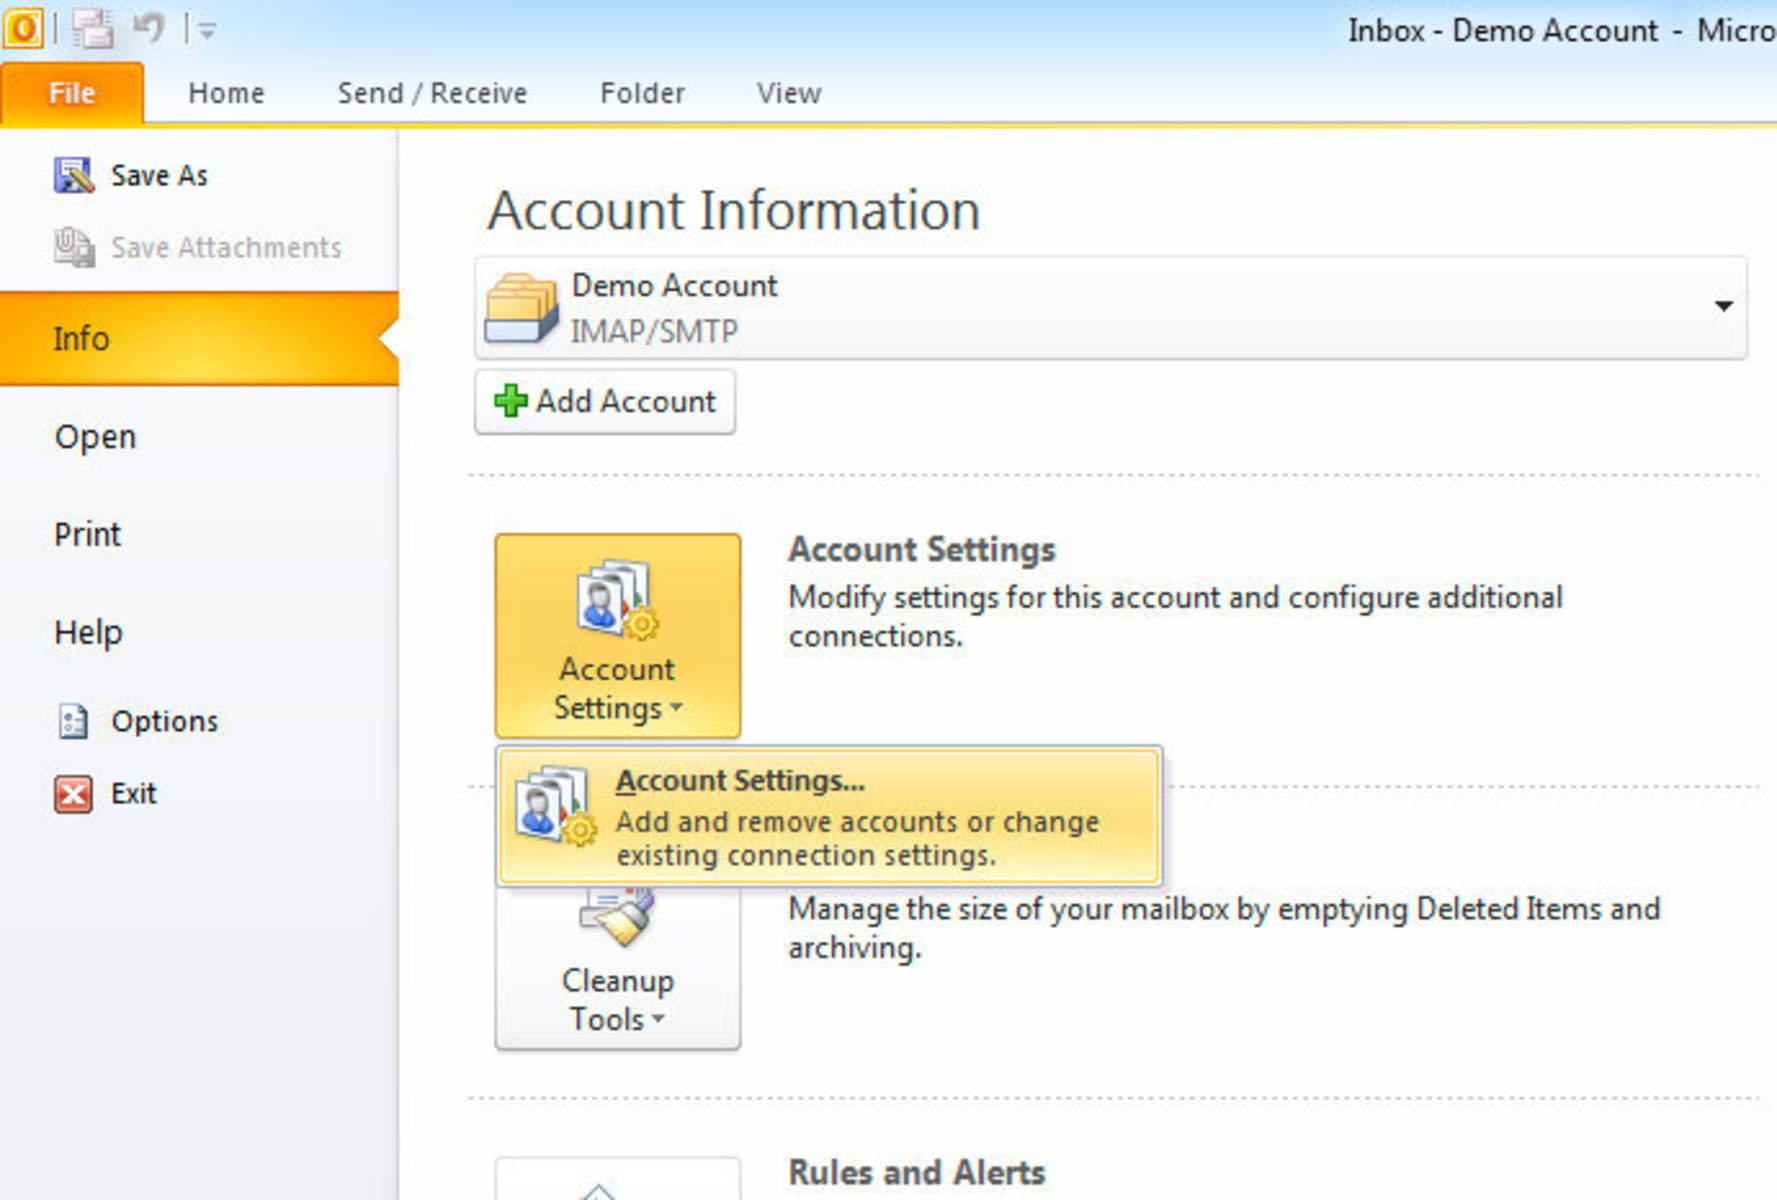
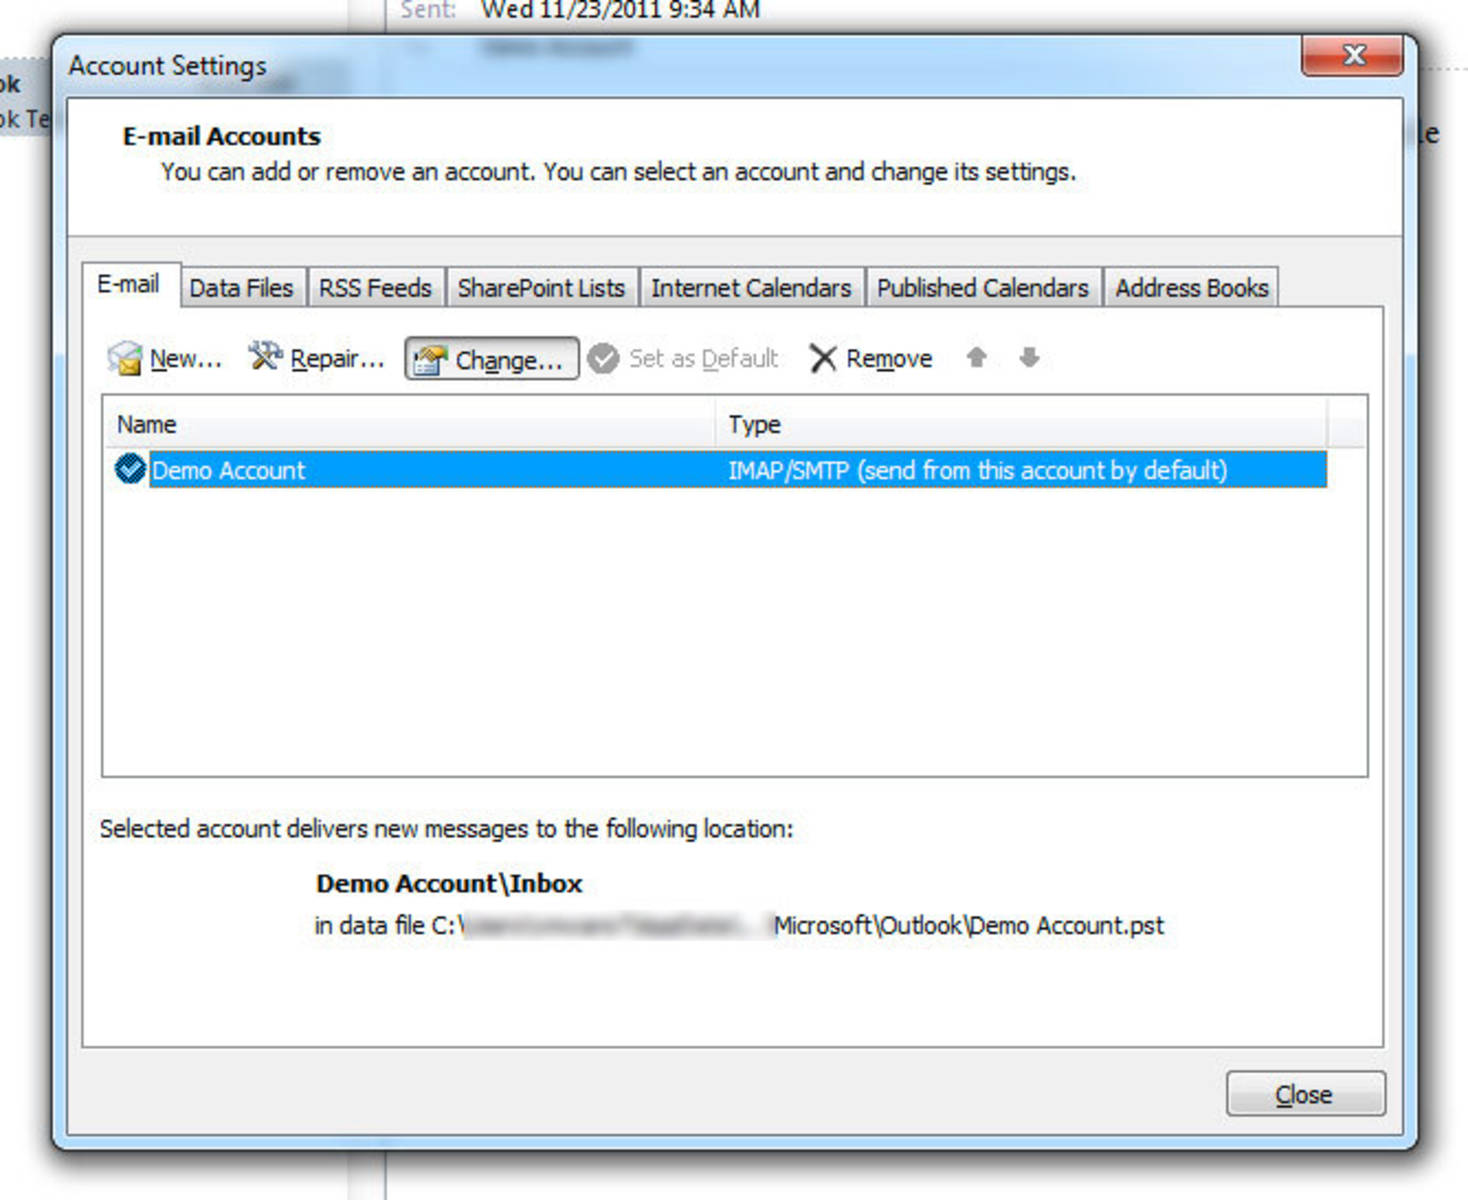
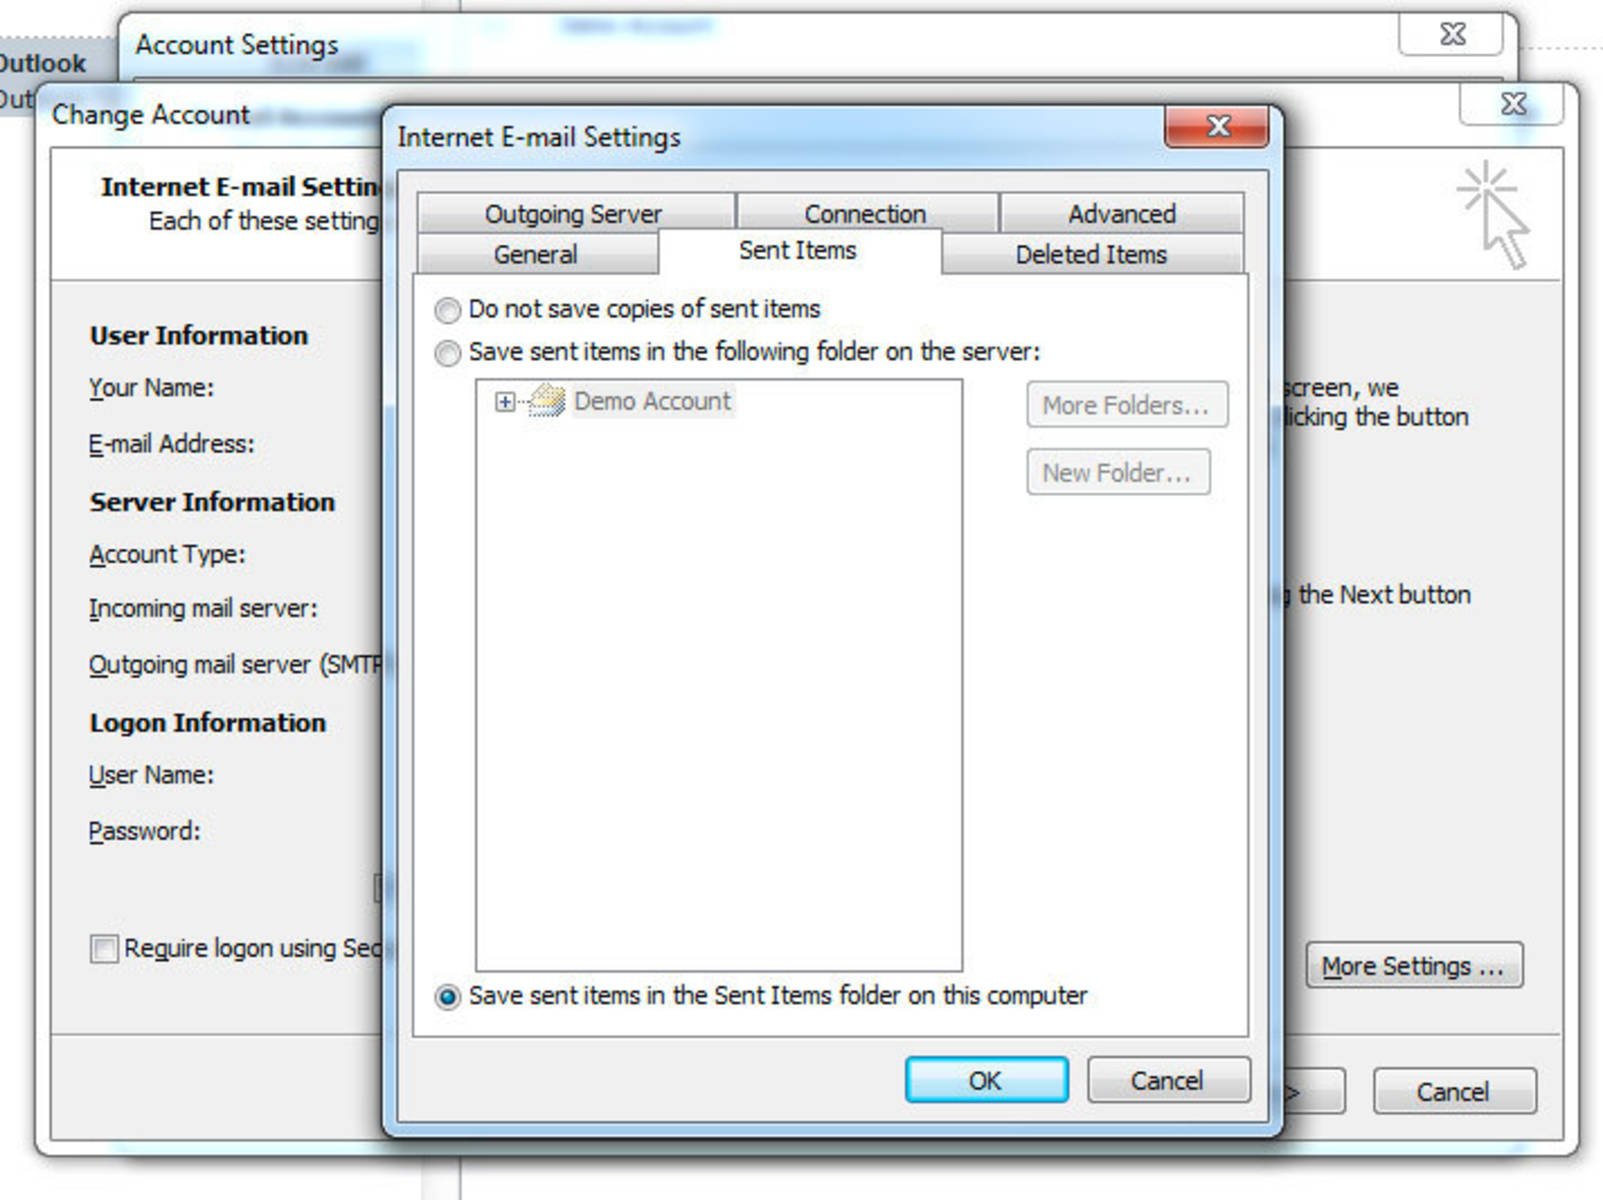
Since your mailbox has a file size limit,  we suggest making a few additional changes to help make sure you don’t save too many items on the server. Typically you won’t need to access all of your sent messages from another device, so we recommend updating Outlook to save your sent messages to a local folder (a folder located on your computer’s hard drive instead of on the server).

We highly recommend backing up all data on your computer regularly... whether you save email messages locally or not. Check out a program called Carbonite.

Note: This method is no longer available in Outlook 2013.


Continue to Part III - Setting up archive folders for long-term storage on your computer

Posted April 10, 2012

Details

Step 1 » From the File menu, select Info and choose "Account Settings".
Step 2 » Select your mail account from the E-Mail tab and click on the Change button.
Step 3 » Click the More Settings button and select the Sent Items tab, and choose "Save sent items in the Sent Items folder on this computer". Click OK. Click Next to save changes. Outlook will test your account settings. When the test has completed successfully, click Close. Click Finish on the succeeding screen to close the settings window and return to your inbox.
[?]