Email Setup for Thunderbird 31

Email Setup for Thunderbird 31

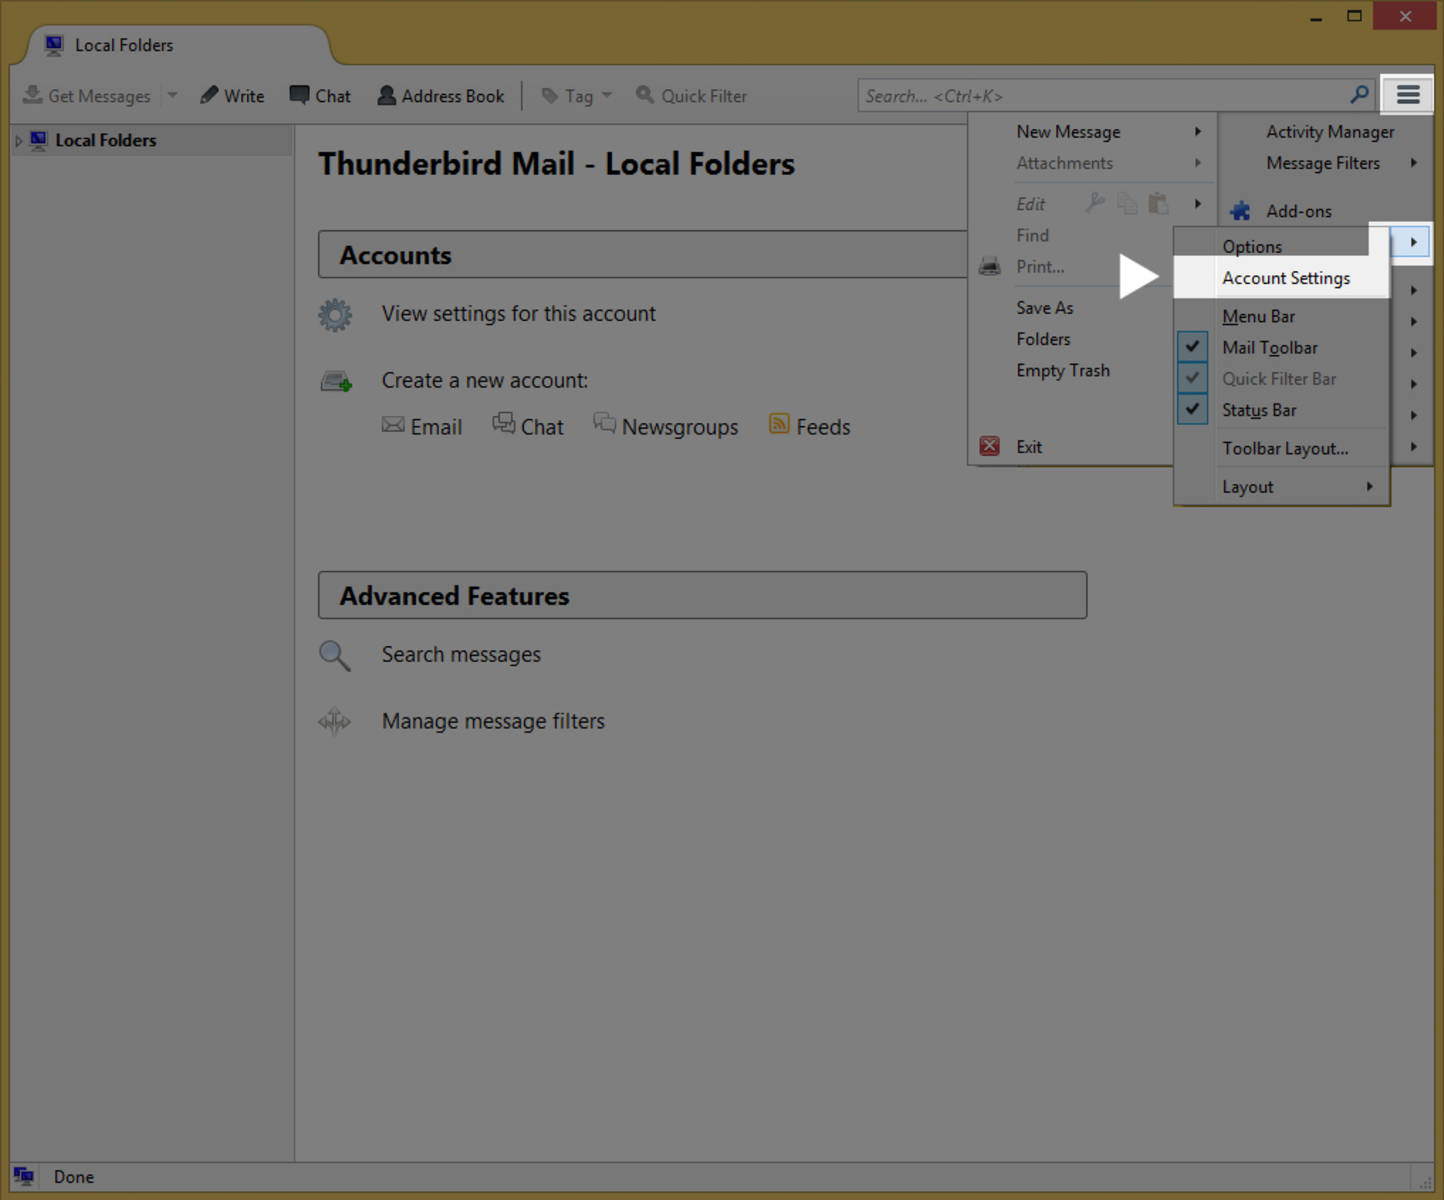
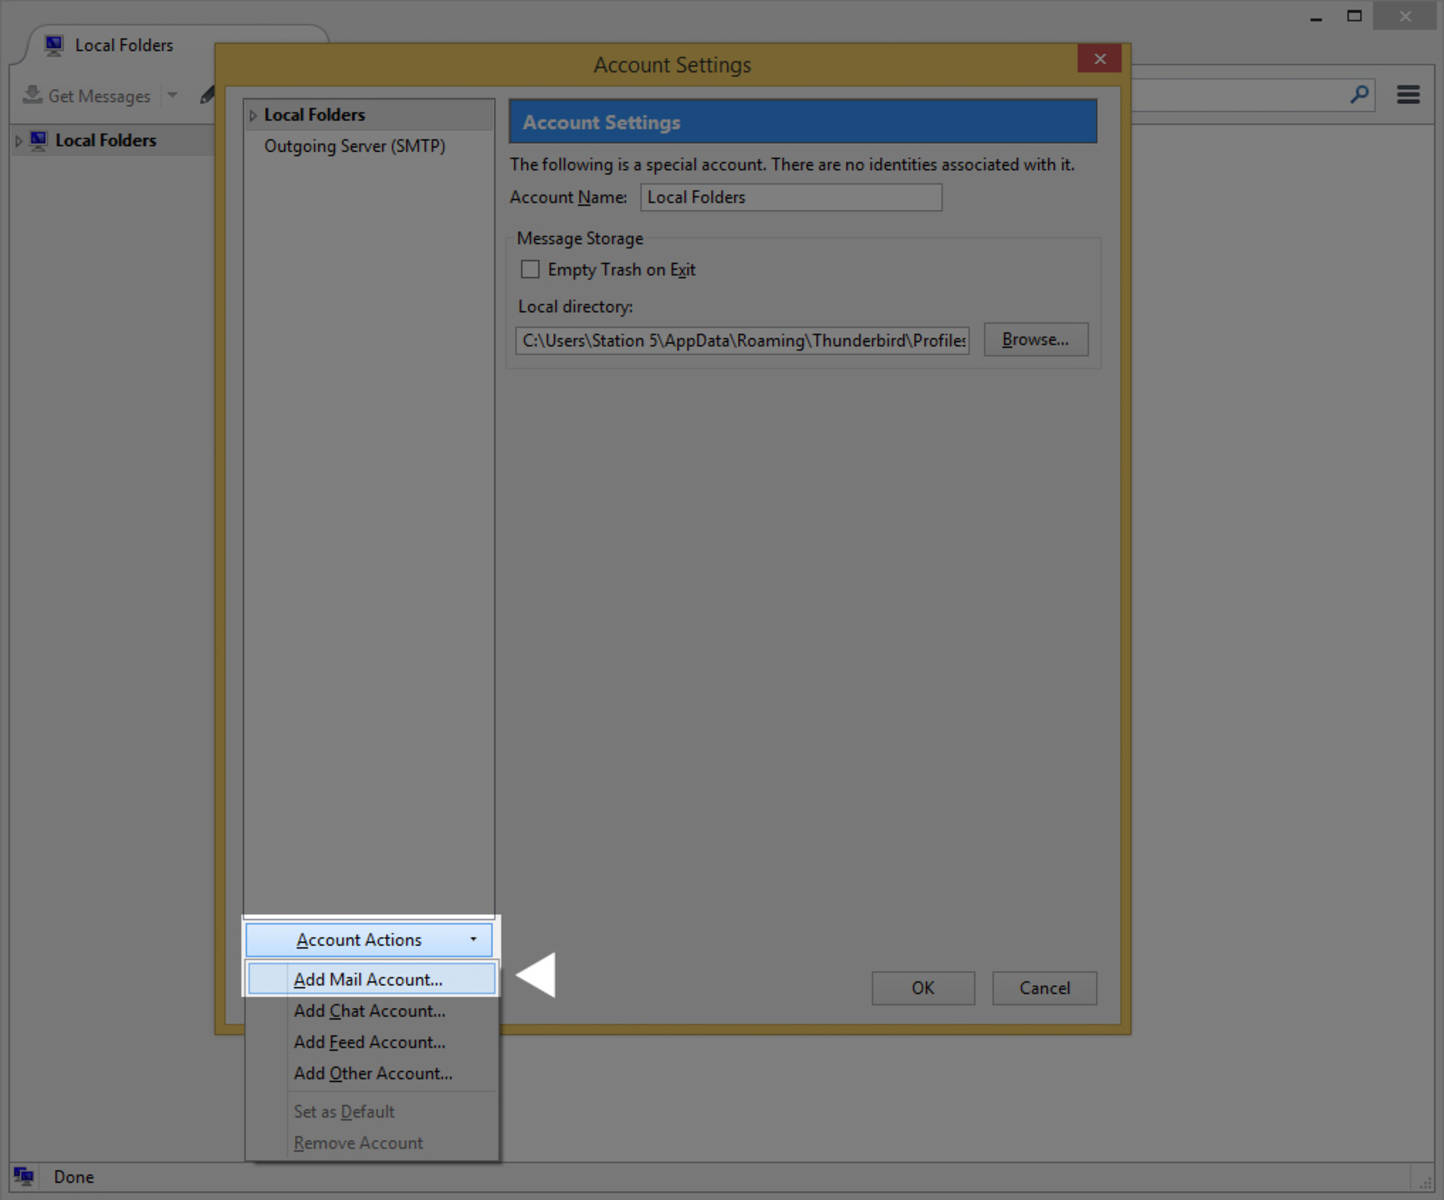
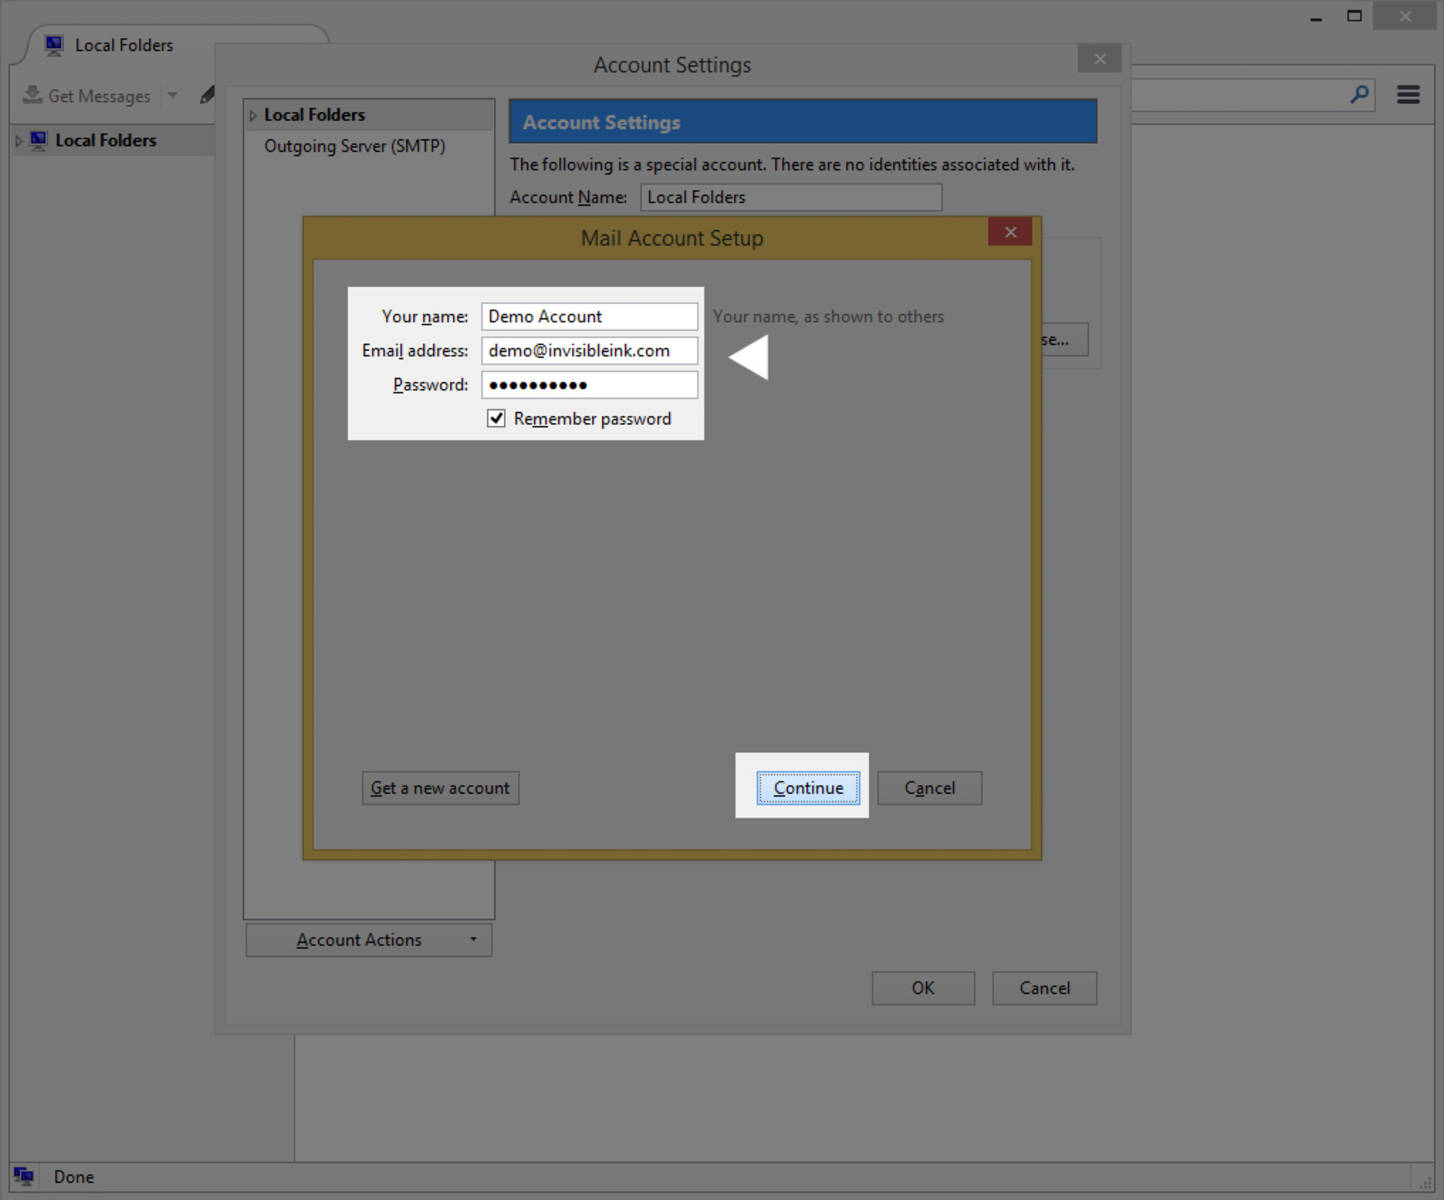
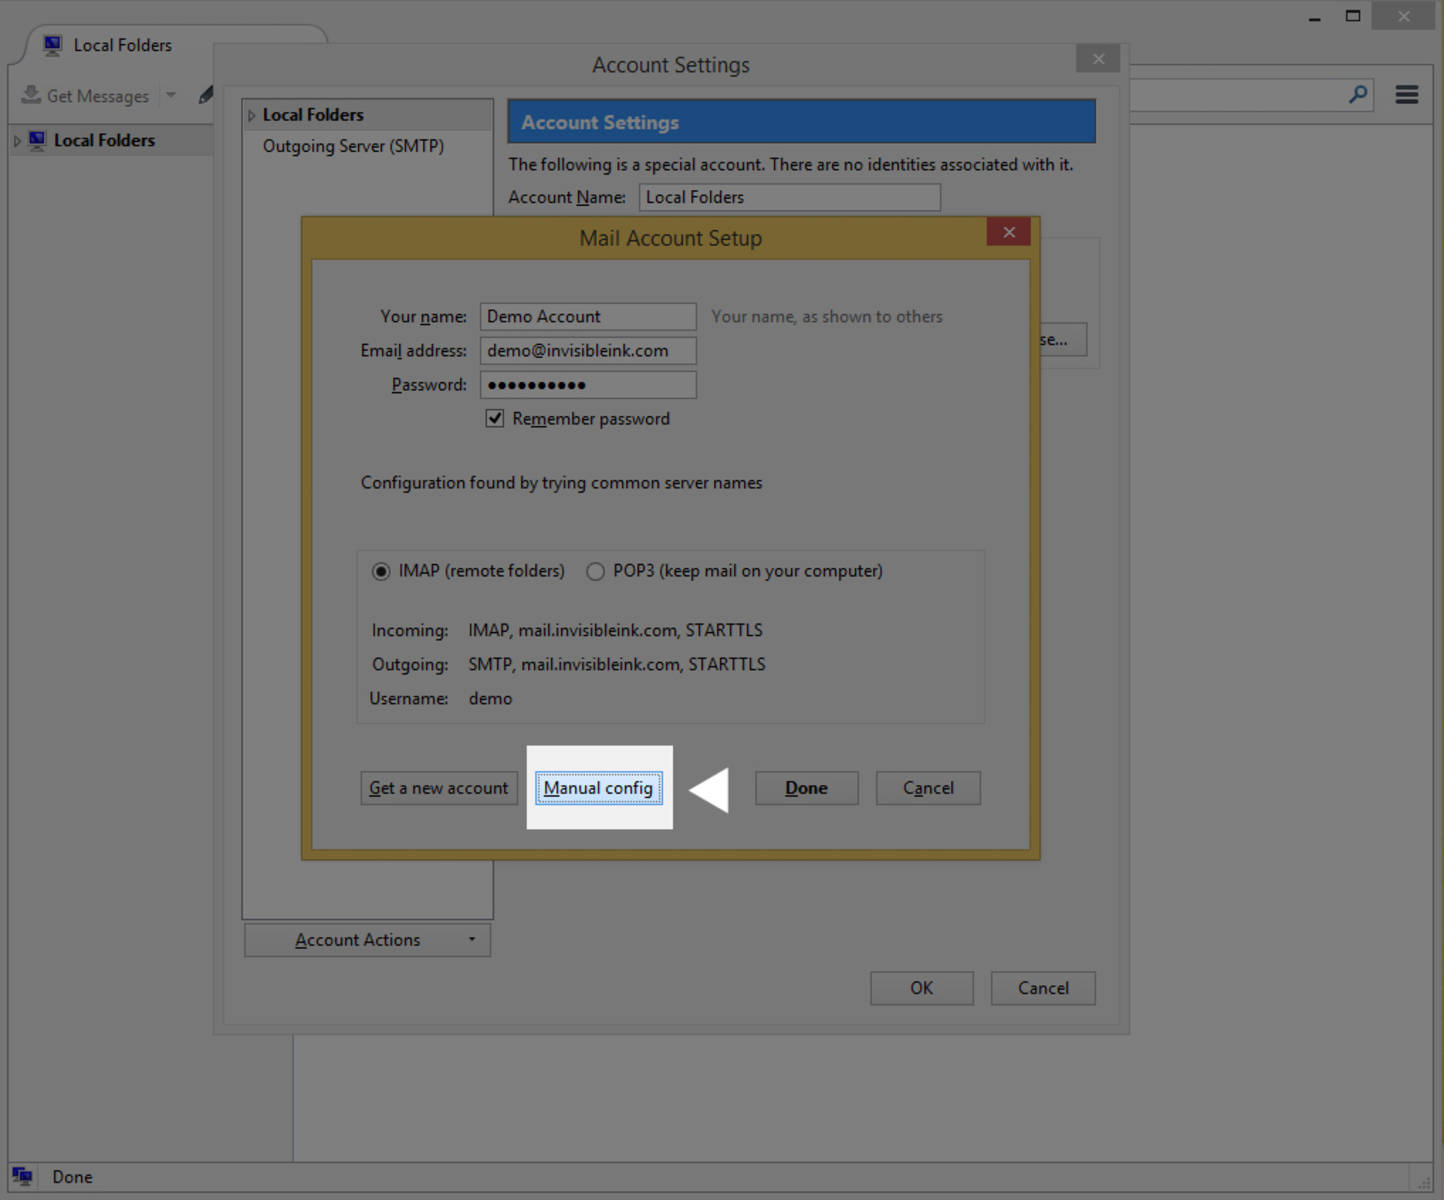
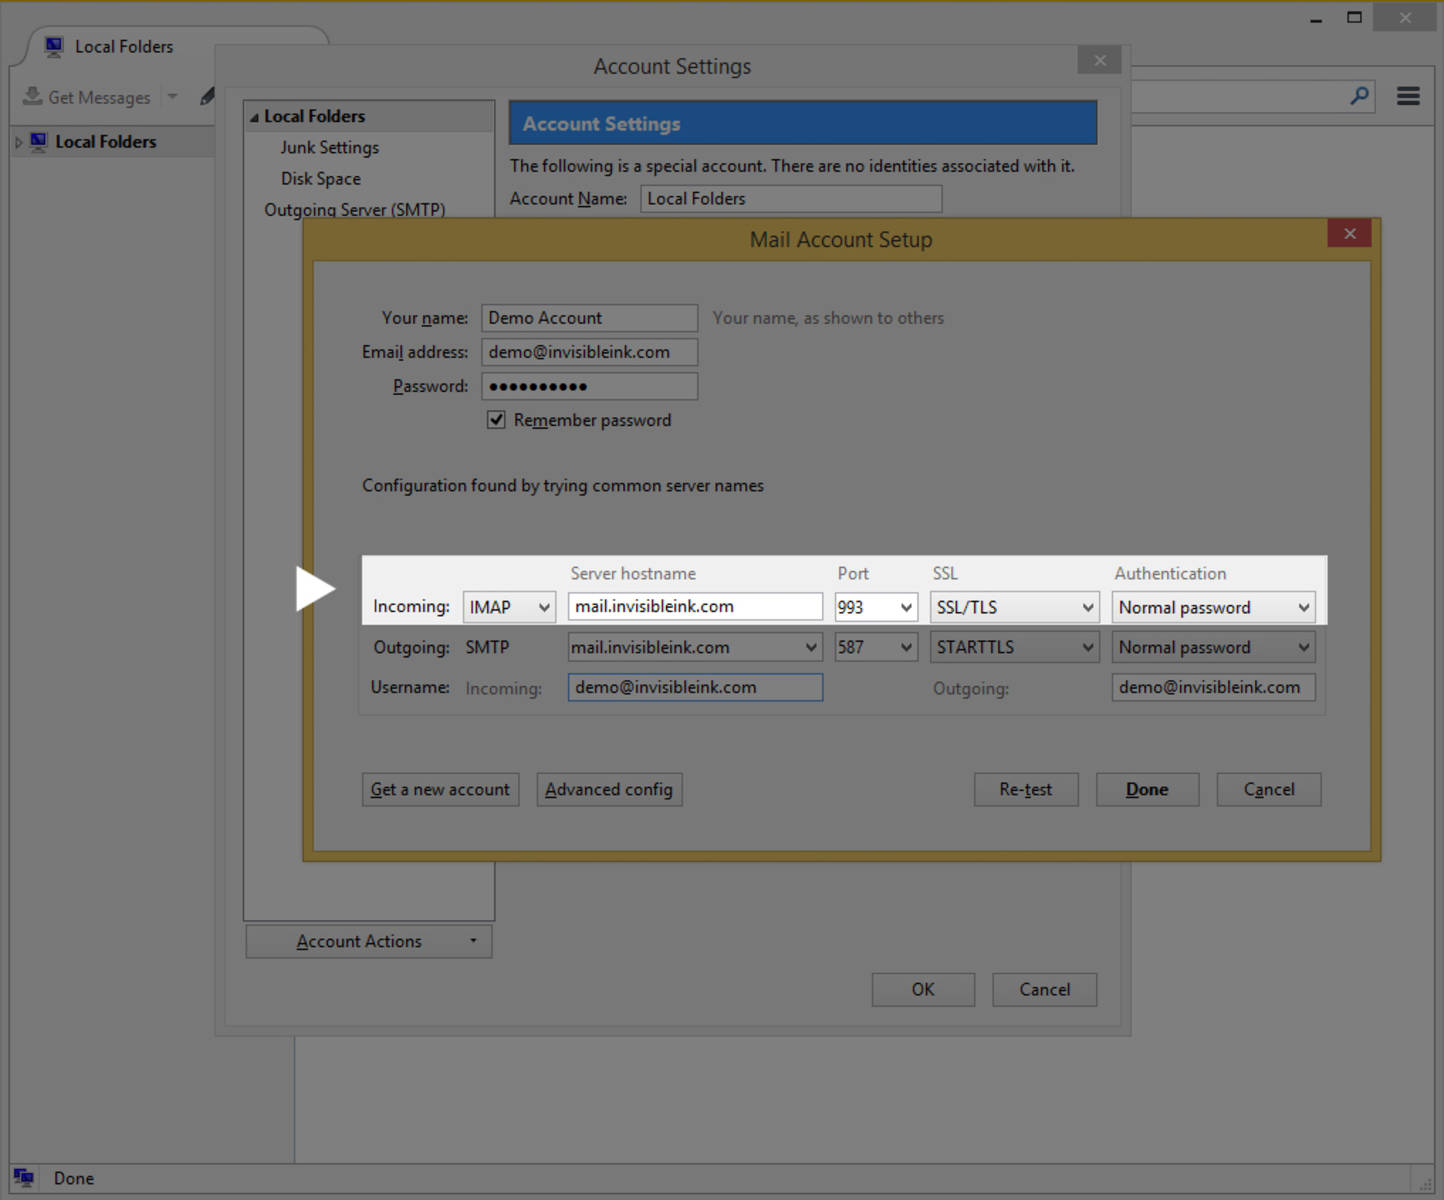
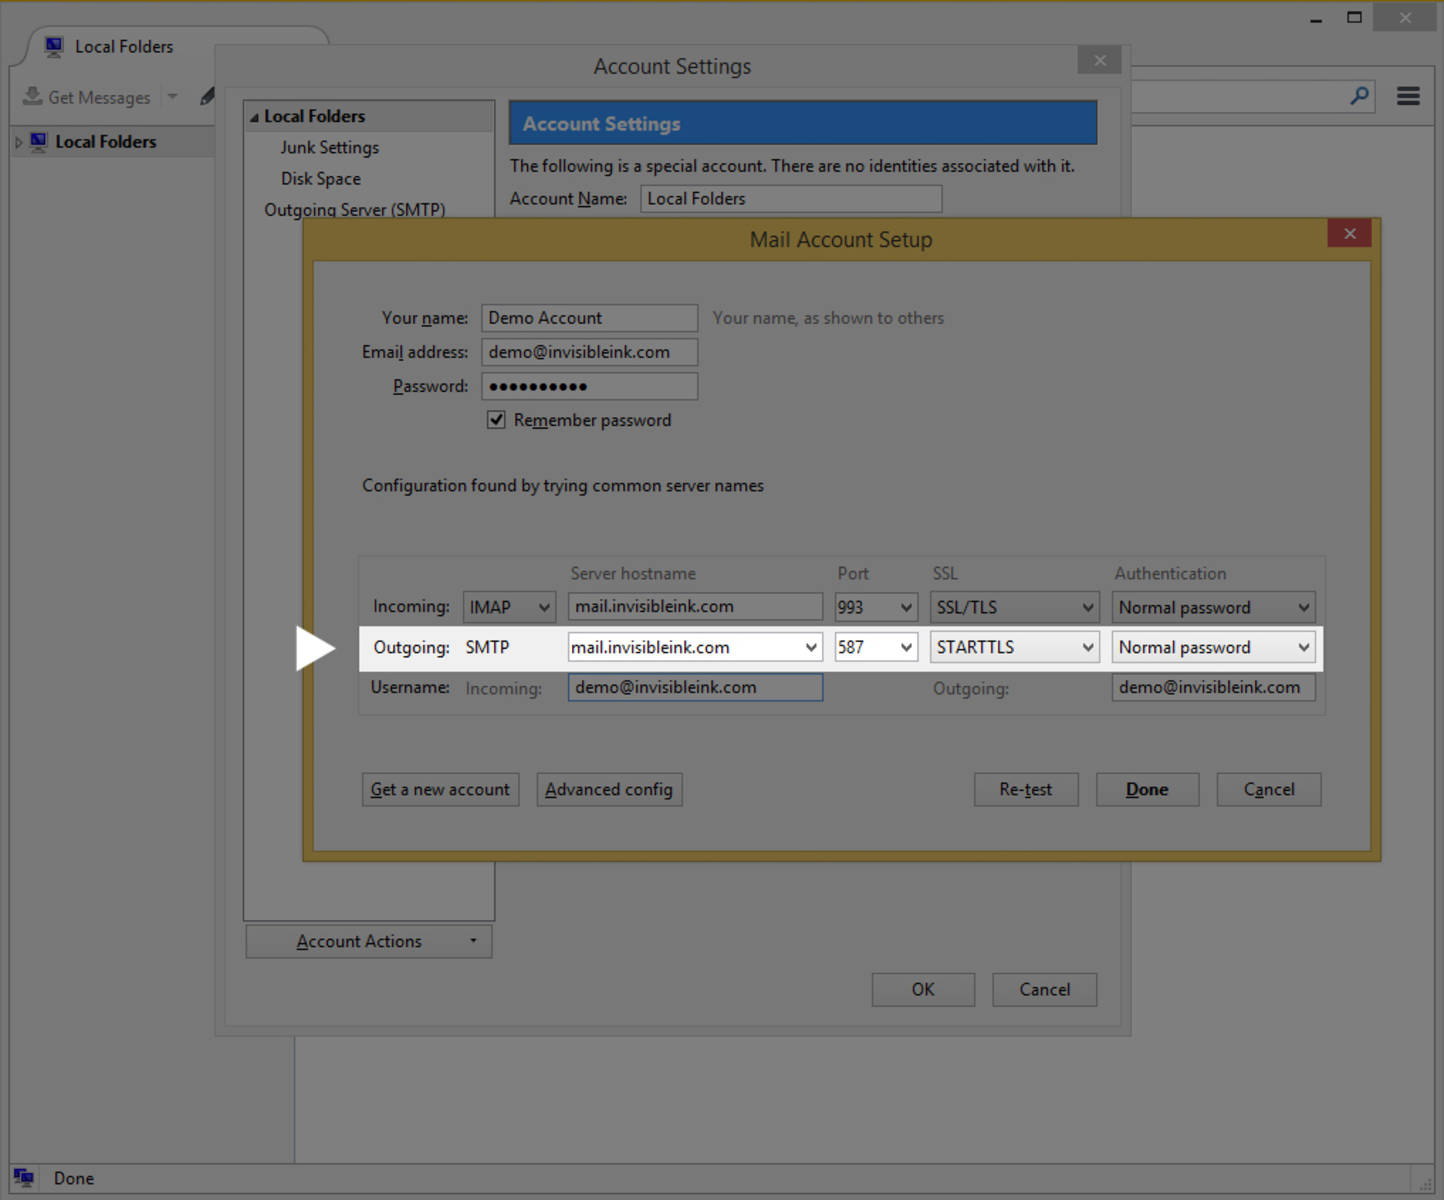
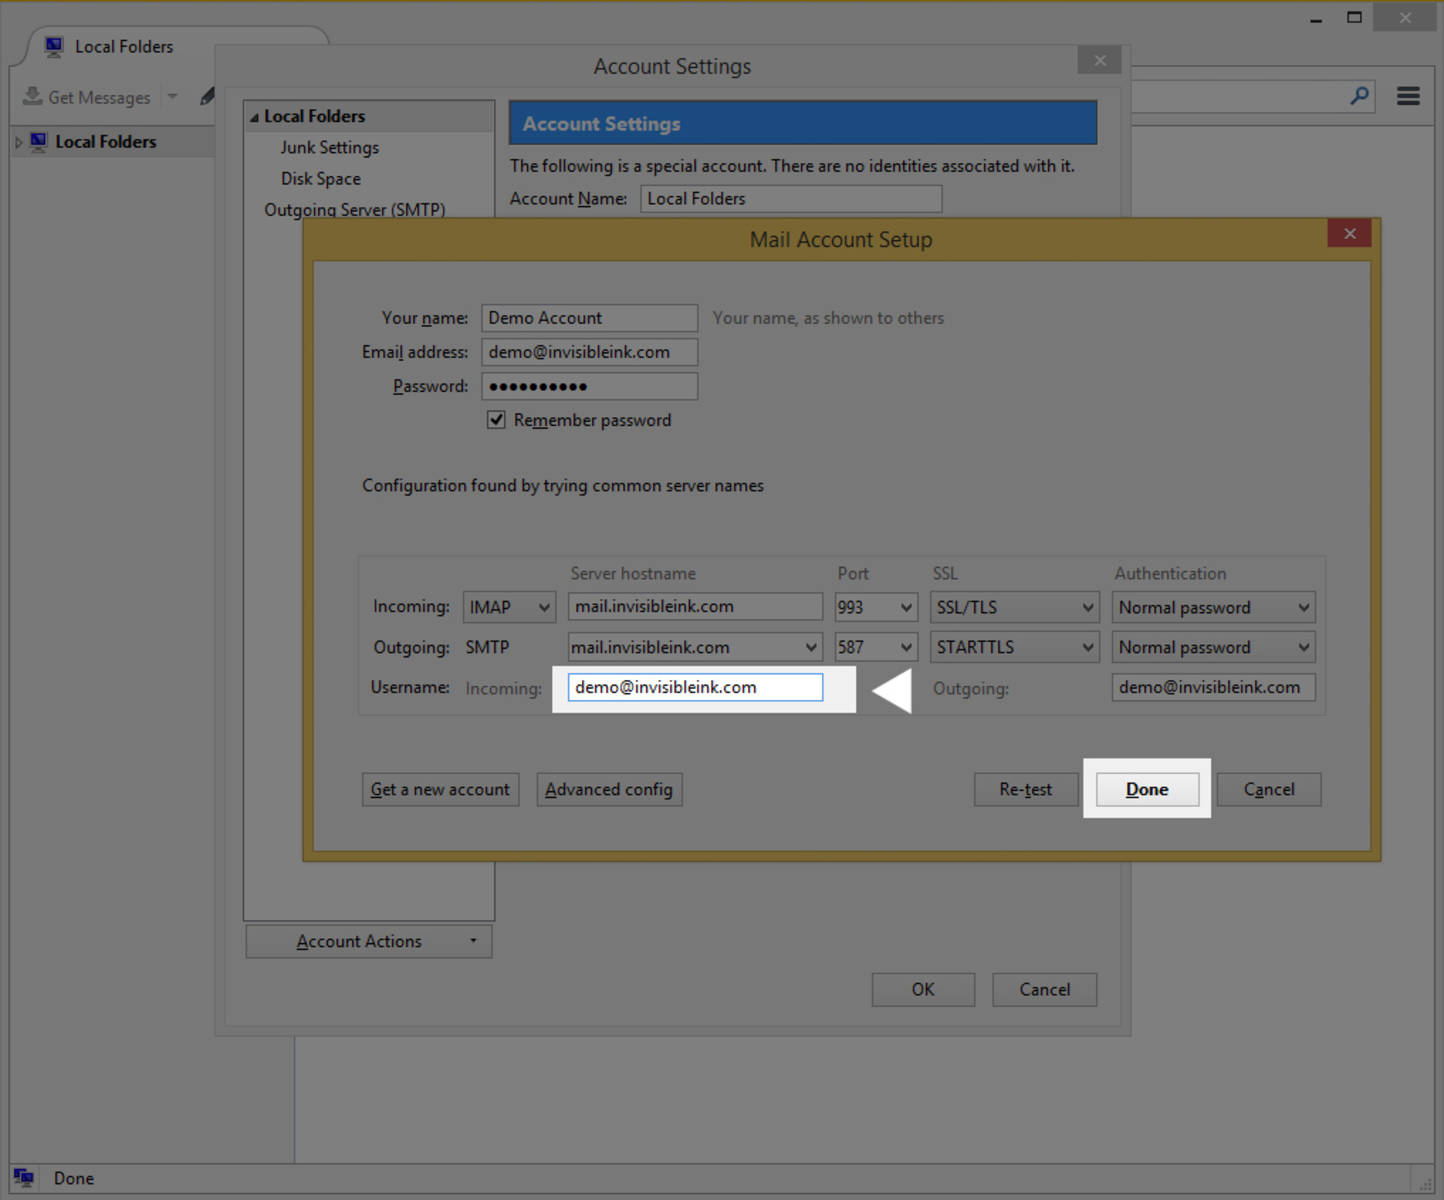
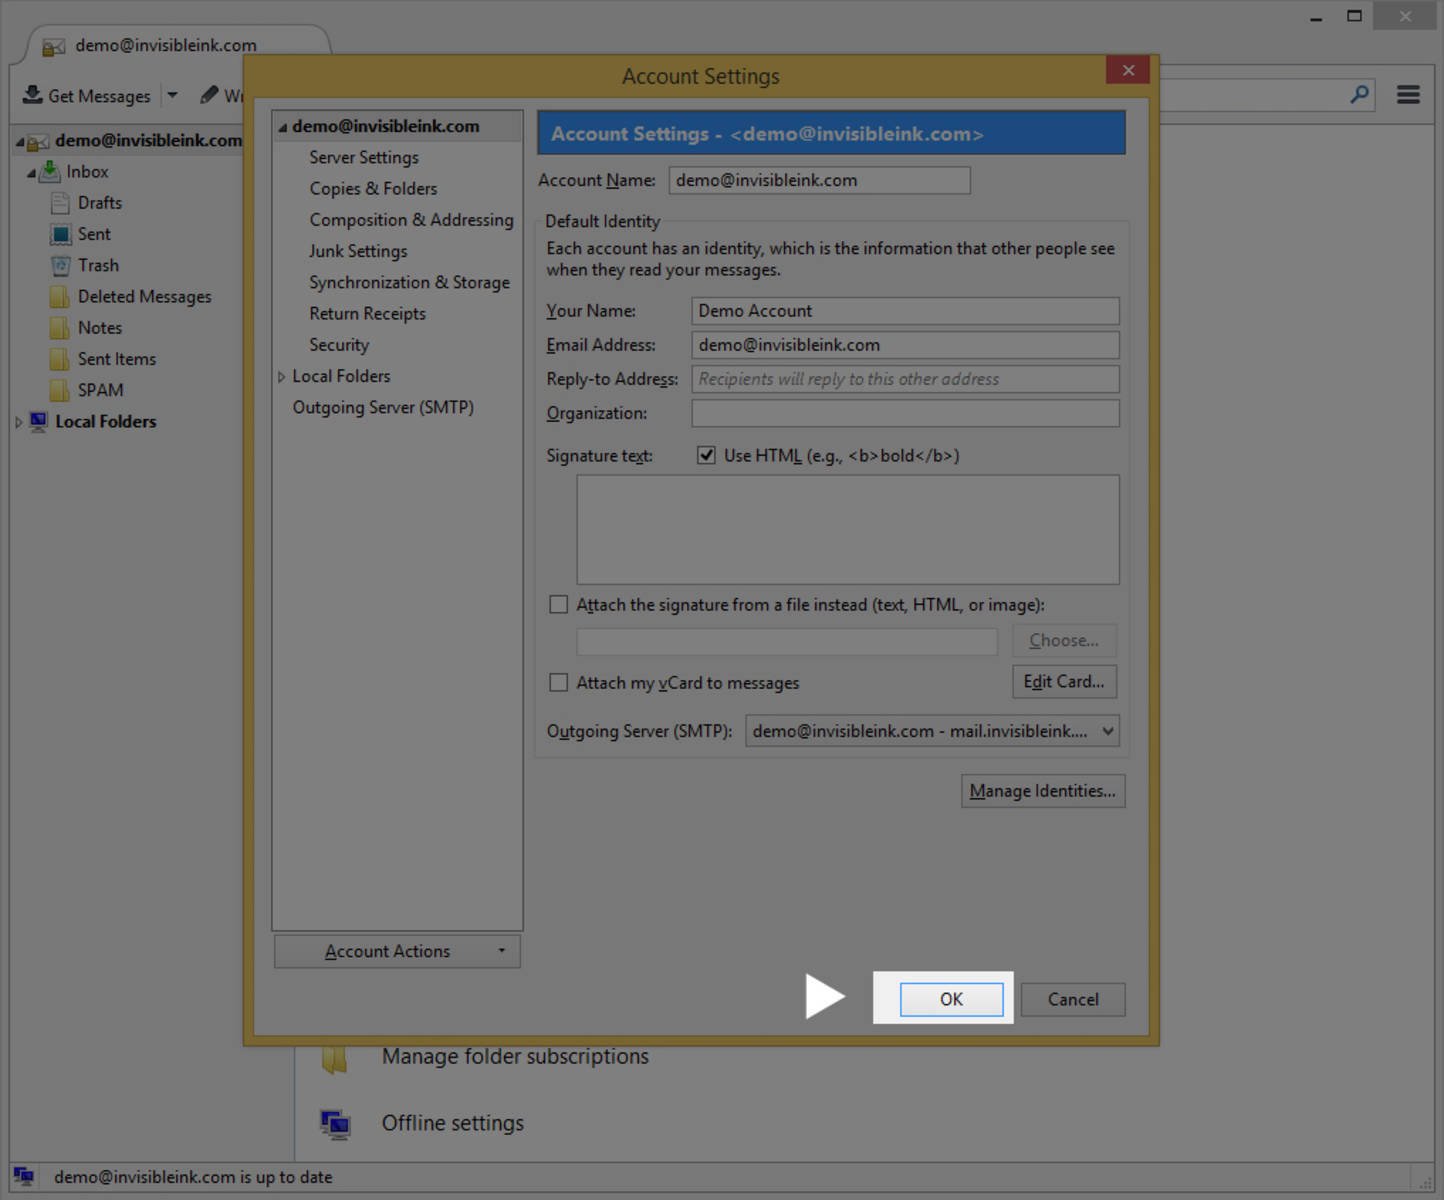
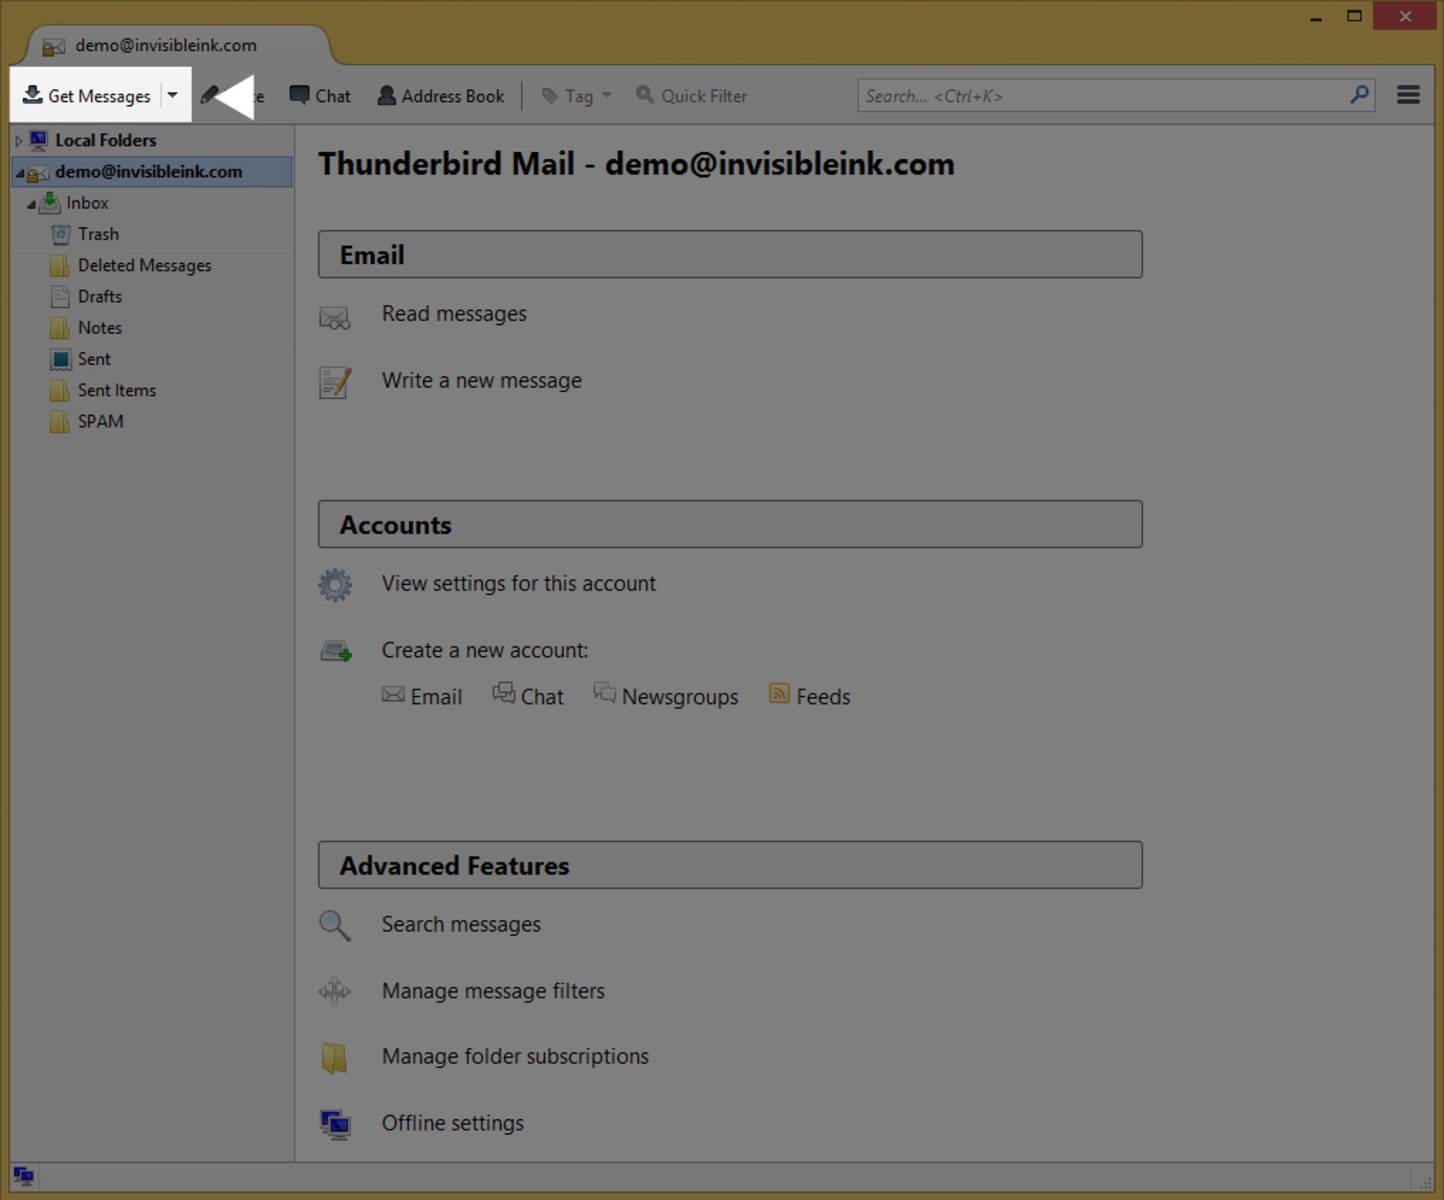
Thunderbird is a free alternative to the standard mail apps for Windows and Mac. The following instructions will guide you through the step-by-step process of adding a secure IMAP account. This guide was prepared for Thunderbird version 31 using Windows 8. For previous versions, view our Thunderbird 24 setup guide.

Account Settings

  • Account type: IMAP
  • Incoming mail server: mail.invisibleink.com
  • Outgoing mail server: mail.invisibleink.com
  • Username: you@yourdomain.com (full email address, all lowercase)

View Setup Guide

Posted January 09, 2015

Details

Step 1 » From the Tools menu, select Options, then choose Account Settings.
Step 2 » From the Account Actions menu (bottom left), select Add Mail Account.
Step 3 » Enter your name, email address and password, then click Continue.
Step 4 » Thunderbird will attempt to configure your account. When prompted, click Manual Config to enter additional settings.
Step 5 » Type mail.invisibleink.com in the incoming server hostname field, then select SSL/TLS from the SSL drop-down menu. Authentication should be set to Normal Password.
Step 6 » Type mail.invisibleink.com in the outgoing server hostname field, then select STARTTLS from the SSL drop-down menu. Authentication should be set to Normal Password.
Step 7 » Enter your full email address for the username, then click Done to create your account.
Step 8 » Thunderbird will return to the Account Settings screen after successfully completing a test of your settings. Click OK to return to the Inbox.
Step 9 » Click Get Messages to sync your new mailbox with the server.
[?]