Email Setup for Outlook 2013

Email Setup for Outlook 2013

The following instructions will guide you through the step-by-step process of adding a secure email account to Outlook 2013.

Account Settings

  • Account type: IMAP
  • Incoming mail server: mail.invisibleink.com
  • Outgoing mail server: mail.invisibleink.com
  • Username: you@yourdomain.com (full email address, all lowercase)

View Setup Guide

Updated November 12, 2014

Optimizing Outlook

  1. Show Missing Folders
  2. Add an Image to your Outlook Email Signature
  3. Delete an Email Stuck in Your Outbox
  4. Setting up an Email Archive
  5. Automatically Archive Sent Messages

Posted January 03, 2014

Details

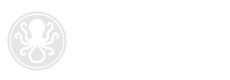
Step 1: From the File menu, select Info then click "Add Account".
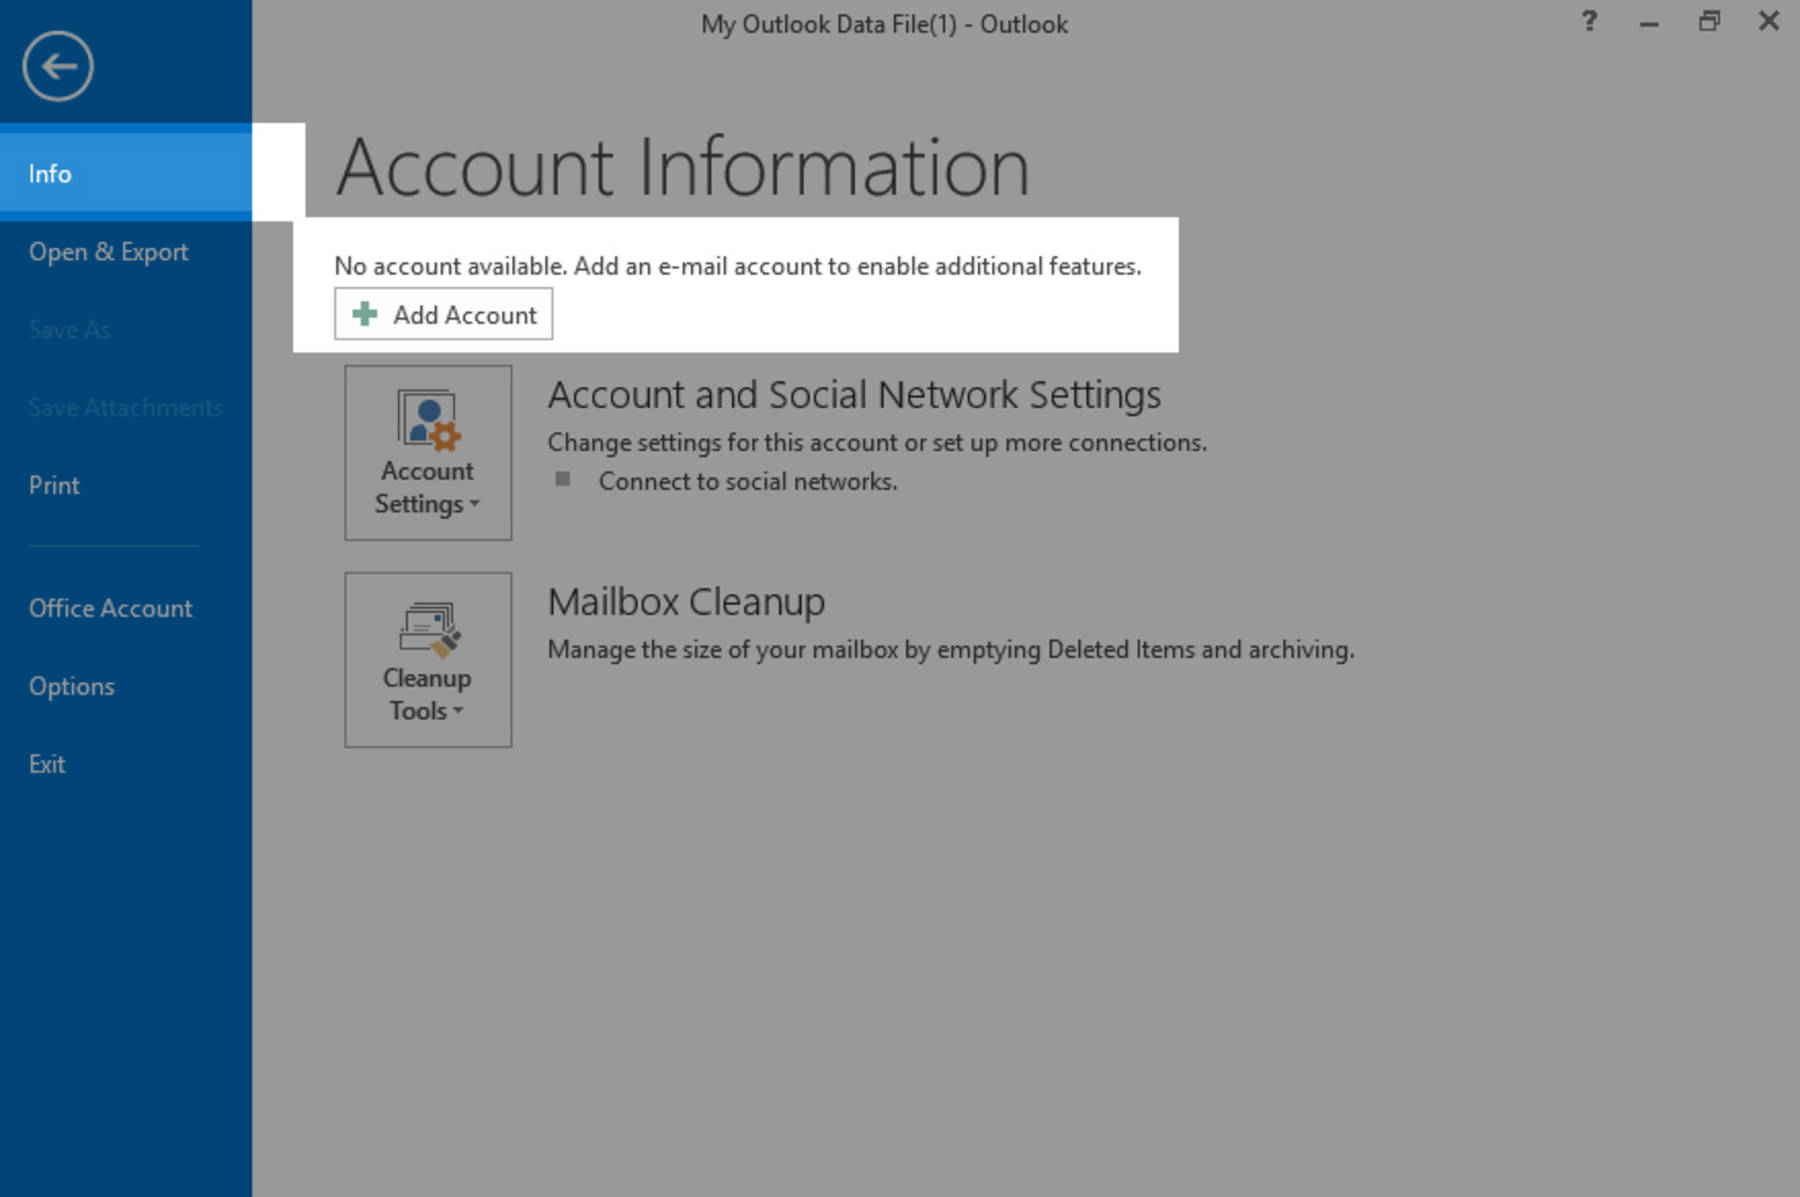
Step 2: Select "Manual setup or additional server types", then click Next.
Step 3: Select "POP or IMAP", then click Next.
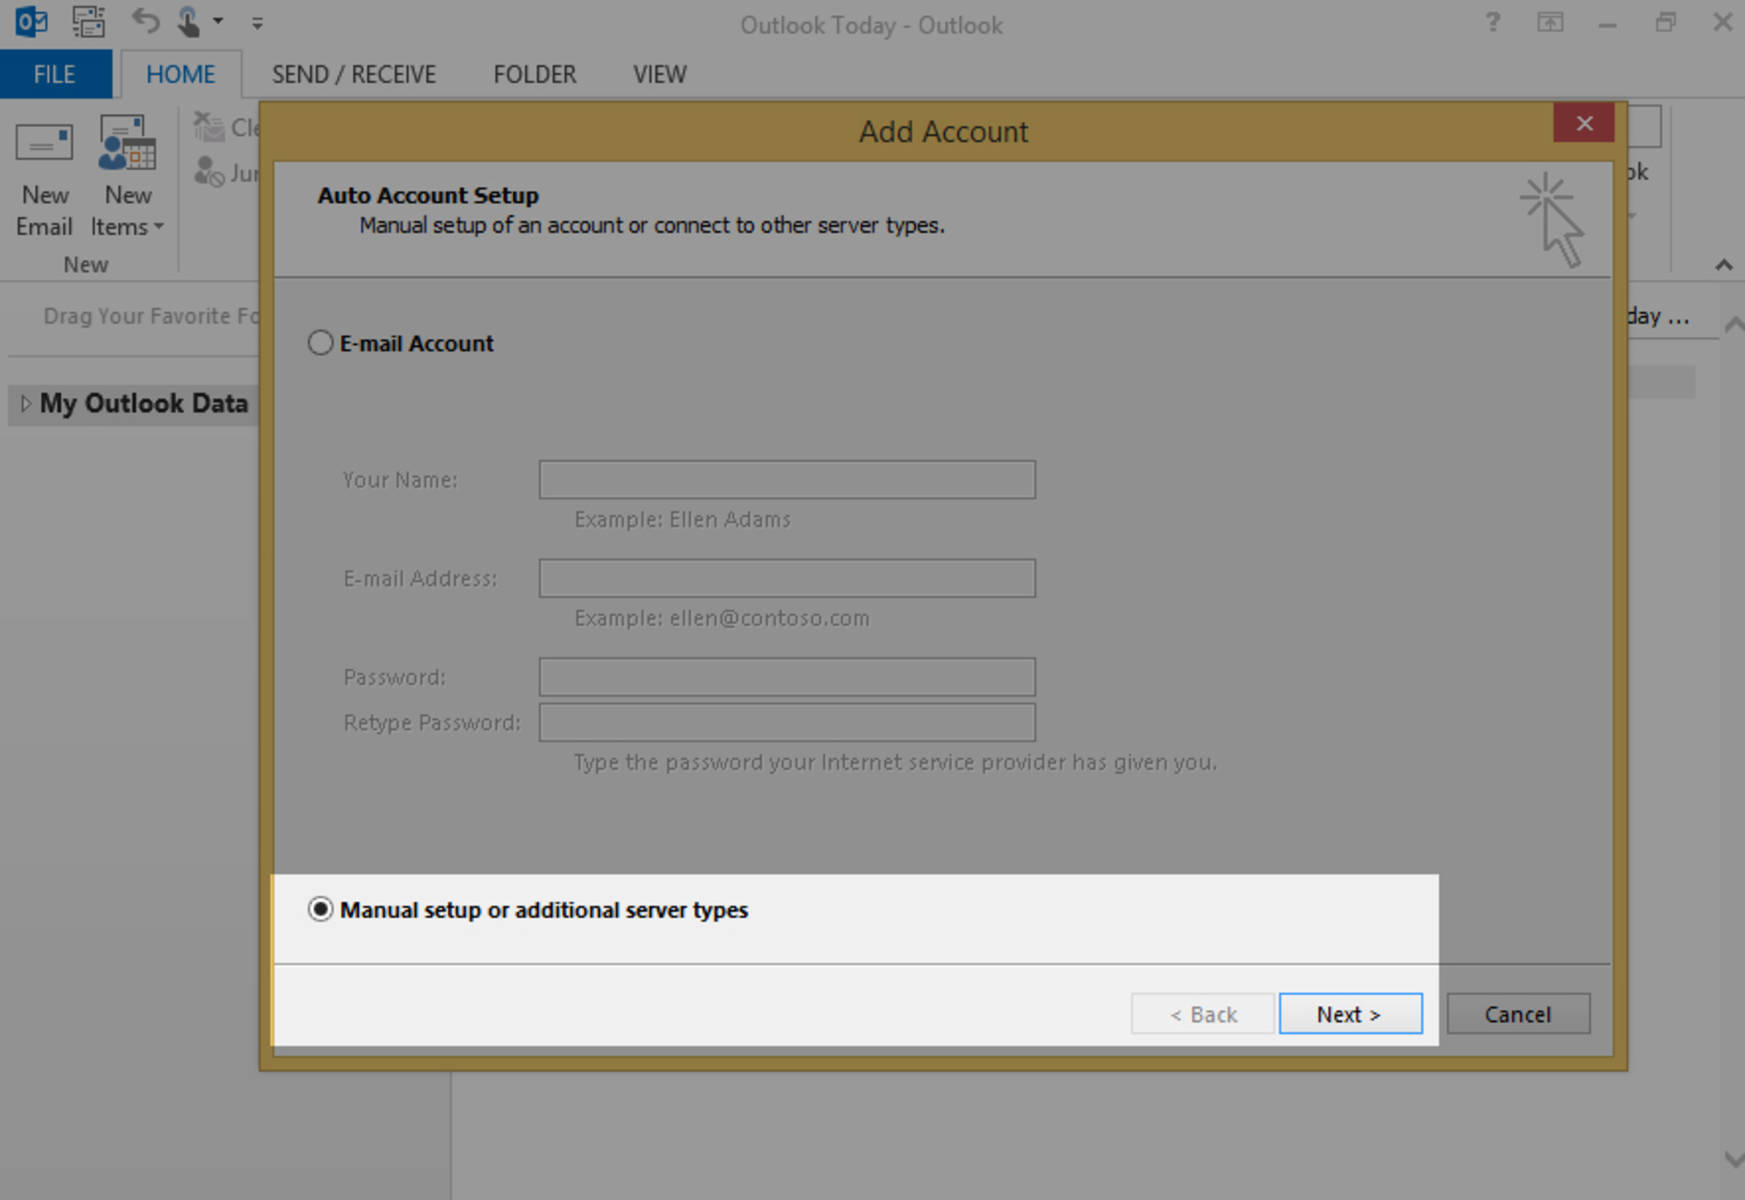
Step 4: Enter your name & email address, then select IMAP as your account type. Enter the incoming server, outgoing server, and your username and password. Click "More Settings" to configure additional options.
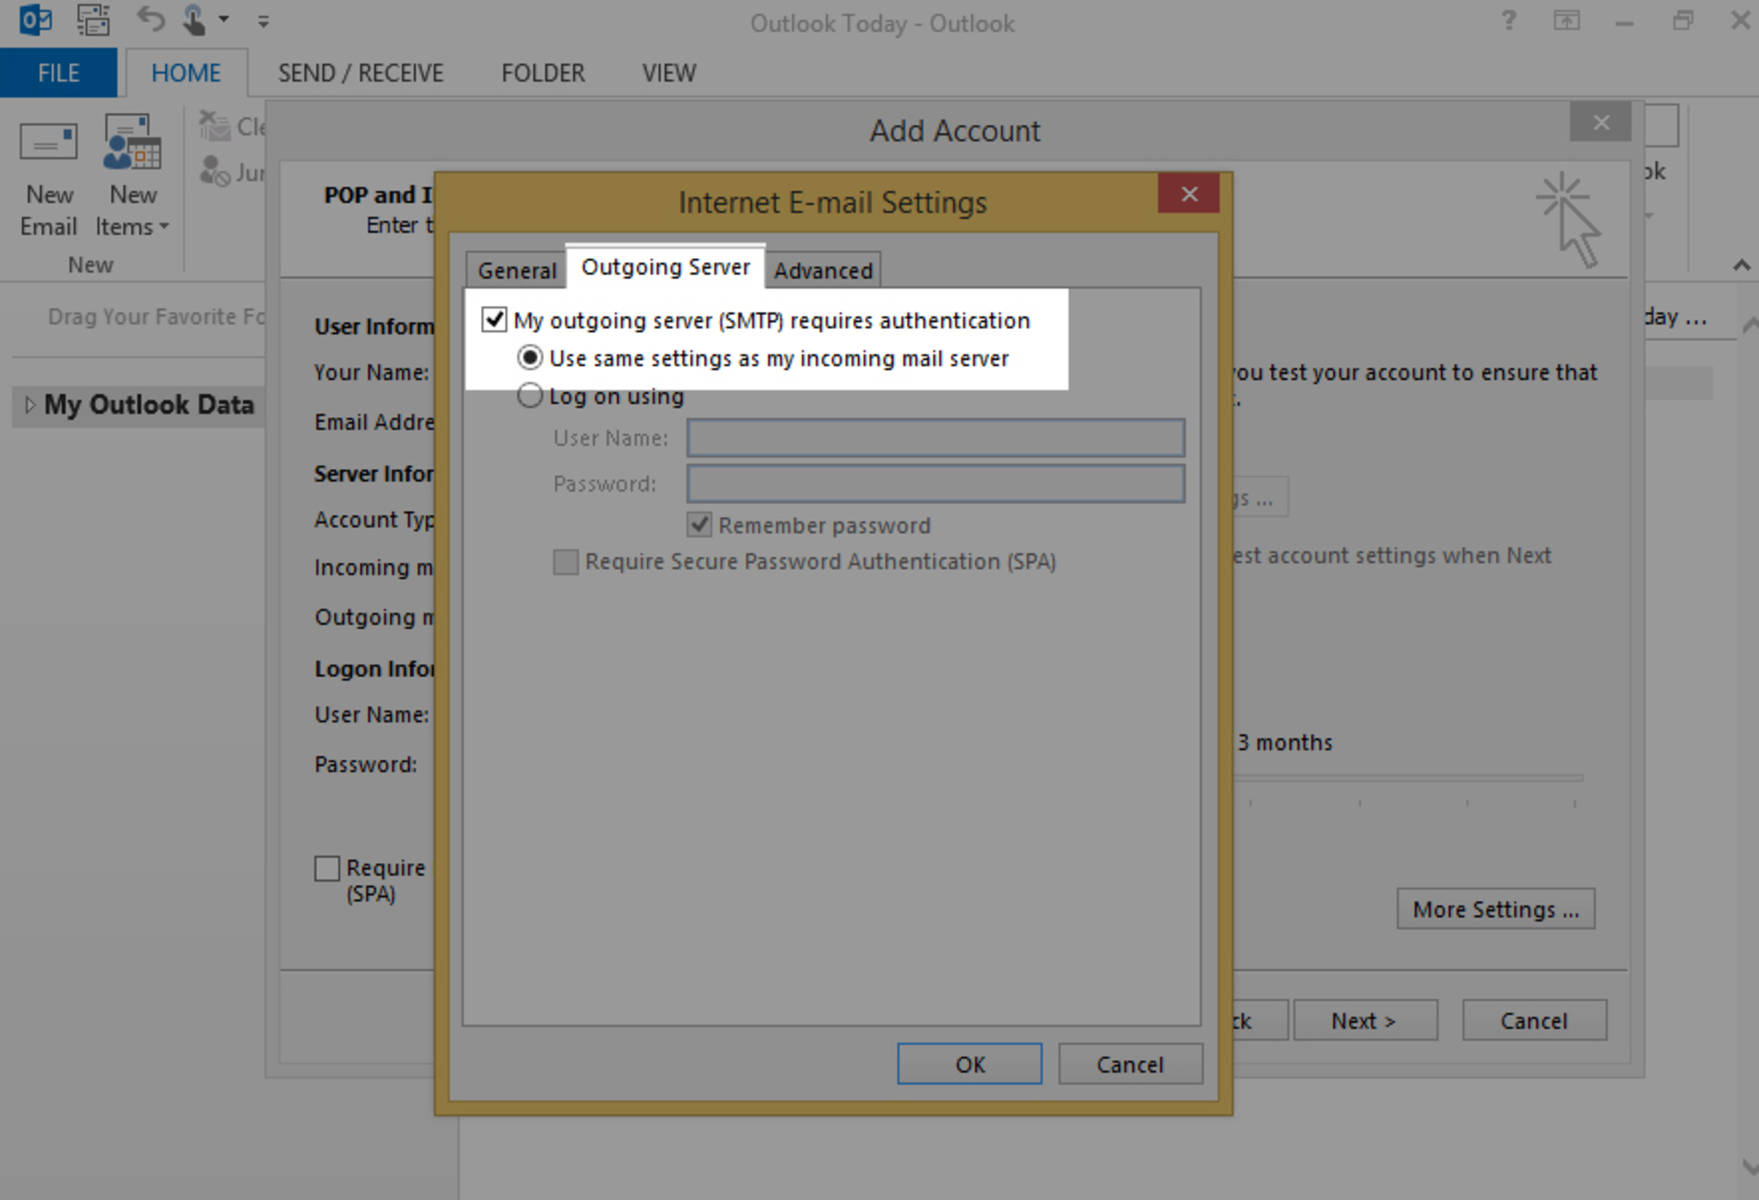
Step 5: From the Outgoing Server tab, check to box labeled "My outgoing server (SMTP) requires authentication".
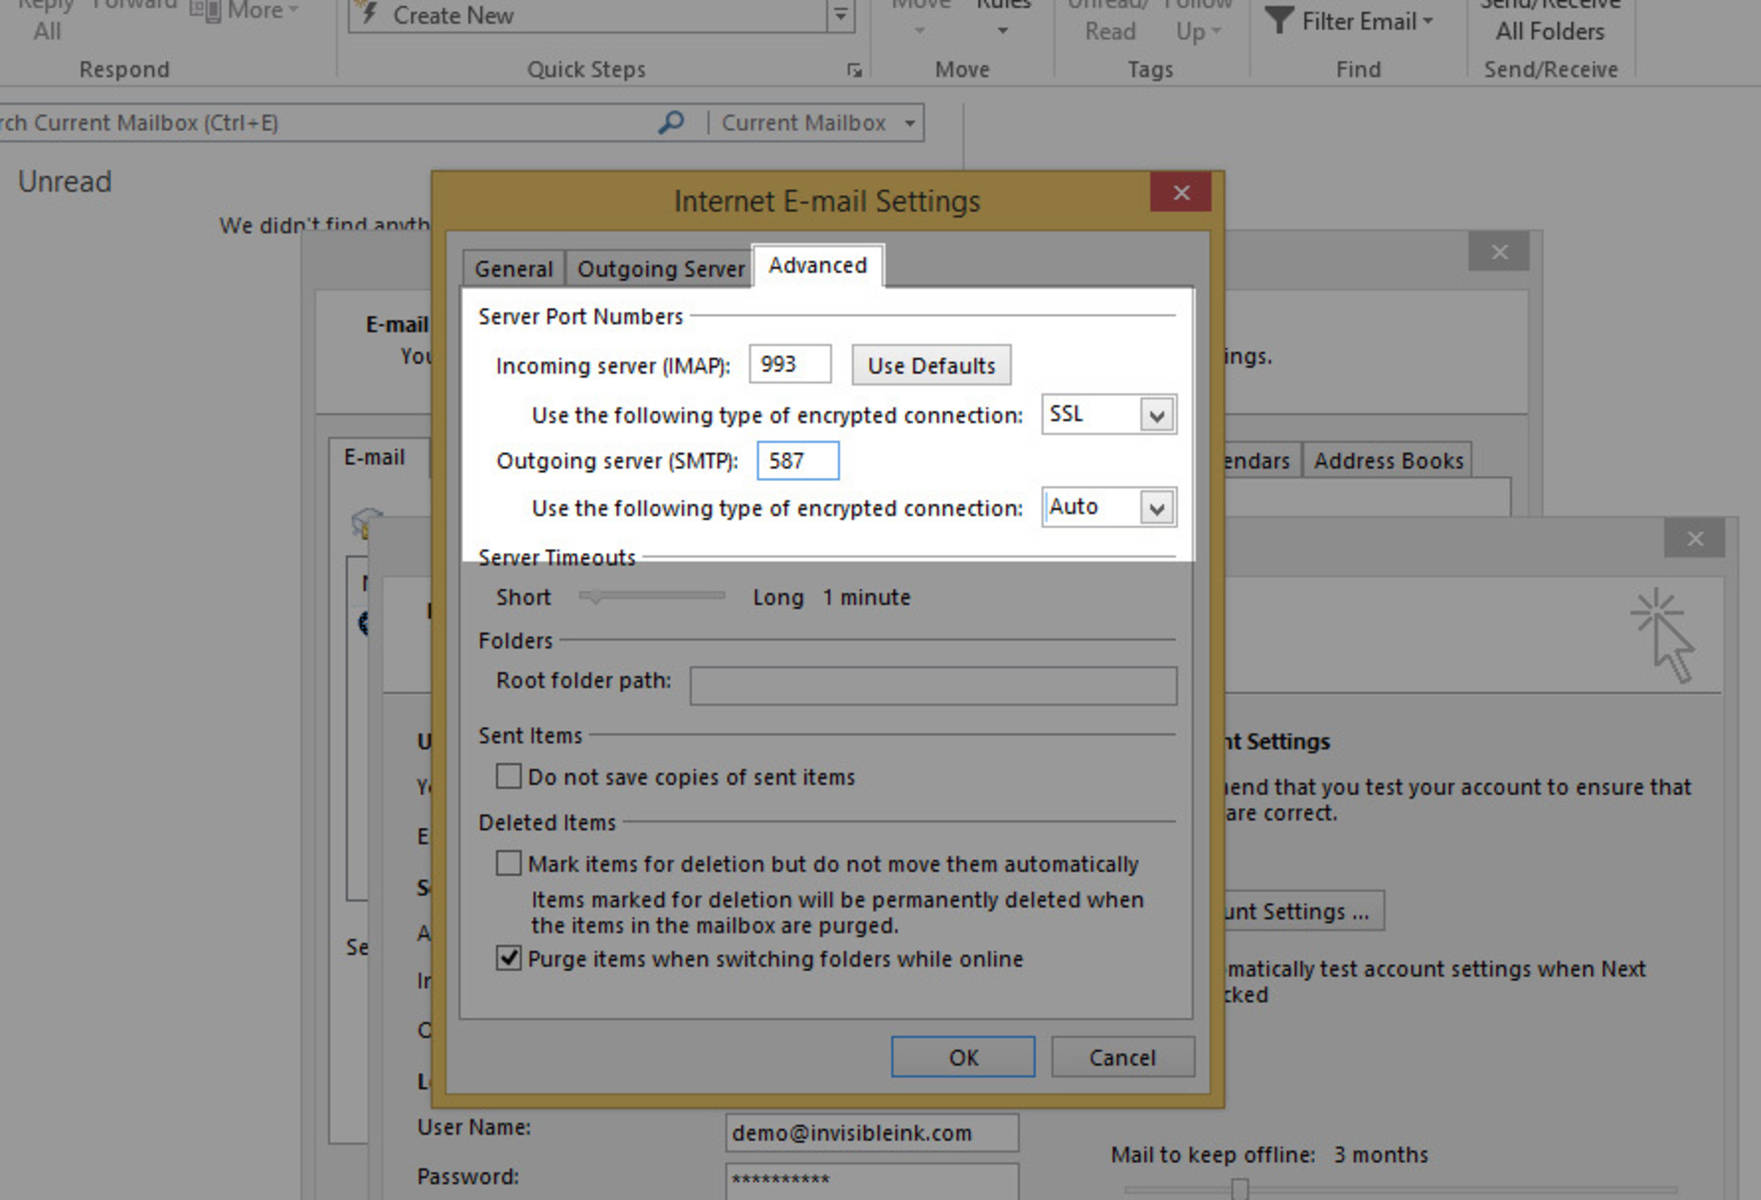
Step 6: From the Advanced tab, select SSL as the encryption type for the Incoming server, and select Auto for the Outgoing server. Change the Outgoing server port number to 587, then click OK to close the More Settings window.
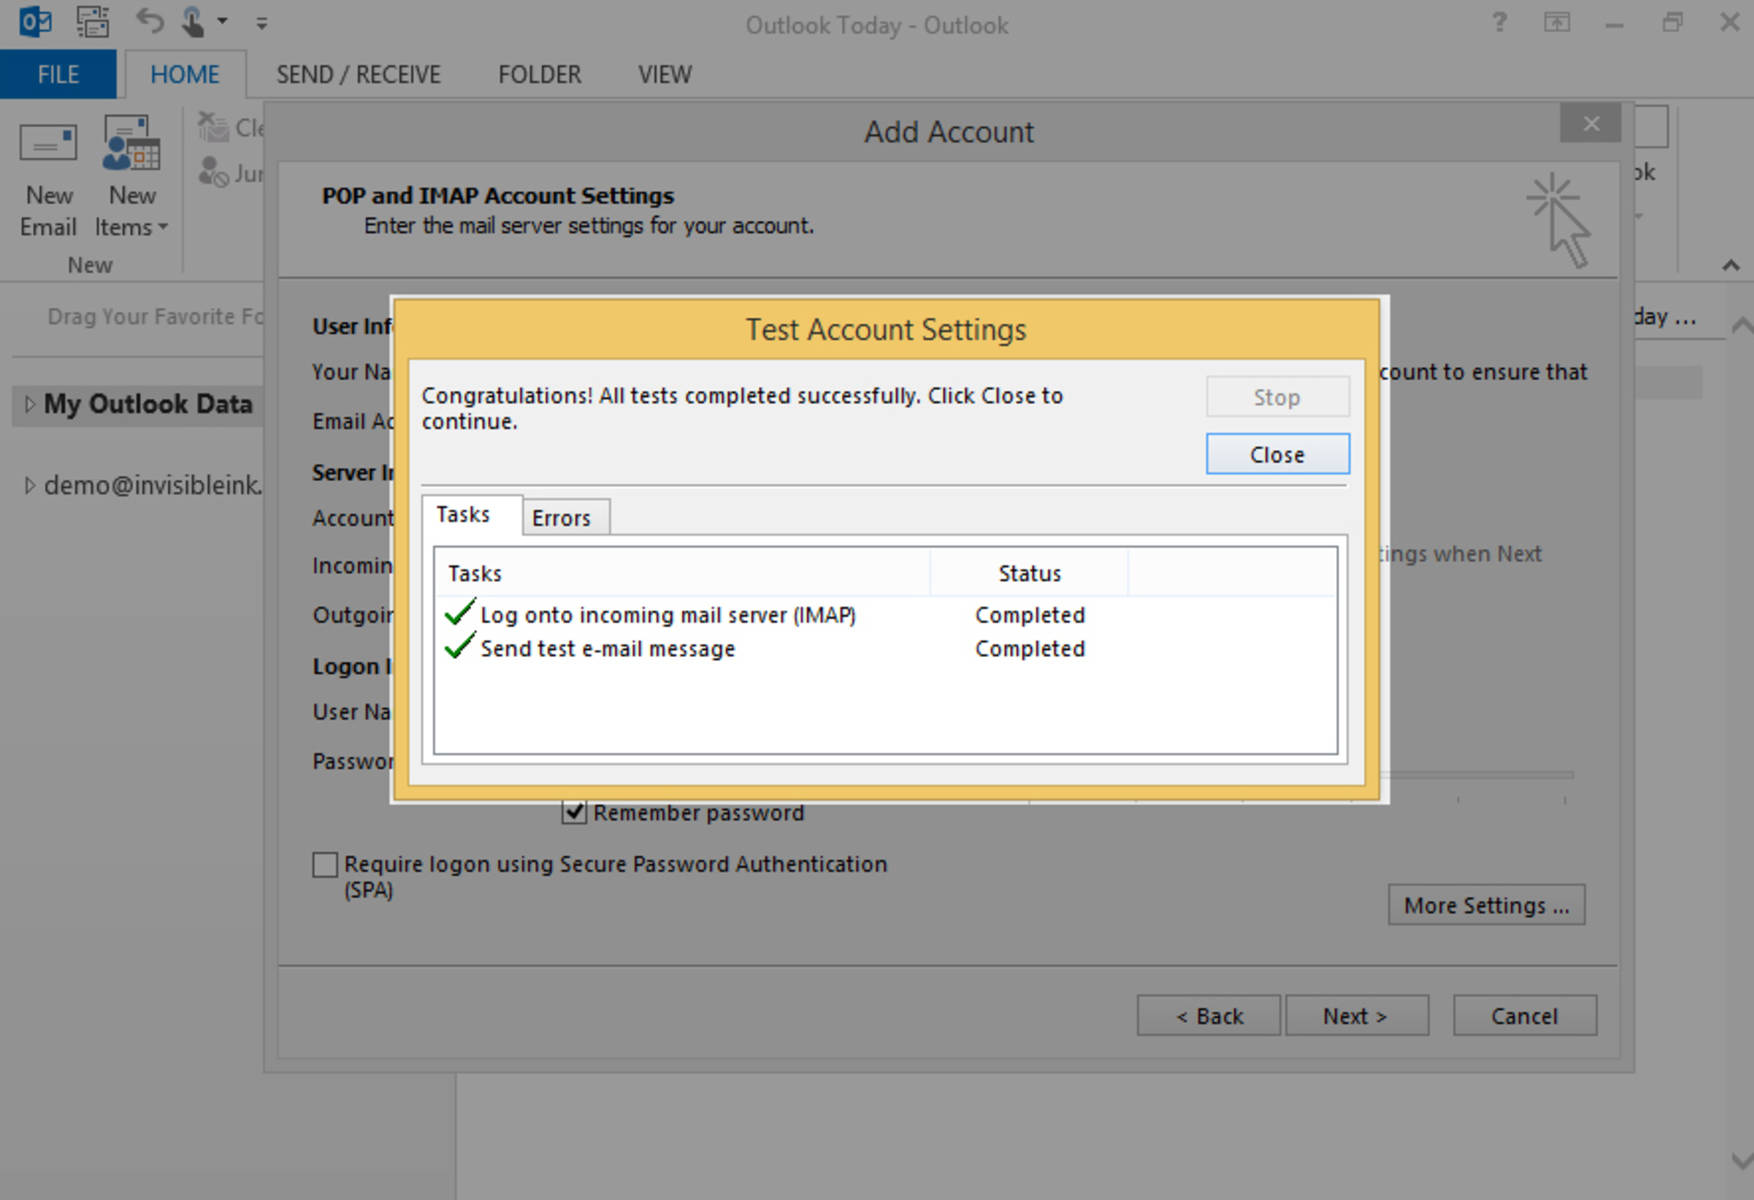
Step 7: Click "Next" to test your account settings. When Outlook has completed the test, click "Close" to access your new mail account.
[?]